
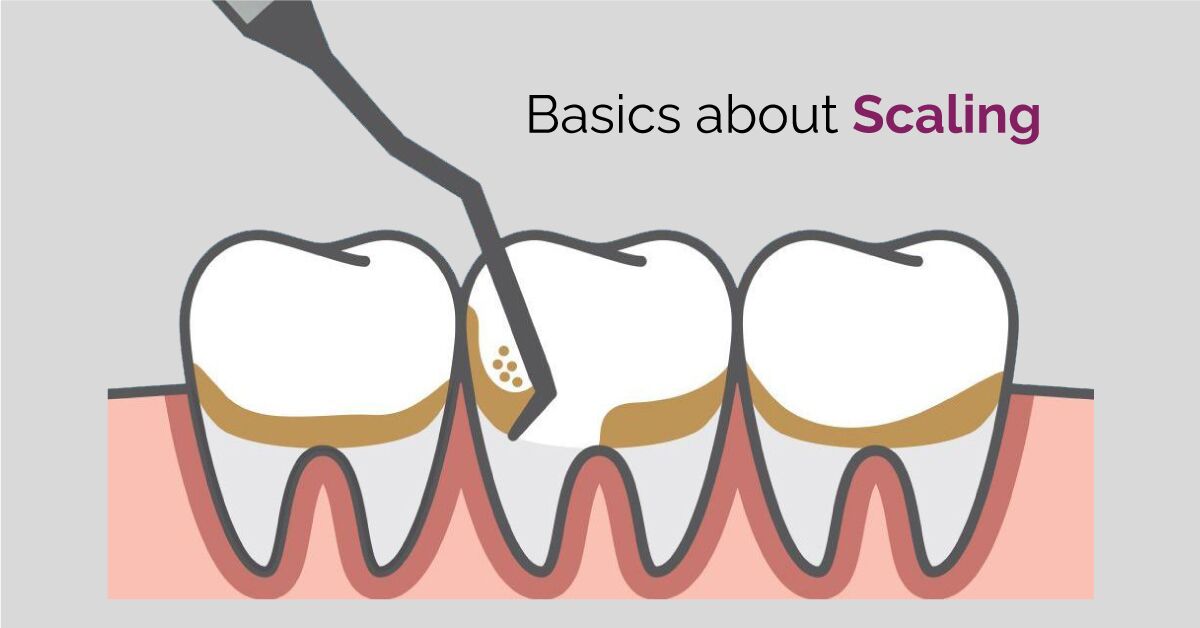
Plaque hardens into tartar in just 48 hours—and once it calcifies, no amount of brushing can remove it. That’s where a tooth scaler comes in. Designed to break down and remove stubborn calculus from tooth surfaces, scalers are essential tools in every dental office. But with at-home versions now flooding the market, many people wonder: Can I safely use a tooth scaler on my own teeth?
The truth is, while how to use a tooth scaler correctly may seem straightforward, improper technique can lead to serious harm—scratched enamel, gum lacerations, infection, or even permanent tooth damage. Dental hygienists spend years mastering the art of scaling, learning precise angles, pressure control, and anatomy. Replicating that skill without training is risky.
This guide walks you through safe, effective methods for using a tooth scaler at home, if approved by your dentist. You’ll learn the tools, techniques, and red flags to watch for—and why prevention is always better than removal.
Know Your Tools: Hand Scalers vs. Ultrasonic Devices
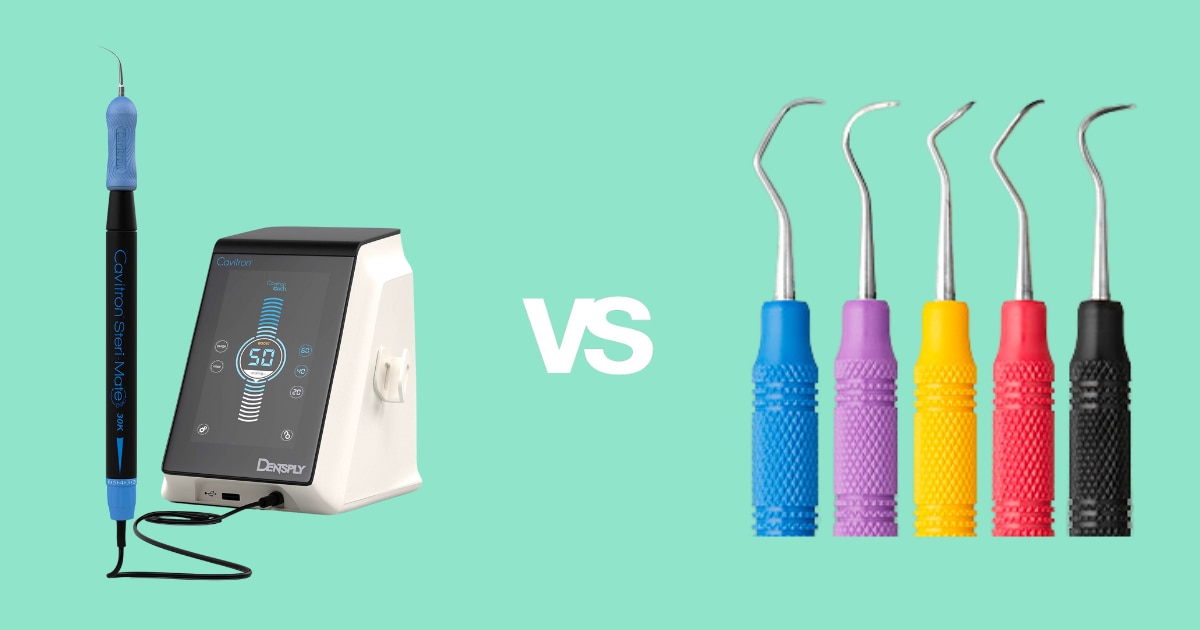
Not all scalers are created equal. Understanding the difference helps you choose wisely—and use safely.
Hand Scalers: Precision Requires Practice
Hand scalers are manual metal instruments with a sharp, curved tip. Common types include:
– Sickle scaler: Ideal for visible tartar above the gumline
– Curette: Used by professionals for subgingival (below-gum) cleaning
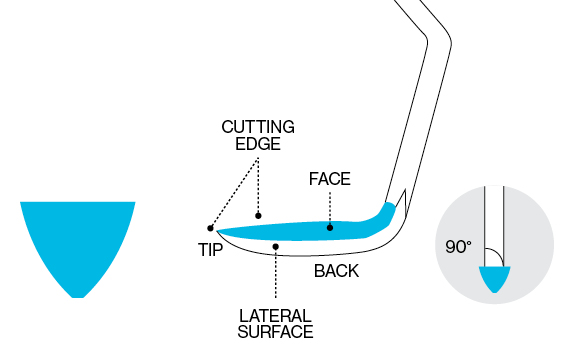
These require expert-level angulation (70–80 degrees) and a light touch. Without proper technique, they can easily gouge enamel or slice through delicate gum tissue.
Ultrasonic Scalers: Vibration Over Force
Ultrasonic scalers use high-frequency vibrations (25,000–50,000 Hz) to shatter tartar, often paired with a water spray to cool the tip and flush debris. Professional models are powerful and precise; consumer versions are weaker but still pose risks.
⚠️ Critical Warning: Most medical-grade scalers require a dental license to purchase. Consumer tools sold online may look professional but lack precision—increasing the risk of burnishing, where tartar is compressed rather than removed.
Who Should Never Use a Tooth Scaler at Home
Even with perfect technique, some people must avoid at-home scaling entirely.
High-Risk Groups
- Gum disease patients: Scaling below the gumline without sterilization can spread infection
- Receding gums or exposed roots: Cementum (root covering) is soft and easily damaged
- Tooth sensitivity: Scaling can expose dentin, worsening pain
- Pregnant individuals: Hormonal changes increase gum fragility
- Blood thinners or clotting disorders: Risk of prolonged bleeding
- Dental restorations: Crowns, implants, and bridges can be scratched or loosened
❌ Never scale around implants—micro-scratches harbor bacteria and accelerate peri-implantitis, a leading cause of implant failure.
If any of these apply to you, skip the scaler and consult your dentist.
Step-by-Step: Safe At-Home Scaling (If Approved)
✅ Important: Only proceed if your dentist has cleared you for limited, supragingival (above-gum) scaling.
Sterilize Tools Before Every Use
Contaminated instruments can introduce harmful bacteria under the gumline—potentially causing infection.
Sterilization steps:
1. Wash with antibacterial soap and hot water
2. Soak in 70% isopropyl alcohol for 20–30 minutes
3. Rinse thoroughly and air dry on a clean paper towel
🔥 Note: Boiling or alcohol does not sterilize like an autoclave. True sterilization requires heat and pressure—unavailable at home.
Prepare Your Environment and Mouth
Poor visibility increases the risk of injury. Maximize both access and lighting.
Oral Prep
- Brush and floss thoroughly
- Use plaque disclosing tablets to spot missed areas
- Rinse with warm water or saltwater
Setup
- Sit in front of a bright, well-lit mirror
- Use a magnifying mirror (10x recommended)
- Position a handheld light or headlamp
- Sanitize your workspace
🔍 Visual tip: Tartar appears yellow, brown, or black near the gumline—especially on lower front teeth (lingual side).
Master Proper Scaling Technique
One wrong move can cause irreversible damage. Technique is everything.
Use a Fulcrum for Stability
- Rest your ring finger on a tooth or cheek
- Creates a pivot point, reducing hand tremors
- Essential for control in tight spaces
Hold the Scaler Correctly
- Use a modified pen grip—like holding a pencil
- Fingers relaxed, wrist loose
- Avoid gripping too tightly, which reduces precision
Angle and Stroke: How to Avoid Injury
The wrong angle or pressure can cut gums or scratch enamel.
For Hand Scalers
- Hold at 70–80 degrees to the tooth surface
- Use short, sweeping strokes from crown to gumline
- Keep tip in constant contact with tooth
- Never go below the gumline
✅ Correct motion: Like peeling an apple—smooth, gliding strokes
For Ultrasonic Scalers
- Start on lowest power setting
- Keep tip moving constantly—no stationary spots
- Use water spray if available to flush debris
- Limit sessions to 10–15 minutes
❌ Never press hard—let the vibration do the work.
Work One Area at a Time
Systematic cleaning reduces missed spots and overuse.
Recommended Sequence
- Distal (back side of tooth)
- Facial (cheek or lip side)
- Mesial (front side, toward midline)
- Lingual (tongue side)
For Lower Front Teeth
- Do all away-facing surfaces, then all toward-facing
- Or group by facial and lingual first
🔁 Pro tip: Use a rotating pattern—start with upper right, move clockwise—to avoid skipping areas.
Clean Between Teeth Safely
The interdental papilla (gum between teeth) is fragile and easily cut.
Proximal Surface Tips
- Approach from the facial side, wrapping around gently
- Adjust angulation slightly for tight spaces
- Never force the scaler into contact areas
- Use interdental brushes or floss instead for tight gaps
⚠️ Critical rule: If you feel resistance, stop. You’re likely hitting soft tissue or restoration.
After Scaling: Check and Care
Your job isn’t done when the scaler stops.
Final Inspection Steps
- Run finger or scaler gently along gumline—should feel smooth
- Use mirror to check for rough spots (indicate leftover tartar)
- Floss thoroughly to remove debris
- Rinse with antiseptic mouthwash or warm water
🔎 Missed areas? Plaque disclosing tablets can reveal residual buildup.
Aftercare: Soothe and Monitor
Gums may be slightly tender. Watch for warning signs.
Normal Response
- Mild redness or brief bleeding
- Slight sensitivity for 1–2 days
Stop Immediately If You See:
- Persistent bleeding (more than 5 minutes)
- Pain beyond mild discomfort
- Visible cuts in gums
- Increased sensitivity or loose teeth
🚨 Seek dental care if symptoms last more than 48 hours.
Common Mistakes That Damage Teeth
Even small errors can lead to long-term harm.
| Mistake | Risk | Fix |
|---|---|---|
| Too much pressure | Enamel scratches, gum cuts | Use light touch—let the tool work |
| Scaling below gumline | Gum injury, bone damage | Stay above the gumline only |
| Working without a mirror | Accidental laceration | Always use magnifying mirror + light |
| Poor sterilization | Infection risk | Clean and soak in alcohol every time |
| Overuse (weekly or daily) | Gum recession, enamel wear | Limit to once every 2–3 months |
| Ignoring signs of disease | Missed gum disease | See a dentist if gums bleed often |
💡 Pro tip: If it hurts, you’re doing it wrong.
How Often Should You Scale at Home?
Frequency matters. More isn’t better.
Recommended Schedule
- Only if approved by your dentist
- Once every 2–3 months max
- Between professional cleanings—never as a replacement
📅 Best practice: Use home scaling to maintain, not fix, oral health.
Prevent Tartar—Don’t Just Remove It
The real goal? Stop tartar before it forms.
Daily Routine That Works
- Brush 2x/day for 2 minutes with fluoride toothpaste
- Use electric toothbrush with pressure sensor
- Floss or water floss daily—plaque hides between teeth
- Mouthwash: Antimicrobial or fluoride-based
- Tartar-control toothpaste: Helps slow buildup
🎯 Key insight: 90% of tartar comes from plaque you missed brushing.
When to See a Dentist
Home tools can’t replace professional care.
Warning Signs You Need a Dentist
- Gums bleed daily when brushing or flossing
- Receding gums or teeth looking longer
- Deep pockets (food traps, bad breath)
- Loose teeth or shifting bite
- Pus, abscess, or severe pain
🔍 Pocket depth >3mm? That’s periodontal disease—requires professional treatment.
Safer Alternatives to DIY Scaling
Skip the scalers. Focus on prevention and professional care.
Upgrade Your Routine
- Interdental brushes: Better than floss for wide gaps
- Water flosser: Removes plaque below gumline safely
- Tongue scraper: Reduces bacteria and bad breath
- Chewable probiotics: Support healthy oral microbiome
Affordable Professional Options
- Dental schools: Supervised cleanings at low cost
- Community clinics: Sliding-scale fees based on income
- Public health programs: Free or low-cost cleanings
💬 “You only get one set of adult teeth.” – Dental Hygienist, Whitney
Final Advice: Protect Your Smile
Tooth scalers are not DIY tools. They’re precision instruments designed for trained hands.
Can You Scale Safely at Home?
- Possibly, if you:
- Have healthy gums
- Scale only above the gumline
- Use sterilized, proper tools
- Limit frequency
- Work under dentist guidance
But the risks often outweigh the benefits.
Professional Consensus
“It’s like performing surgery after watching a YouTube video.”
“Even hygienists can’t scale their own teeth safely.”
“One slip can cause permanent damage.”
Conclusion: Prevention Over Removal
The best way to deal with tartar? Stop it before it starts.
Brush properly, floss daily, and visit your dentist every 6 months (or every 3–4 if you’re a rapid tartar former). Use disclosing tablets to perfect your brushing. Invest in an electric toothbrush and water flosser.
If you’re scaling at home out of necessity—due to cost or access—explore dental schools or low-income clinics instead. Your teeth are worth protecting.
✋ Final warning:
Put the scaler down.
Let the professionals handle it.
Your smile will thank you.