
If you have just unboxed your Brookstone water flosser and feel uncertain about where to begin, you are not alone. Many first-time users find the initial setup and technique unfamiliar, but mastering this device transforms your daily oral care routine into something fast and effective. The Brookstone water flosser uses a pulsating water stream to clean between teeth and below the gumline, making it especially valuable for those with braces, implants, or sensitive gums. Whether you are new to water flossing or switching from string floss, learning how to use a Brookstone water flosser correctly delivers healthier gums, fresher breath, and reduced plaque buildup.
This guide walks you through every step from assembly to daily use and maintenance. You will learn how to fill the reservoir properly, select the right tip, adjust pressure settings, and clean each area of your mouth effectively. We also cover troubleshooting common problems, safety precautions, and expert tips so you can achieve optimal results from day one.
Prepare Your Brookstone Water Flosser Before Use
Proper setup before turning on the device ensures safe and effective water flossing. Taking time with preparation prevents leaks, performance issues, and discomfort during use.
Fill the Reservoir with Lukewarm Water
Remove the water tank from the main unit and fill it with lukewarm water. Avoid using boiling water, which can damage internal seals, or cold water, which may cause sensitivity discomfort. If you prefer enhanced cleaning, mix in antiseptic mouthwash at a 1:1 ratio with water. Never use undiluted mouthwash, essential oils, or abrasive solutions, as these can damage internal components or irritate soft oral tissues. Fill only to the marked line on the reservoir to prevent overflow and leakage during operation.
Attach and Secure the Reservoir Properly
Reattach the filled reservoir to the base unit until it clicks securely into place. Check that the sealing ring is clean and properly seated before attaching. A loose fit or damaged O-ring frequently causes dripping and reduced water pressure. Inspect the seal visually before each use if you notice persistent leaking.
Choose and Install the Correct Tip
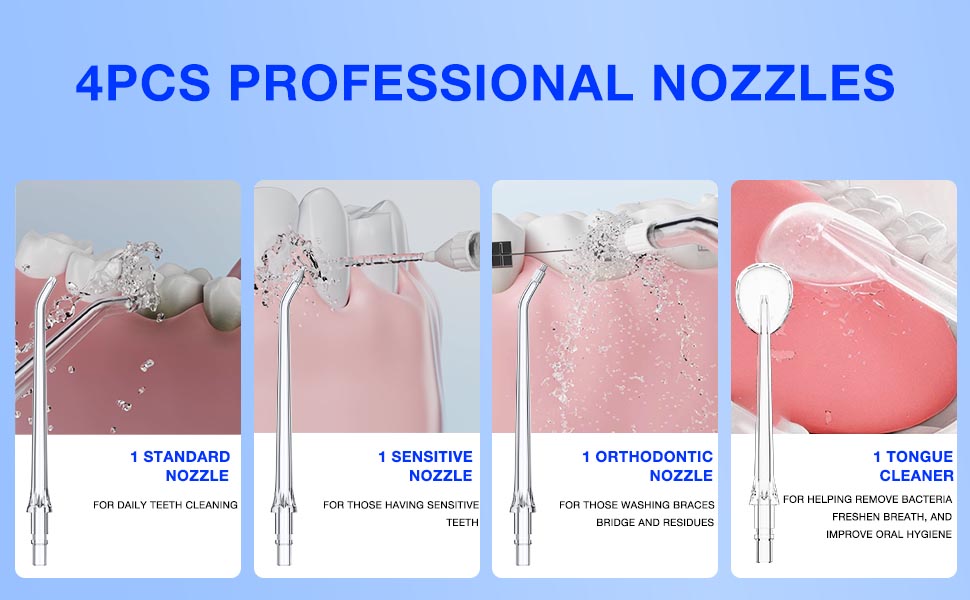
Brookstone models typically include multiple nozzle types for different dental needs. The standard tip works well for everyday cleaning. The orthodontic tip targets food trapped around braces or retainers. The periodontal tip reaches deep gum pockets, ideal for those with gum disease. The sensitive tip provides gentler pulsation for tender or healing gums. Insert your chosen tip into the handpiece and twist clockwise until snug. Avoid forcing the tip, which can damage the connection. If multiple household members use the device, label each tip to prevent cross-contamination.
Position Yourself Correctly for Flossing
Your body position significantly affects how well the water flosser works and how much mess you create. Proper posture makes the process easier and more effective.
Stand Over the Sink During Use
Always use the flosser while standing at a sink to catch splashes and runoff. Even experienced users produce some water spray, so positioning over a basin prevents wet floors and clothing.
Lean Forward and Prepare Your Mouth
Tilt your head slightly forward to let water drain out of your mouth rather than flowing down your throat. Keep your lips slightly closed around the tip to control the spray without blocking the stream entirely. This position gives you better control and reduces swallowing.
Insert the Tip Before Turning On the Device
Place the nozzle in your mouth before pressing the power button. Starting the device first creates a sudden burst of water that may spray across the bathroom instead of into your mouth. This simple step prevents frustration and wasted water.
Start Flossing with Proper Technique
With the device prepared and your position set, you are ready to begin cleaning between your teeth. Using correct technique ensures thorough cleaning without damaging your gums.
Turn On and Select the Right Pressure
Press the power button to activate the flosser. Start at the lowest pressure setting, which typically ranges from 30 to 50 psi, especially if you are new to water flossing. Most Brookstone models offer 3 to 5 pressure levels. Low pressure suits sensitive gums or post-surgery care. Medium pressure at 60 to 80 psi works well for daily use. High pressure at 90 to 120 psi tackles heavy plaque or orthodontic appliances. Use the control button to cycle through settings and increase intensity gradually as you become comfortable with the sensation.
Aim the Stream at the Gumline Correctly
Hold the tip at a 90-degree angle to the gumline, not pointed directly into the gums. Focus on the space between teeth where plaque and food debris accumulate. Move systematically starting at the back molars and work forward along the outer gumline. Repeat on the inner tongue-side surfaces. Do not skip the back sides of your front teeth. Spend approximately one second per gap between teeth, pausing briefly to let the pulsating stream loosen trapped particles.
Keep Moving to Prevent Irritation
Holding the water stream in one spot for too long can irritate sensitive tissue. Use slow, steady motions similar to mowing a lawn to cover all areas evenly. Constant movement prevents discomfort while ensuring thorough cleaning across your entire mouth.
Finish and Clean Up After Each Use
Proper shutdown and cleanup keeps your device hygienic and extends its lifespan. Taking a few minutes after each session prevents problems down the road.
Turn Off and Remove the Tip
After completing both your upper and lower arches, turn off the device first. Then remove the tip from your mouth before detaching it from the handpiece. This order prevents any remaining water from dripping onto the counter.
Empty and Rinse the Reservoir
Pour out any remaining liquid from the reservoir. Rinse it thoroughly under warm water to prevent mineral buildup or bacterial growth. Leave the reservoir off the base or slightly ajar to air dry completely before storing. Moisture remaining in the reservoir creates breeding grounds for bacteria and causes unpleasant odors.
Rinse and Store the Tip Properly
Rinse the nozzle under running water to flush out any debris or particles. Shake off excess water and store it upright in the built-in tip holder if your model includes one. Proper storage prevents contamination and extends the life of the tip. Allowing the tip to air dry completely before storage is essential for hygiene.
Store the Unit Upright in a Dry Location
Place the main unit on a clean, dry surface away from damp areas like under the sink. Moisture near the motor can damage electronics over time. Most Brookstone models are not fully waterproof despite their water resistance rating, so keeping the motor unit dry is critical.
Maintain Your Device with Weekly Care
Regular maintenance prevents clogs, odors, and performance decline. A few simple weekly tasks keep your flosser working like new.
Deep Clean with Vinegar Solution Weekly

Once a week, fill the reservoir with equal parts white vinegar and water. Run the flosser for 60 seconds to flush the internal tubing. This solution dissolves mineral deposits from hard water and kills bacteria that accumulate in the system. After running the vinegar solution, rinse the reservoir thoroughly and run clean water through the device to remove any vinegar taste or residue.
Inspect and Replace Seals When Needed
Check the rubber sealing ring regularly for cracks or warping. A damaged seal causes leaks and reduced performance. Replace the sealing ring immediately if you notice any damage. Most Brookstone models include replacement seals available from the manufacturer or dental supply retailers.
Wipe Down the Exterior Regularly
Use a damp cloth to wipe the motor unit clean. Never submerge the motor in water or run it under the tap, even on cordless models with IPX7 water resistance. The electronics are not waterproof and can be damaged by water ingress. A simple wipe-down removes splashes and keeps the unit looking new.
Replace Flosser Tips Every Three to Six Months
Like toothbrush bristles, flosser tips wear out over time and lose effectiveness. Regular replacement ensures consistent cleaning performance.
Know When to Replace Your Nozzle
Replace tips when you notice visible cracks or bends in the plastic. Pay attention to reduced water flow even after thorough cleaning. Discoloration that will not rinse away indicates mineral buildup that compromises hygiene. Frayed edges or rough spots also signal that replacement is needed. Using worn tips reduces cleaning efficiency and may harbor bacteria that reintroduce harmful microbes to your mouth.
Use Separate Tips for Each User
To avoid cross-contamination, assign a color-coded tip to each person who uses the device. Most multi-tip kits include different colors for easy identification. This practice is especially important in households where multiple family members share one flosser unit.
Charge Cordless Models Correctly
Proper battery care ensures your cordless Brookstone water flosser stays ready for use. Following charging guidelines extends battery life and maintains consistent performance.
Follow Initial and Ongoing Charging Practices
Charge fully before first use, which typically requires 4 to 6 hours for a complete charge. For regular use, recharge every 2 to 3 weeks if you use the device daily. Most Brookstone cordless models last up to 2 weeks on a single charge, though this varies depending on pressure settings and usage frequency.
Monitor Battery Status Indicators
Many Brookstone units feature LED lights showing charge status. A solid green light indicates full charge. Flashing yellow signals low battery. Red means immediate charging is needed. Use only the provided USB cable or charging dock, as third-party chargers may damage the battery or void your warranty.
Use Your Water Flosser Daily for Best Results
Consistency matters more than perfection when it comes to oral hygiene. Daily use delivers cumulative benefits that improve over time.
Time Your Flossing Correctly
Dentists recommend water flossing once per day, preferably after brushing. This timing flushes out any loosened debris and gives your mouth a final cleanse after your brushing routine. For people with braces, implants, or gum disease, your dentist may recommend twice-daily use for better plaque control and inflammation reduction.
Understand the Benefits of Regular Use
Studies show water flossers can reduce gum inflammation significantly more than string floss alone. Regular users report fresher breath because the water flushes out odor-causing bacteria between teeth. The pulsating action also stimulates blood flow in the gums, strengthening tissue over time. For those with orthodontic appliances, water flossers reach under and around brackets and wires that traditional floss cannot easily access.
Troubleshoot Common Brookstone Water Flosser Problems
Even well-maintained devices occasionally develop issues. Knowing how to address common problems keeps your flosser working reliably.
Fix No Water Flow Issues
If your flosser produces no water, check several potential causes. An empty reservoir is the most obvious. A clogged tip can also block flow. A loose connection between the reservoir and base may prevent water from reaching the pump. Refill the tank if empty. Remove the tip and clear blockages using a needle or pin. Soak stubborn clogs in warm vinegar water for 10 minutes before rinsing. Reattach all connections firmly and test again.
Stop Reservoir Leaking
Leaking usually stems from two issues. The reservoir may not be snapped in completely, or the sealing ring could be damaged or missing. Remove and re-seat the tank firmly until you hear it click. Inspect the O-ring for cracks or wear and replace if necessary. Avoid over-tightening, which can damage the seal.
Restore Weak Water Pressure
Weak pressure often results from three causes. Low battery in cordless models reduces power to the pump. A partial clog in the tip or internal tubing restricts flow. Low water level may be insufficient for proper operation. Charge the device fully. Clean the tip thoroughly. Ensure the reservoir is at least half full before use.
Address Device Not Turning On
If the unit refuses to power on, check the charge first. Ensure the device is fully charged or plugged in properly. Inspect the charging port for lint or moisture that may interrupt the connection. Try a different outlet or USB adapter. If the device remains unresponsive after these steps, contact Brookstone customer support for warranty service.
Reduce Excessive Splashing
Excessive spray usually results from incorrect angle or too-high pressure settings. Reduce the pressure setting and close your lips gently around the tip to control the stream. Leaning further over the sink helps catch runoff. Using a towel around your neck during early uses catches splashes while you master the technique.
Follow Important Safety Precautions
While water flossers are safe for most adults, certain situations require extra caution or consultation with your dentist.
Age Restrictions and Supervision
Water flossers are not recommended for children under 12 years old. Younger children lack the coordination to use the device safely and may inhale or swallow large amounts of fluid. Supervise teenagers until they demonstrate comfortable and safe technique.
Post-Surgery Waiting Periods
Avoid using your water flosser immediately after oral surgery or dental procedures. Wait until your dentist provides approval, typically 7 to 10 days after extractions or implant placement. Premature use can dislodge blood clots or irritate healing tissue.
Consult Your Dentist for Specific Conditions
Speak with your dentist before using a water flosser if you have open sores or infections in your mouth, severe gum recession, bleeding disorders, or recent periodontal surgery. Your dentist may recommend specific tips or pressure settings appropriate for your condition.
Know When to Stop Use
Some light bleeding in the first week is normal as your gums adjust to water flossing. However, if bleeding continues beyond 14 days, see your dentist. Persistent bleeding could signal underlying gum disease that needs professional treatment.
Frequently Asked Questions About Brookstone Water Flossers
Can I use mouthwash in my Brookstone water flosser?
Yes, but you must dilute it with equal parts water. Undiluted mouthwash can damage internal seals and irritate soft tissues. Rinse the reservoir thoroughly after using mouthwash to prevent residue buildup.
How often should I replace the flossing tip?
Replace tips every 3 to 6 months, or sooner if you notice cracks, reduced water flow, or discoloration. Worn tips clean less effectively and may harbor bacteria.
Is the Brookstone water flosser waterproof?
Most Brookstone cordless models carry an IPX7 water resistance rating, meaning they can withstand temporary immersion in water. However, the motor unit should never be submerged, and you should keep the charging port dry.
Can I use my water flosser in the shower?
Models with IPX7 ratings can be used in the shower, but always verify your specific model’s capabilities. Using the device in the shower is popular among users who want to combine water flossing with their shower routine.
Why does my flosser leak from the base?
Leaking usually indicates a loose reservoir connection or damaged sealing ring. Remove and reattach the reservoir firmly. Inspect the O-ring for cracks and replace if necessary.
What pressure setting should I start with?
Begin at the lowest pressure setting, around 30 to 50 psi, especially if you are new to water flossing or have sensitive gums. Increase gradually as you become comfortable, targeting 60 to 80 psi for daily use.
Key Takeaways for Using Your Brookstone Water Flosser
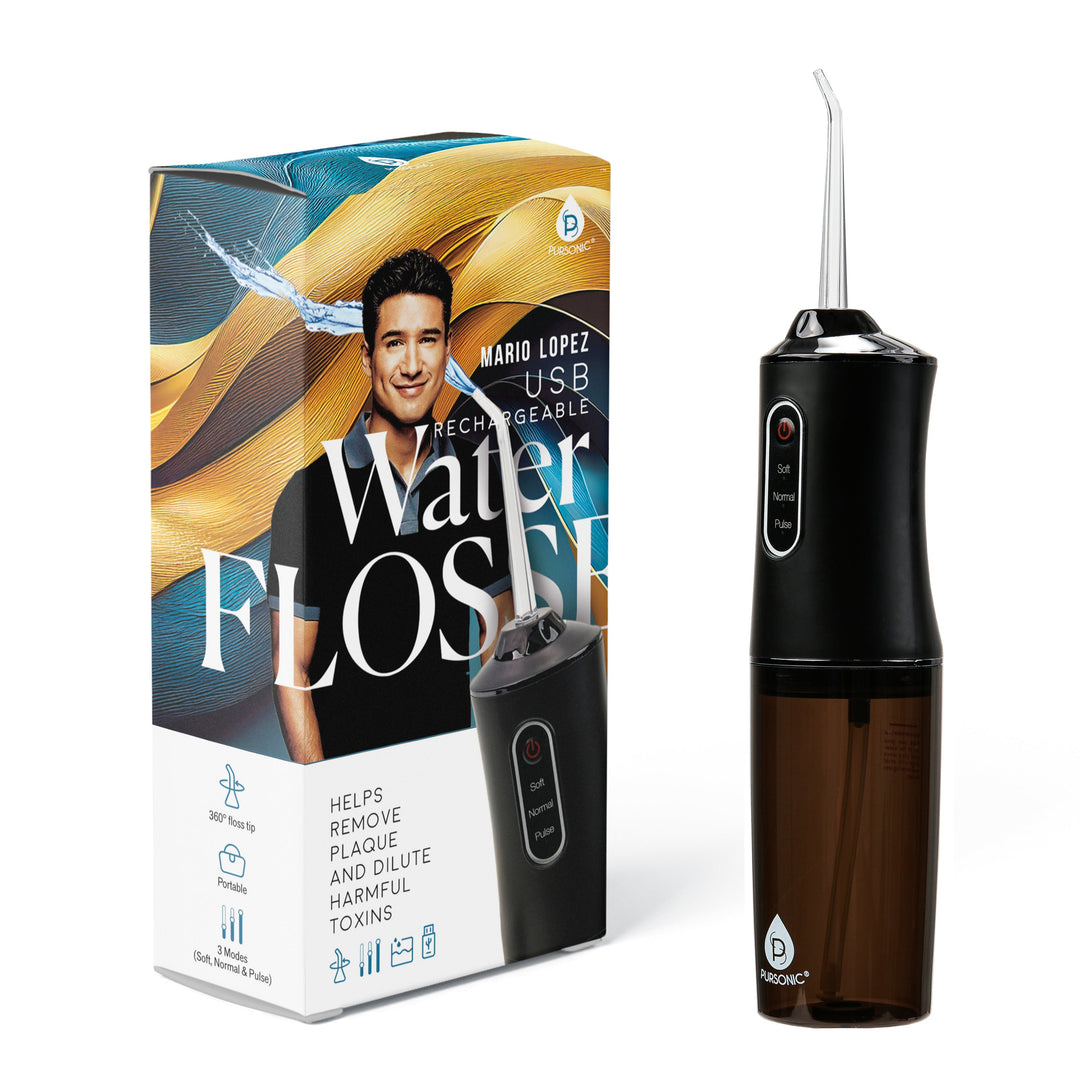
Mastering your Brookstone water flosser delivers significant oral health benefits when used consistently and correctly. Start with proper setup by filling the reservoir with lukewarm water and selecting the appropriate tip for your dental needs. Use the lowest pressure setting initially and increase gradually as your gums adapt. Aim the stream at a 90-degree angle to the gumline and move systematically through all areas of your mouth, including the often-neglected tongue-side surfaces.
Maintenance matters for long-term performance. Clean the reservoir weekly with vinegar solution, inspect seals regularly, and replace tips every three to six months. Store the unit upright in a dry location and keep the charging port free of debris. Daily use after brushing maximizes the benefits, reducing plaque buildup and improving gum health over time.
With the right technique and consistent care, your Brookstone water flosser becomes a powerful tool for maintaining oral health. The investment of a few minutes each day pays off with cleaner teeth, healthier gums, and fresher breath.