
If you have just purchased a GuruNanda water flosser, you might feel uncertain about where to start. This cordless, rechargeable device delivers up to 1800 pulses per minute to flush out plaque, food debris, and bacteria from between teeth and below the gumline. Learning how to use GuruNanda water flosser correctly ensures you get the maximum oral health benefits from this dentist-recommended tool.
This guide walks you through every step, from charging the device to maintaining it for long-term performance. Whether you wear braces, have sensitive gums, or simply want a more effective cleaning routine, you will find clear, actionable instructions here.
Charge Before First Use
Before your first session, fully charge the device to ensure optimal performance. Skipping this step can lead to weak water pressure or premature shutdown during use.
Full Charge Takes 3-4 Hours
Use the included USB cable to plug into any standard USB port such as a laptop, wall adapter, or power bank. A full charge takes approximately 3-4 hours depending on your model. Once charged, the LED indicator turns solid green.
Pro Tip: Never charge near water. Place the flosser on a dry counter or towel to avoid electrical hazards.
The battery lasts 14-30 days with twice-daily 2-minute sessions. The red LED light signals low battery, so recharge before the device dies completely.
Fill Reservoir With Lukewarm Water
Proper water temperature and fill level are critical for comfort and effective cleaning. Taking this step correctly prevents leaks and ensures consistent water flow.
Use Lukewarm Water Only
Remove the water tank from the handle and fill with lukewarm water up to the max fill line. Avoid hot water, which can warp internal components. Cold water is safe but may cause sensitivity in some users.
Warning: Overfilling leads to leaks. Always stop at the marked line.
You can enhance cleaning by adding antimicrobial mouthwash diluted 1:1 with water, or 1 part rinse to 3 parts water for stronger formulas. Never use undiluted essential oils, alcohol-heavy rinses, or thick solutions because they can clog the pump. Reattach the reservoir securely before use.
Attach the Correct Nozzle Tip

GuruNanda includes multiple tips designed for different oral needs. Using the right tip makes all the difference in cleaning effectiveness and comfort.
Choose Your Tip by Need
The Classic Jet Tip works best for daily plaque removal between teeth and along gums. The Orthodontic Tip has an angled design that cleans around braces, wires, and aligners. The Periodontal Tip targets gum pockets and deep crevices for users with gingivitis. The Tongue Cleaner Tip removes bacteria and reduces bad breath if included with your model.
How to Insert and Remove Tips
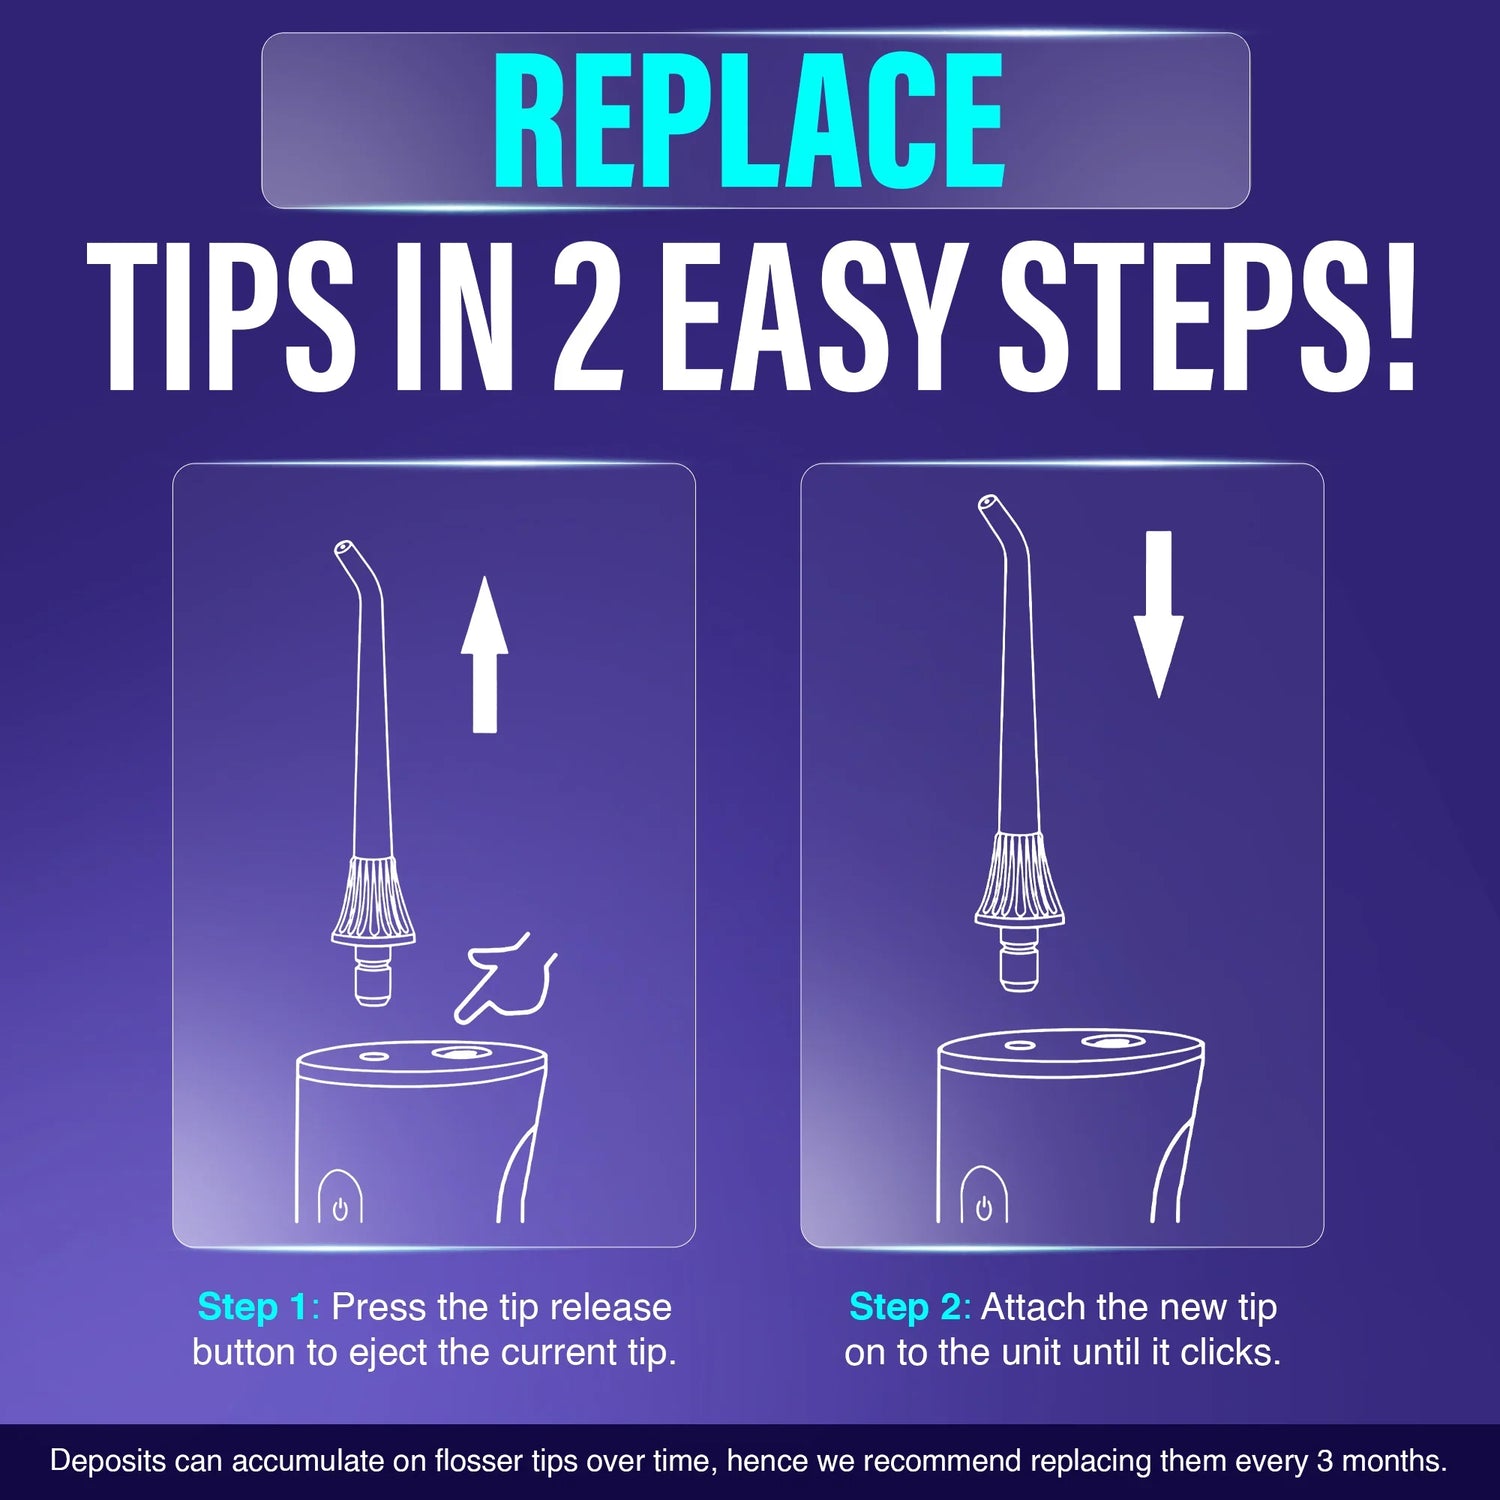
Slide the tip into the nozzle port until it clicks or locks into place. Some models require a quarter-turn twist to secure. To remove, press the tip release button and pull straight out.
Replace tips every 3-6 months, or sooner if cracked, discolored, or spraying unevenly. Orthodontic users should replace tips every 3 months.
Position Over Sink Correctly
Your stance and mouth position prevent splashing and ensure full coverage of all teeth. Proper positioning also maximizes control, especially when using higher pressure settings.
Lean Forward and Open Mouth
Stand at the sink and lean slightly forward. Keep your mouth open so water flows freely into the basin. Do not swallow the water during use. Place the tip just above the gumline, not pressed into the gums. Hold the flosser at a 45-90 degree angle to the tooth surface.
Pro Tip: Start at the back molars to avoid missing hard-to-reach areas.
Select the Right Mode and Pressure
GuruNanda models offer four cleaning modes to match your gum sensitivity and cleaning goals. Starting with the right mode prevents discomfort and helps your gums adapt.
Start on Soft Mode
The Soft or Gentle mode is ideal for sensitive gums, children, or post-surgery use. Normal mode provides standard daily cleaning for most users. Pulse mode delivers intermittent bursts that massage gums and boost circulation. The Whitening or Deep Clean mode offers the highest pressure for plaque and stain removal.
Use the mode button to cycle through settings. Begin with Soft mode for the first few days, then gradually increase as your gums adapt. The smart 2-minute timer shuts off automatically when done.
Floss Each Tooth Systematically
A structured routine ensures you clean every area without skipping spots. Following a systematic approach leads to better oral health outcomes.
Follow the Quadrant Method
Divide your mouth into four sections: upper right, upper left, lower left, and lower right. Spend 30 seconds per quadrant, pausing 2 seconds per tooth.
Technique Steps:
Guide the stream along the gumline, focusing on the space between teeth. Clean both outer cheek side and inner tongue side surfaces. For back teeth, open wider and angle carefully. Around braces or implants, direct water around brackets and under wires. Let water flow naturally into the sink.
Expert Note: Water flossing does not replace string floss for tight contacts. For best results, floss manually first, then use the water flosser to flush out loosened debris.
Turn Off and Rinse After Use
Proper post-use care prevents bacterial buildup and extends device life. Taking a few extra seconds after each session makes a significant difference in longevity.
Shut Down and Detach the Tip
Press the power button to turn off the device. Remove the tip using the release button. Rinse the tip under running water to clear debris.
Warning: Never leave water in the reservoir. It promotes mold and mineral deposits that can damage the device.
Empty any remaining water from the tank and rinse it thoroughly before storing.
Clean and Dry the Reservoir

Daily drying and weekly deep cleaning keep your flosser hygienic and performing well. Regular maintenance prevents clogs and extends the life of internal components.
Empty and Air Dry After Each Use
After each use, empty the tank completely. Rinse with clean water. Leave it detached and upside down to air dry completely before reassembling.
Weekly Descaling Routine
Mineral buildup from hard water reduces performance over time. Fill the reservoir with 50% white vinegar and 50% water. Run the flosser for 1 minute without aiming at your mouth. Flush with two full tanks of clean water to remove vinegar residue.
Perform this weekly if you use hard water or daily mouthwash.
Use UV Sanitization (Advanced Models)
If you own the GuruNanda 3.0 with UV sanitization, take advantage of automatic nozzle and tank disinfection. This feature kills up to 99.9% of oral bacteria.
Sanitize Nozzle and Tank in 5-10 Minutes
Reattach the used tip after flossing. Place the flosser on the charging base. Press the UV button or let it auto-start. The cycle runs for 5-10 minutes, then shuts off automatically.
Maintenance Tip: Replace the UV bulb every 6-12 months if dimming occurs.
Maintain Battery and Storage
Proper charging and storage keep your flosser ready for daily and travel use. Following these guidelines ensures consistent performance over time.
Avoid Overcharging and Store Properly
Unplug once fully charged to extend battery life. Use only the original cable and adapter. Store in a cool, dry place away from humidity.
For long-term storage lasting 3 or more months, charge to 50-80% and top up every 3 months. The device is TSA-approved and lasts weeks on a single charge, making it ideal for travelers.
Replace Tips Every 3-6 Months
Worn tips reduce cleaning power and can harbor bacteria. Regular replacement ensures effective plaque removal and better hygiene.
Signs It Is Time to Replace
Replace the tip if it is cracked, bent, or discolored. Replace if water spray is uneven or weak. Replace if you notice less effective cleaning overall.
Orthodontic and gum disease patients should replace tips every 3 months. Replacement packs are available from GuruNanda and cost between $9.99 and $14.99 depending on the model.
Troubleshoot Common Issues
Even well-maintained flossers can experience problems. Knowing how to fix common issues saves time and prevents frustration.
Weak Water Flow
A clogged tip or mineral buildup causes weak water flow. Rinse the tip under running water and run a vinegar descaling cycle to resolve this.
Leaking Reservoir
A loose cap, damaged O-ring, or cracked seal leads to leaking. Tighten the cap and inspect the seal. Replace if worn.
Device Will Not Turn On
Low battery or a charging fault prevents the device from turning on. Recharge fully and try a different outlet or cable.
Excessive Noise or Splashing
Air in the pump or pressure set too high causes excessive noise. Refill the tank and run briefly to prime. Start on Soft mode and lean forward while using.
Frequently Asked Questions About Using GuruNanda Water Flosser
Can a water flosser replace traditional floss?
For most people, water flossing is as effective as string floss in reducing plaque and gum disease. However, for extremely tight contacts between teeth, string floss may still be necessary. GuruNanda recommends flossing manually first, then using the water flosser to flush out loosened debris.
How often should I water floss?
Use your GuruNanda water flosser twice daily, morning and night, for optimal gum health. Some users with braces or dental work prefer to use it after every meal.
Is it safe for sensitive gums?
Yes. The adjustable pressure settings allow users to start gently and increase over time. Clinical evidence confirms that regular use reduces gum sensitivity, inflammation, and bleeding.
Can I use mouthwash in the tank?
Yes, but only diluted with water in a 1:1 or 1:3 ratio. Avoid thick, oily, or undiluted essential oils because they may clog the pump or degrade internal components.
How do I know when to replace the tips?
Replace tips every 3-6 months, or sooner if the tip is cracked, bent, or discolored. Replace if water spray becomes uneven or cleaning performance decreases.
Key Takeaways for Using Your GuruNanda Water Flosser
Using your GuruNanda water flosser correctly transforms your oral hygiene routine. The device removes up to 29% more plaque than string floss and reaches 3 mm below the gumline, helping prevent gingivitis and protect dental work.
Charge fully before first use and maintain regular charging cycles. Fill with lukewarm water and select the appropriate tip for your needs. Start on Soft mode and gradually increase pressure as your gums adapt. Clean systematically using the quadrant method, spending about 30 seconds per section.
Maintain your device by emptying and drying the reservoir after each use, performing weekly vinegar descaling, and replacing tips every 3-6 months. If your model includes UV sanitization, use it after each session for enhanced hygiene.
Combine water flossing with manual brushing and regular dental checkups for comprehensive oral health. With consistent use, you will notice less gum bleeding, fresher breath, and cleaner teeth within 1-2 weeks.