
If you’ve just purchased a Philips Sonicare Water Flosser, you’re taking an important step toward improving your oral hygiene. Water flossers can remove up to 99.9% more plaque than string floss alone, making them especially effective around braces, implants, and tight spaces. This guide covers everything you need to know: from charging and nozzle selection to proper technique and daily maintenance, so you can get the most from your device.
Charge Your Flosser Before First Use
Your Sonicare Cordless Power Flosser 3000 needs a full charge before you start using it. Charge the device for 24 hours initially to condition the lithium-ion battery for optimal performance and longevity. This one-time extended charge helps the battery reach its full capacity and extends overall lifespan.
The magnetic USB charging base makes this simple. Watch the LED indicator while charging: a red light means the unit is charging, and a green light confirms it’s fully charged and ready for use. Once green, unplug the device. A full charge provides up to 30 uses, giving you about a month of daily flossing before you need to recharge.
Fill the Reservoir With Lukewarm Water
Fill the water reservoir with lukewarm water, which means room temperature or slightly warm. Hot or cold water can cause sensitivity, especially if you have exposed roots or gum recession. Skip this step, and you might experience discomfort that discourages consistent use.
Avoid adding undiluted mouthwash, alcohol-based rinses, or essential oils to the reservoir. These substances can degrade internal seals and tubing over time. If you want flavored water, mix equal parts water and dentist-approved mouthwash. Always fill to the MAX line only. Overfilling causes leaks during use, so check that the reservoir is seated firmly in the handle before starting.
Choose the Right Nozzle for Your Needs
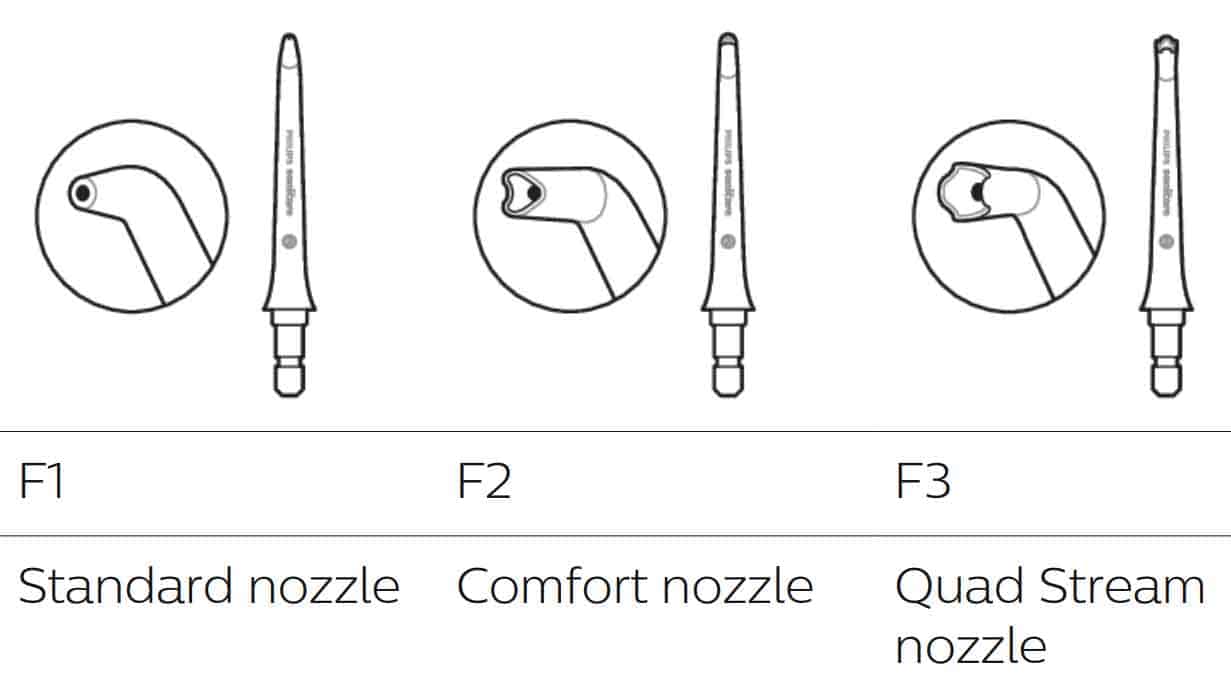
Sonicare offers several interchangeable nozzles designed for specific dental situations. Select the one that matches your oral health needs and snap it firmly into the handle until it clicks into place.
The Standard Jet Tip works for everyday plaque removal. The Orthodontic Tip cleans around braces and wires effectively. The Plaque Seeker Tip targets crowns, bridges, and implants. The Gum Care Tip delivers softer spray for sensitive or receding gums. The Tongue Cleaner Tip removes bacteria that causes bad breath. Replace all nozzles every 3 to 6 months, or sooner if you notice cracks or discoloration.
Select the Proper Pressure Mode
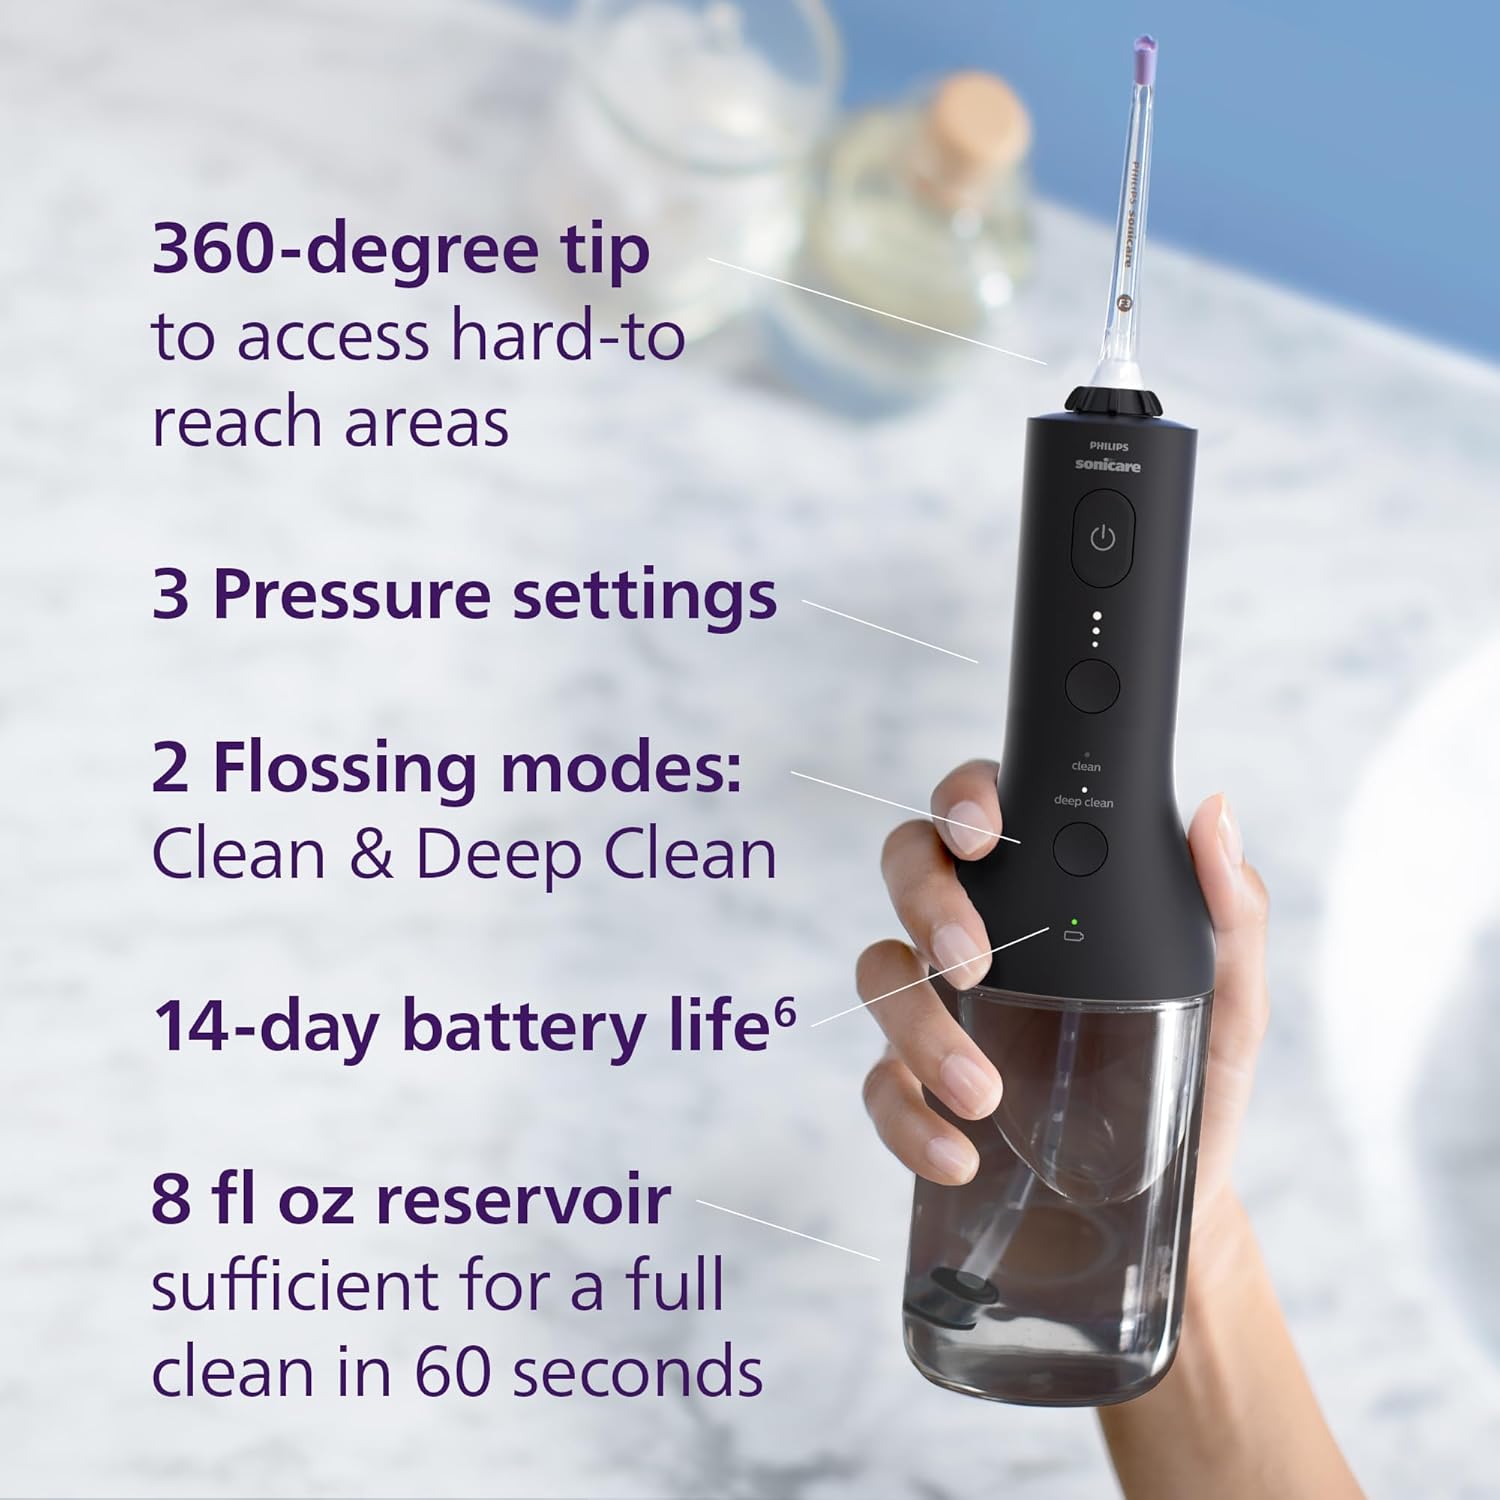
Start with Sensitive mode for the first week of use. This gentle setting helps your gums adapt to water flossing, reducing initial bleeding or discomfort. It’s also ideal after dental work or if you have existing gum inflammation.
Once you’ve adjusted, switch to Clean mode for everyday use. It delivers balanced pulsations that remove plaque between teeth and below the gumline, perfect for maintaining healthy gums. Reserve Deep Clean mode for tough areas like molars, implants, or bridges. Its high-intensity pulses dislodge stubborn debris but should only be used after your gums are conditioned to lower pressures.
Position the Tip at the Correct Angle
Hold the flosser nozzle at a 90-degree angle to your gumline. This positioning directs the water pulse between teeth and just under the gum margin, where plaque hides. Don’t press hard against your teeth or gums. Let the pulsations do the work. Forcing the tip can bruise gums and cause unnecessary pain.
Seal your lips slightly to minimize splashing, but allow water to flow out of your mouth and into the sink. Breathe through your nose during use to prevent gagging, especially when cleaning back teeth.
Follow the Correct Flossing Order
Begin at your back molars, which are often neglected and collect the most food debris. Work systematically around your mouth, either clockwise or counterclockwise, so you don’t miss any gaps. This methodical approach ensures complete coverage.
Pause for 1 to 2 seconds between each tooth gap to let the water pulse flush out bacteria and particles. For implants, braces, or problem areas, extend this to 2 to 3 seconds per site. Split your mouth into four quadrants: upper right, upper left, lower right, and lower left. Spend about 30 seconds per quadrant to complete a full 2-minute session.
Integrate Water Flossing Into Your Daily Routine
Use the water flosser after brushing but before mouthwash. Brushing first loosens surface plaque, then water flossing flushes out interdental debris, and finally mouthwash delivers antimicrobial agents to clean surfaces. This sequence maximizes cleanliness and protection.
One session per day, preferably at night, is enough to reduce gum bleeding, plaque, and bad breath. Clinical studies show significant gum health improvements within 2 weeks of consistent use. The key is making water flossing a daily habit, not an occasional supplement to your oral care routine.
Clean the Device After Each Use
After every session, empty remaining water from the reservoir. Press the power button briefly without water to clear the tubing. Wipe the exterior with a soft, damp cloth. Leaving water inside promotes mold growth and mineral buildup that can damage the device.
Once a week, run a solution of equal parts water and white vinegar through the device to dissolve limescale and kill bacteria. Then flush with clean water. Never use bleach, undiluted vinegar, or abrasive cleaners on your flosser.
Store Your Flosser Properly
Store the flosser upright in a dry area, like a medicine cabinet. This prevents water pooling and maintains seal integrity. Keep spare nozzles in a ventilated container, not sealed in plastic, to prevent moisture buildup and bacterial growth. The cordless design makes it travel-friendly, but pack smart: bring extra nozzles in a ventilated case and use bottled water if tap water quality is questionable.
Target Problem Areas Strategically
Spend extra time on high-risk zones: teeth with deep gum pockets, sites of past gum disease, areas around implants or bridges, and back molars. Use Deep Clean mode on these spots after you’ve acclimated to lower pressures. If you wear braces, use the Orthodontic Tip daily to prevent white spot lesions and decalcification around brackets and wires.
Follow Important Safety Guidelines
Do not use the flosser on surgical sites, open wounds, or active infections unless your dentist approves. Avoid directing the stream into your upper back teeth at a steep upward angle, as this may force water into your maxillary sinuses and cause discomfort. Keep the device away from children. It’s not for unsupervised use by minors.
Troubleshoot Common Issues
If you get no water stream, check that the reservoir is properly seated and the nozzle is securely attached. Remove and rinse the nozzle under water to clear blockages. If the device leaks from the base, ensure the reservoir isn’t overfilled and that O-rings are clean and intact. Wipe seals regularly to prevent debris buildup.
For short battery life, you may have skipped the initial 24-hour charge. Clean charging contacts with a dry cloth. Avoid frequent partial charges. Fully deplete and recharge monthly to recalibrate the battery.
Maximize Device Longevity and Warranty Coverage
The Sonicare Cordless Power Flosser 3000 is built with water-resistant, durable materials designed for bathroom use. With proper care, many users report reliable performance beyond two years. Philips offers a limited 2-year warranty covering defects in materials and workmanship. Register your device online for full support.
Adjust to Your New Routine
Expect mild gum bleeding for the first 5 to 7 days. This is normal as your gums adjust to water flossing. It typically stops as inflammation decreases and tissue strengthens. Starting with Sensitive mode reduces irritation and improves long-term compliance.
With daily use, users report a 100% reduction in gum bleeding after 2 weeks, cleaner-feeling teeth especially between molars, fresher breath due to tongue cleaning, and easier maintenance with braces or implants.
Frequently Asked Questions About Sonicare Water Flosser
How long does it take to charge a Sonicare Water Flosser for first use?
Charge your Sonicare Water Flosser for 24 hours before the first use. This initial charge conditions the lithium-ion battery for maximum lifespan and performance.
Can I use mouthwash in my Sonicare Water Flosser?
You can use a 50/50 mix of water and dentist-approved mouthwash. Avoid undiluted mouthwash, alcohol-based rinses, or essential oils, as these may degrade internal seals and tubing.
How often should I replace the nozzle on my water flosser?
Replace nozzles every 3 to 6 months, or sooner if you notice cracks, discoloration, or wear. Worn nozzles harbor bacteria and reduce cleaning effectiveness.
What pressure mode should I start with as a beginner?
Start with Sensitive mode for the first week. This gentle setting helps gums adapt and reduces initial bleeding or discomfort. Progress to Clean mode for daily use, and reserve Deep Clean for tough areas.
How long should a water flossing session last?
Each session should last 1 to 2 minutes to achieve full coverage of all teeth and gum areas. Pause 1 to 2 seconds between each tooth gap for optimal debris removal.
Key Takeaways for Using Your Sonicare Water Flosser
Using your Sonicare Water Flosser correctly transforms your oral hygiene routine. Charge fully before first use, start with Sensitive mode, and progress gradually to higher pressures as your gums adapt. Position the tip at 90 degrees to your gumline, move systematically around your mouth, and pause 1 to 2 seconds between each tooth. Use the device after brushing but before mouthwash for maximum benefit. Clean the unit after each use, perform weekly deep cleaning with vinegar solution, and replace nozzles every 3 to 6 months. With consistent daily use, you’ll see healthier gums, less plaque, and fresher breath within two weeks.