
A clean Waterpik water flosser reservoir is essential for maintaining strong water pressure, preventing odors, and ensuring hygienic oral care. Over time, tap water leaves behind mineral deposits, while moisture fosters bacterial growth and biofilm, leading to musty smells, reduced performance, and potential health risks. Cleaning the reservoir is not just about appearance. It directly affects how well your flosser works. If you have noticed cloudy residue, a funky odor, or weaker spray, it is time for a deep clean.
This guide delivers the exact steps, safe methods, and expert-backed routines to keep your Waterpik reservoir spotless and functioning like new. You will learn how to clean it by hand or in the dishwasher, flush internal tubing, sanitize flossing tips, and prevent future buildup, all based on manufacturer guidelines and user-tested practices.
Remove Reservoir Safely Before Cleaning

Always start with safety when cleaning your Waterpik. Unplug the Waterpik unit before removing the reservoir to prevent electrical hazards and accidental activation during cleaning. Grip the reservoir firmly and lift it straight off the base. Most models detach easily with a simple press or twist. Check your user manual if removal feels stiff, as some models have specific locking mechanisms. Once detached, set the motor base aside and never submerge it in water. Keeping electrical components dry protects both your safety and the device lifespan.
Locate and Remove the Black Valve
Many Waterpik models include a small black rubber check valve at the bottom of the reservoir. This valve controls water flow and prevents backflow. To remove it, gently push upward from underneath until it pops out. Set it aside for separate cleaning. A clogged or damaged valve can cause leaks or low pressure, so inspect it closely. Look for cracks, stiffness, or discoloration. Replace the valve immediately if worn. Waterpik sells replacement valves online or through customer service.
Clean the Reservoir by Hand or Dishwasher
Choose the safest cleaning method based on your specific model. Most countertop Waterpik units have dishwasher-safe reservoirs, but cordless models often require hand washing. Always confirm compatibility in your manual before using the dishwasher. Whether using a dishwasher or hand-washing, avoid abrasive tools and harsh chemicals that can damage BPA-free plastic.
Dishwasher Cleaning on Top Rack Only
For compatible models, place the reservoir and black valve on the top rack of your dishwasher. Never use the heated-dry cycle. Excessive heat can warp the plastic. Run a normal wash cycle with regular detergent. After the cycle, inspect the reservoir for cloudiness or film. If residue remains, follow up with a vinegar soak. Let all parts air-dry completely before reassembling the unit.
Hand-Washing With Mild Soap
Fill a sink or basin with warm water and a few drops of mild dish soap. Use a soft sponge, non-abrasive cloth, or bottle brush to scrub the interior, especially corners and the base where water evaporates slowly. Avoid steel wool or scouring pads. These scratch surfaces and trap bacteria. Rinse thoroughly under running water to remove all soap residue. If the reservoir still looks cloudy, mineral or biofilm buildup likely remains. Proceed to a vinegar soak for deeper cleaning.
Flush Internal System Monthly
Cleaning the reservoir is not enough. Mineral deposits and bacteria hide in internal tubing, the pump, and flossing tip. A monthly flush removes this hidden buildup and restores peak performance to your device.
Prepare Vinegar Cleaning Solution
Mix one part white vinegar with two parts warm water. For example, use one-third cup vinegar plus two-thirds cup water. Alternatively, use one to two tablespoons of vinegar per full reservoir of warm water. White vinegar dissolves limescale, kills mold, and eliminates biofilm without damaging internal components. Never use undiluted vinegar. It is too harsh and may degrade seals over time.
Run Solution Through the Flosser
Reattach the clean reservoir to the base. Fill it with the vinegar-water mix. Place the flossing tip over the sink and turn on the unit. Run the full solution through until the reservoir is empty. This flushes the entire water path, including tubing and nozzle. You will notice discolored water or particles. This is trapped buildup being removed from your system.
Rinse With Clean Water Thoroughly
After the vinegar flush, refill the reservoir with clean warm water. Run another full cycle to remove any vinegar taste or odor. Repeat the rinse if needed. For best results, finish with distilled water to neutralize pH and prevent new mineral deposits from forming inside the tubing.
Deep Clean With Alternative Agents

For stronger sanitation or odor removal, use these safe, effective alternatives to vinegar.
Hydrogen Peroxide Soak Method
Mix two parts water with one part three percent hydrogen peroxide. Soak the reservoir, black valve, and flossing tips for five to seven minutes. Peroxide kills bacteria and mold more aggressively than vinegar. Rinse all parts thoroughly afterward. This method is ideal if you have stored the flosser damp or notice persistent mildew smells that vinegar alone cannot eliminate.
Denture Tablet System Flush
Drop one denture cleaning tablet into warm water and dissolve it according to package instructions. Fill the reservoir with the solution and run it through the system. Follow with one to two rinse cycles using clean water. Users report excellent results with weekly use. This method deeply sanitizes without scrubbing and leaves no residual odor.
Mouthwash for Quick Odor Control
For a quick refresh between deep cleanings, pour a small amount of antimicrobial mouthwash into the empty reservoir. Close the lid and shake gently for thirty seconds. Empty and rinse with water. This will not remove limescale but helps neutralize odors and adds a fresh scent to the reservoir.
Follow Recommended Cleaning Schedule
Stick to a routine to prevent problems before they start. Here is the ideal maintenance plan for your Waterpik.
• After each use: Empty the reservoir. Leave the lid open and store it detached and upside down to dry completely.
• Monthly: Hand wash or run through the dishwasher. Perform a vinegar or denture tablet flush.
• Every two to three weeks in hard water areas: Increase internal flushes to prevent rapid scaling.
• Every three to six months: Replace flossing tips. Soak old ones in vinegar or peroxide before discarding.
Hard water users need more frequent cleaning. Mineral deposits clog tubing fast and reduce water pressure significantly.
Use Distilled Water for Daily Use
Switch from tap to distilled or filtered water for daily use. Tap water, especially hard water, contains calcium and magnesium that form limescale inside the reservoir and pump. Distilled water prevents buildup, reduces cleaning frequency, and extends your flosser life. It is a small change that pays off in performance and longevity. You will notice stronger water pressure and fewer clogs.
Dry and Store Properly
Improper drying causes eighty percent of odor and mold issues. Always empty the reservoir after use. Store it detached, uncapped, and upside down on a clean towel in a well-ventilated area. This allows trapped moisture to evaporate completely. For stubborn water in corners, wrap a lint-free cloth around a silicone brush or chopstick to absorb it. Never seal the reservoir while damp. This creates a perfect environment for bacteria and mold to flourish.
Inspect for Damage and Buildup
Regular checks catch problems early before they become major issues.
• Cloudiness or film indicates biofilm. Clean with vinegar or run through dishwasher.
• White or greenish deposits mean hard water scale or algae. Run a descaling flush.
• Musty smell signals bacterial growth. Sanitize with peroxide or denture tablet.
• Cracks or warping require replacing the reservoir. Damaged plastic can harbor bacteria.
• Leaking at base likely means a faulty black valve. Clean, reseat, or replace it.
Replace the reservoir if it is brittle or discolored, even if it still holds water. A compromised reservoir can affect hygiene and performance.
Model-Specific Cleaning Tips
Cleaning methods vary slightly by model type. Know yours to avoid causing damage.
Countertop Models
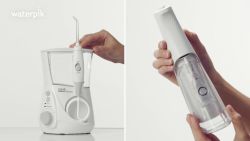
Countertop models like the WP-660 and WP-100 have large, wide-mouthed reservoirs that are usually dishwasher-safe. You can easily access the black valve and perform full vinegar flushes with minimal effort. These models are ideal for deep cleaning routines.
Cordless Portable Models
Cordless models like the WP-450 and WP-560 have smaller reservoirs that may not be dishwasher-safe. Hand-wash only. Never submerge the motorized base. Follow the manufacturer guide strictly. Cordless units are more sensitive to moisture and heat damage.
All Waterpik Models
All Waterpik models use BPA-free plastic. Avoid bleach, undiluted vinegar, or abrasive tools. These degrade materials and void warranties. When in doubt, consult your manual for specific guidance on your model.
Maintain Flossing Tips and Handle
Do not forget the parts that touch your mouth. Clean these components regularly for optimal hygiene.
Clean and Replace Flossing Tips
Remove tips after each use. Soak in a two-to-one water-to-vinegar or water-to-peroxide solution for five minutes. Rinse well. Never boil tips unless the manual allows it. Heat warps plastic and ruins the tips. Replace tips every three to six months, or sooner if cracked or discolored.
Sanitize Handle Assembly
For countertop models, detach the tip. Soak the handle opening in a two-to-one water-to-vinegar mix for five to seven minutes. Rinse thoroughly. Wipe the exterior with a damp cloth. Never immerse the handle in water. The electrical components can be damaged by moisture.
Prevent Common Reservoir Issues
Most problems are avoidable with proper care and regular maintenance.
Fix Low Water Pressure
If spray weakens, mineral buildup is likely the cause. Run a vinegar flush and clean the black valve. Replace the valve if cracked. Use distilled water going forward to prevent recurrence of pressure problems.
Eliminate Musty Odors
Odors mean trapped moisture or biofilm. Flush with hydrogen peroxide. Improve drying habits. Store reservoir open and inverted. Clean monthly without fail to prevent odors from returning.
Stop Leaks at the Base
Leaks usually stem from a damaged or misaligned black valve. Remove, clean, and reinsert it. Replace if worn. Also check for debris in the connection port that might cause leaking.
Avoid Warped Reservoirs
Never expose the reservoir to high heat. No boiling, no dishwasher heated-dry cycle. Warped plastic will not seal properly and may leak. Air-dry only to preserve the shape and function of your reservoir.
Use Safe Cleaning Agents
Stick to proven, safe solutions for your Waterpik.
| Component | Best Cleaner | Instructions |
|---|---|---|
| Reservoir (Hand Wash) | Mild dish soap | Scrub with soft brush, rinse well |
| Reservoir (Dishwasher) | Standard detergent | Top rack only, no heated dry |
| Internal Flush | White vinegar + water | One-to-two ratio, run full cycle, then rinse |
| Tip and Valve Soak | Vinegar or peroxide | Two-to-one ratio, five to seven minutes, rinse well |
| Weekly Sanitizing | Denture tablet | Dissolve, run through, rinse twice |
| Odor Control | Mouthwash | Shake, empty, rinse. Use sparingly. |
Never use bleach or strong solvents. They damage seals and plastics in your Waterpik.
Protect Warranty and Safety
Follow manufacturer guidelines to keep your warranty valid. Never immerse electrical parts in water. Avoid ultrasonic cleaners unless approved. Use only food-grade, non-toxic cleaning agents. Proper maintenance is not just about performance. It is about safety and long-term value for your investment.
Universal Tips for All Water Flossers
While this guide focuses on Waterpik, the same principles apply to generic or store-brand flossers with removable reservoirs. Monthly vinegar flushes, air drying, tip replacement, and using filtered water work for any model. Always check your manual for dishwasher safety and material limits specific to your device.
Stick to Best Practices for Long-Term Use
For a clean, high-performing flosser, follow these simple rules consistently.
• After every use: Empty reservoir, leave open to dry.
• Monthly: Deep clean reservoir and flush with vinegar or denture tablet.
• Every three to six months: Replace flossing tips.
• Hard water areas: Clean every two to three weeks.
• Storage: Keep reservoir detached, uncapped, and inverted.
Frequently Asked Questions About Cleaning Waterpik Reservoirs
How often should I clean my Waterpik reservoir?
Clean the reservoir after each use by emptying and letting it air dry. Perform a deep clean monthly using hand washing, dishwasher, or vinegar flush. In hard water areas, clean every two to three weeks to prevent mineral buildup.
Can I put my Waterpik reservoir in the dishwasher?
Most countertop Waterpik reservoirs are dishwasher-safe on the top rack only. Cordless models typically require hand washing. Always check your user manual to confirm compatibility. Never use the heated-dry cycle, as excessive heat can warp the plastic.
Why does my Waterpik smell musty?
Musty odors indicate bacterial growth or biofilm buildup from trapped moisture. Flush the system with vinegar or hydrogen peroxide. Improve your drying routine by storing the reservoir detached, uncapped, and upside down. Clean monthly to prevent odors from returning.
What is the best solution for deep cleaning the internal system?
White vinegar mixed with warm water is the best solution for deep cleaning. Use one part vinegar to two parts water. Run the solution through the entire system monthly. For extra sanitization, use hydrogen peroxide or denture cleaning tablets.
Can I use tap water in my Waterpik?
You can use tap water, but it may cause faster mineral buildup, especially in hard water areas. Using distilled or filtered water reduces limescale formation, extends time between cleanings, and maintains better water pressure. It is a simple change that improves performance significantly.
How do I know if my black valve needs replacing?
Inspect the black valve for cracks, stiffness, discoloration, or deformation. If the valve is damaged, it can cause leaks or reduced water pressure. Replace it immediately if worn. Waterpik sells replacement valves online or through customer service.
Key Takeaways for Maintaining Your Waterpik Reservoir
A clean Waterpik reservoir means better oral health, stronger performance, and a longer-lasting device. Ignoring maintenance leads to clogs, odors, and bacterial exposure that can compromise your oral hygiene routine. By following this routine, you will keep your water flosser hygienic, effective, and reliable for years to come.
Empty and air dry the reservoir after every use. Deep clean monthly with vinegar or denture tablets. Replace flossing tips every three to six months. Use distilled water to minimize mineral buildup. Store the reservoir detached and inverted to prevent mold and odors. Start today and maintain this simple schedule for optimal results. Your smile will thank you for the extra care.