
If your cordless Waterpik water flosser isn’t delivering the powerful stream it once did, or worse, emits a musty smell when in use, it’s likely overdue for a deep clean. Over time, mineral deposits from tap water and moisture buildup can lead to clogs, reduced pressure, and bacterial growth inside the device. Regular cleaning isn’t just about performance, it is essential for hygiene and long-term reliability.
The good news? Cleaning your cordless Waterpik is simple, quick, and requires only household items like vinegar and a soft brush. This guide walks you through every step from disassembling the unit to flushing internal tubing so you can restore peak performance and keep your flosser safe and effective.
Disassemble Before Cleaning
Always start with a safe, powered-down unit. Turn off the flosser and ensure it is unplugged if rechargeable. Begin disassembly by removing the water reservoir from the motorized base. Take off all flossing tips from the handle. Set aside the charging base and never submerge it.
The handle is water-resistant, not waterproof. Never dunk the base or run it under water. Only removable parts like the reservoir and tips should be cleaned directly.
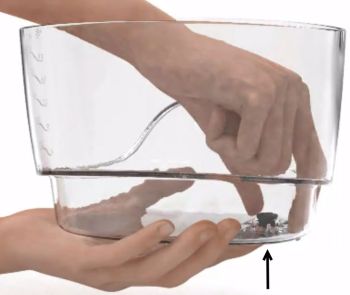
Some models have a black rubber check valve at the bottom of the reservoir. If yours does, gently push it out from underneath for separate cleaning. This small part prevents backflow and often traps debris.
Wipe the Exterior Regularly
Fingerprints, toothpaste splatter, and bathroom grime accumulate on the handle and body over time. Regular exterior cleaning keeps your device looking new and prevents residue from entering internal components.
Clean With a Damp Cloth
Use a soft, lint-free cloth dampened with mild dish soap. Gently wipe the handle, power button, and charging contacts. Avoid abrasive scrubbers, bleach, or ammonia-based cleaners as they can damage plastic and seals. Dry thoroughly after wiping.
Wipe down the unit after each use to prevent buildup. Focus on the nozzle opening and charging area where moisture and residue collect.
Deep-Clean the Flossing Tips
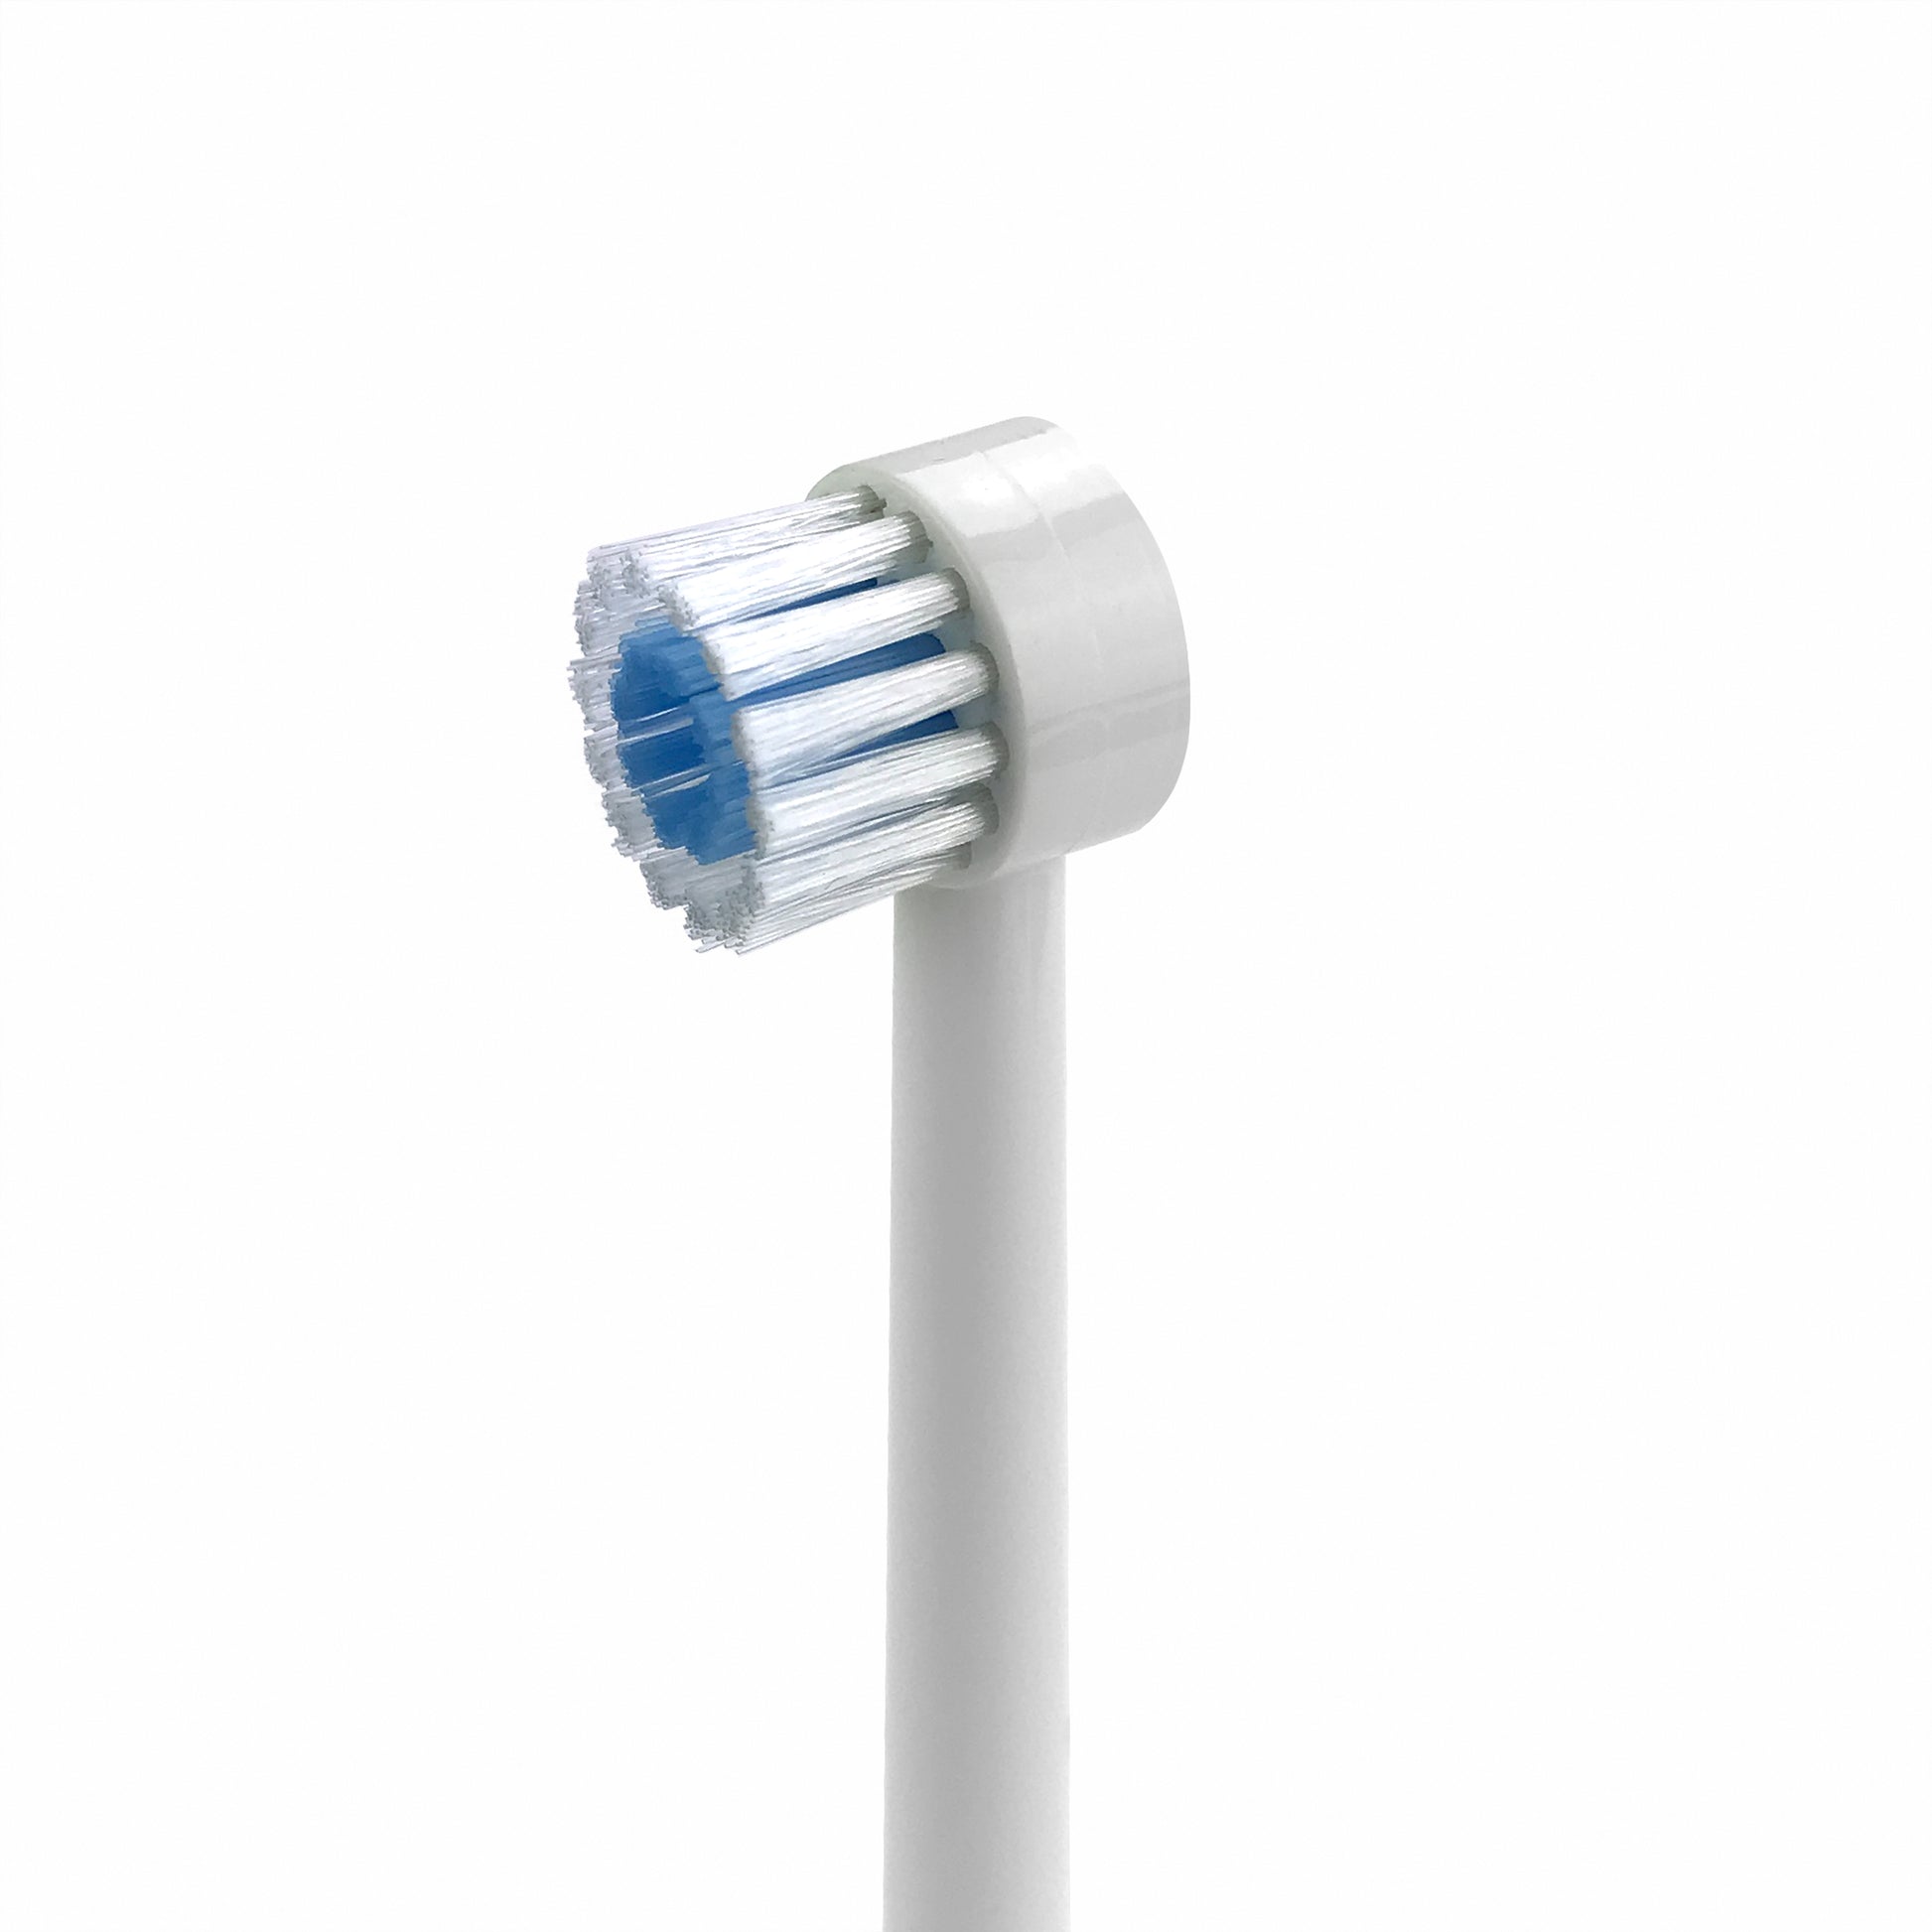
Clogged or dirty tips reduce water pressure and harbor bacteria. Keeping tips clean ensures consistent performance and prevents contamination.
Soak Tips in Cleaning Solution
Choose one of these safe, effective options for soaking your tips.
Equal parts white vinegar and water works well for most users. Alternatively, use 1 part vinegar to 2 parts warm water for a gentler solution. You can also try 2 parts water to 1 part 3% hydrogen peroxide. Another option is an effervescent denture tablet dissolved in warm water.
Soak tips for 5 to 10 minutes, then scrub the nozzle with a soft-bristled toothbrush. Focus on the tiny opening where debris gets stuck. Rinse well under warm water and air-dry completely before reuse.
Replace tips every 3 to 6 months, or sooner if the spray is weak or uneven, if the plastic looks cloudy, cracked, or yellowed, or if the tip is shared among multiple users to avoid cross-contamination.
Do not boil, microwave, or autoclave tips unless specified by Waterpik. High heat can warp the plastic.
Clean the Removable Reservoir
The reservoir is a breeding ground for mold, algae, and limescale, especially if water sits overnight. Regular cleaning prevents buildup that affects performance and hygiene.
Remove and Inspect the Check Valve
If your model has a black silicone flap known as the check valve at the bottom, push it out from underneath. Rinse under warm water for 30 to 45 seconds. Check for cracks or warping and replace if damaged by contacting Waterpik support. Set it aside to dry completely.
Dishwasher or Hand-Wash Method
For the dishwasher method, place the reservoir and valve on the top rack only. Use mild detergent and disable the heated dry function to prevent warping. Air-dry completely before reattaching.
For hand-washing, fill the reservoir with warm, soapy water. Scrub inside with a bottle brush or pipe cleaner. For stubborn stains, add a few drops of white vinegar to the mix. Rinse thoroughly and dry completely.
Empty the reservoir after every use to prevent stagnant water and biofilm buildup.
Flush Internal Tubing With Vinegar
Mineral buildup in internal lines is the top cause of poor performance in cordless Waterpik models. Regular flushing keeps water flowing smoothly.
Use a Vinegar Solution
Mix one of these solutions for effective descaling. Use 1 part white vinegar to 2 parts warm water. Alternatively, use equal parts vinegar and water. You can also add 1 to 2 tablespoons of vinegar to a full reservoir of warm water.
Never use undiluted vinegar, bleach, lemon juice, or unapproved descalers. These can damage seals and leave harmful residues inside the device.
Run a Full Flush Cycle
Follow these steps to flush your device properly.
Reattach the clean reservoir to the base. Fill with your vinegar solution. Place the tip over the sink pointing downward. Turn on the flosser and run the entire solution through on the highest setting. Refill with clean warm water only and flush again. Repeat the rinse cycle if any vinegar smell remains.
Vinegar’s acetic acid dissolves limescale and kills common bacteria and fungi naturally and safely.
Dry and Store Properly
Moisture left inside leads to mold and odors that can ruin your device. Proper drying and storage are essential for maintaining hygiene.
Air-Dry All Parts
Lay out the reservoir, tips, and valve on a clean towel. Let dry in a well-ventilated area and do not reassemble while damp. Store the reservoir detached and with the lid off to allow airflow.
Optimal Storage Conditions
Keep your Waterpik in a cool, dry place away from humidity. Avoid storing it in the shower. Direct sunlight can degrade plastic over time, so keep it shaded.
Before traveling, empty the reservoir and wipe the charging contacts. Use protective caps for tips to prevent contamination.
Troubleshoot Common Issues
Even with regular care, problems can arise. Here is how to fix the most common issues.
Low water pressure is usually caused by a clogged tip or mineral buildup. Clean or replace the tip and flush with vinegar to resolve this.
A gurgling noise typically indicates a dirty check valve or loose reservoir. Clean the valve and reseat the reservoir firmly.
Bad smell comes from mold or biofilm in the reservoir. Soak the reservoir in vinegar and rinse thoroughly.
Leaking may indicate a cracked reservoir or damaged seal. Inspect for cracks and contact Waterpik for replacement parts if needed.
No water flow means the tip is blocked or the reservoir is empty. Check the water level, clear the nozzle, and ensure the reservoir is properly seated.
Maintain Long-Term Performance
Keep your cordless Waterpik working like new with these proven habits that extend its lifespan.
Use Filtered Water
Replace tap water with distilled or filtered water, especially in hard water areas. This reduces limescale buildup by up to 90% and cuts down cleaning frequency significantly.
Stick to a Cleaning Schedule
Full cleaning including exterior, reservoir, and internal flush should be done every 1 to 3 months. In hard water areas, perform a vinegar flush every 2 to 3 weeks. After illness, replace tips and sanitize the reservoir.
Replace Parts on Time
Replace flossing tips every 3 to 6 months. Replace the check valve if cracked or missing. Replace O-rings or seals if leaking occurs.
Register your device on Waterpik.com to access warranty support, replacement parts, and recall alerts.
Battery and Charging Care
Since cordless models rely on sealed batteries, proper charging extends the lifespan significantly.
Charge Smart
Use only the original charging base and cable. Avoid leaving it plugged in continuously as overcharging degrades the battery. Charge when performance drops rather than keeping it constantly connected.
Prevent Corrosion
Wipe charging contacts with a dry cloth weekly. Never expose the charging base to water during cleaning.
Most cordless Waterpik models have a 2-year limited warranty, but damage from neglect like mineral buildup may not be covered.
Monthly Cleaning Checklist
Stay on track with this simple routine that keeps your device in top condition.
Turn off and disassemble the flosser. Wipe the handle with a damp cloth and mild soap. Soak tips in vinegar solution for 5 to 10 minutes. Scrub tips, rinse, and air-dry. Remove the reservoir and clean the check valve. Wash the reservoir in the dishwasher on the top rack or by hand. Flush the internal system with a 1 to 2 vinegar-water mix. Rinse with two full cycles of clean water. Dry all parts completely. Reassemble and store with the reservoir open and detached.
Frequently Asked Questions About Cleaning a Waterpik Cordless Water Flosser
How often should I clean my cordless Waterpik?
Perform a full cleaning including exterior, reservoir, and internal flush once every 1 to 3 months depending on usage. In hard water areas, increase to every 2 to 3 weeks. Clean the exterior after each use and soak tips in vinegar monthly.
Can I submerge my cordless Waterpik in water?
No. The handle is water-resistant but not waterproof. Never immerse the base unit in water or run it under the faucet. Only removable parts like the reservoir and tips should be cleaned directly with water.
Why does my Waterpik smell bad?
Bad odors come from mold or biofilm buildup in the reservoir. Deep-clean the reservoir by soaking it in vinegar solution, then rinse thoroughly. Increase your cleaning frequency to prevent recurrence.
What is the best solution for descaling a Waterpik?
White vinegar is the best natural descaler. Mix 1 part vinegar to 2 parts warm water, or use equal parts vinegar and water. Run this solution through the entire system on the highest setting, then rinse with clean warm water.
How do I clean the check valve on my Waterpik?
Push the black silicone flap out from underneath the reservoir. Rinse under warm running water for 30 to 45 seconds. Inspect for cracks or warping and replace if damaged. Allow to air-dry completely before reattaching.
When should I replace my Waterpik flossing tips?
Replace flossing tips every 3 to 6 months, or sooner if the spray becomes weak or uneven, if the plastic appears yellowed, cloudy, or cracked, or if used by multiple users to prevent cross-contamination.
Key Takeaways for Cleaning Your Cordless Waterpik
Regular cleaning of your cordless Waterpik water flosser is essential for maintaining strong water pressure, preventing bacterial growth, and extending the device’s lifespan. The process takes about 30 minutes and requires only household items like white vinegar, a soft brush, and mild dish soap.
The most important steps are flushing the internal system with vinegar every 1 to 3 months, cleaning the reservoir and check valve regularly, and replacing tips every 3 to 6 months. Always use distilled or filtered water to minimize mineral buildup, and store the device with the reservoir detached and lid off to prevent moisture retention.
By following this simple maintenance routine, your cordless Waterpik will deliver consistent, powerful pulsations, stay free of odors and mold, and last for years to come.