
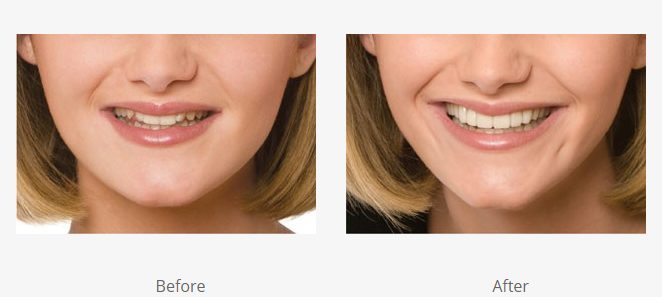
Losing a front tooth can be more than just a dental issue—it can impact your confidence, speech, and ability to eat comfortably. Whether due to injury, decay, or extraction, that sudden gap can feel impossible to ignore. Enter the flipper tooth, a quick, affordable, and removable prosthetic designed to fill the void while you prepare for a permanent solution. But how does a flipper tooth work, exactly?
A flipper tooth functions by combining a custom-fitted acrylic base—crafted to mimic your natural gumline—with one or more artificial teeth, held securely in place through suction, clasps, and precise anatomical fit. Unlike implants or bridges, it doesn’t require surgery or altering healthy teeth. Instead, it’s a temporary, non-invasive fix that restores your smile in as little as 24–48 hours. Often used after extractions or during insurance processing, flippers help maintain proper tooth alignment, support speech, and allow light chewing while you wait for long-term restoration.
In this guide, we’ll break down every aspect of how a flipper tooth works—from its construction and retention methods to daily use, care, and alternatives—so you can decide if it’s the right choice for your situation.
Flipper Tooth Structure: What It’s Made Of

A flipper tooth isn’t a simple plastic tooth—it’s a carefully designed prosthetic with multiple components working together for stability, comfort, and appearance.
Acrylic Base Mimics Natural Gums
The foundation is a thin, gum-colored acrylic resin base that rests on your alveolar ridge—the bony area where your missing tooth once grew. This base is molded from a precise impression or digital scan of your mouth, ensuring a snug fit. Upper flippers often extend slightly onto the palate (roof of the mouth), creating suction for better hold. Lower flippers typically avoid palate coverage to improve speech and comfort, though this can reduce stability.
Artificial Teeth Blend Seamlessly
Embedded into the base are acrylic or porcelain-resin pontics—the fake teeth that fill your gap. Your dentist selects these to match the color, shape, and size of your natural teeth. Whether replacing a single incisor or multiple front teeth, the goal is a natural, undetectable look. While durable for short-term use, these teeth can loosen over time with wear or impact.
Clasps Provide Extra Security
To prevent slipping, many flippers include metal wire clasps or clear acetal (plastic) clasps that wrap around adjacent healthy teeth. Metal clasps offer stronger retention but may be visible, especially near the front. Clear clasps are nearly invisible but less durable—ideal for short-term use when aesthetics are a priority.
How a Flipper Stays in Place Without Glue or Surgery
You might wonder how such a lightweight device stays put. The answer lies in a smart combination of design and oral mechanics.
Suction Secures Upper Flippers
Upper flippers benefit from palatal suction—a vacuum-like seal created when the acrylic base adheres to the moist roof of your mouth. This provides reliable stability for talking and eating. However, if your gums shrink after extraction (a common healing process), the seal weakens, requiring dental adjustments or relining.
Clasps Anchor the Flipper to Adjacent Teeth
For lower flippers or palateless designs, clasps are the primary stabilizers. These small hooks gently grip neighboring teeth, acting like anchors. While effective, they must be carefully designed to avoid damaging supporting teeth or making removal difficult.
Custom Fit Prevents Movement
Even without clasps or suction, a well-made flipper stays in place due to its anatomical precision. Molded directly from your mouth, it contours perfectly to your gum ridge and surrounding structures. This tight fit minimizes food trapping and reduces wobbling during use.
Pro Tip: Gum and bone shrinkage after extraction are normal. If your flipper starts feeling loose, schedule a dental visit. Your dentist can reline or adjust it to restore fit and function.
How It’s Made: Fast, Custom, and Ready in Days
One of the biggest advantages of a flipper tooth is speed. Unlike implants that take months, flippers can be ready in as little as one day, especially when used as an immediate denture placed right after extraction.
Step 1: Mouth Evaluation and Impressions
Your dentist examines your oral health, checks gum condition and bite alignment, and takes either a physical impression (using soft putty) or a digital scan (with an intraoral camera). This ensures a perfect fit.
Step 2: Tooth Shade and Design Selection
Using a dental shade guide, your dentist matches the artificial tooth to your natural teeth. If the flipper is being made before extraction, a pre-fabricated model can be ready for same-day placement.
Step 3: Lab Fabrication in 1–2 Days
The mold or scan is sent to a dental lab, where technicians embed the artificial tooth into the acrylic base and cure it under controlled conditions. Some clinics even offer chairside fabrication, letting you walk out with your flipper the same day.
Step 4: Fitting and Final Adjustments
Once ready, the flipper is tried in your mouth. Your dentist checks for pressure points, speech interference, and comfort, making minor trims if needed. A follow-up visit within a week ensures optimal performance.
Using Your Flipper: Eating, Speaking, and Comfort
After placement, adaptation takes time—but most people adjust within days.
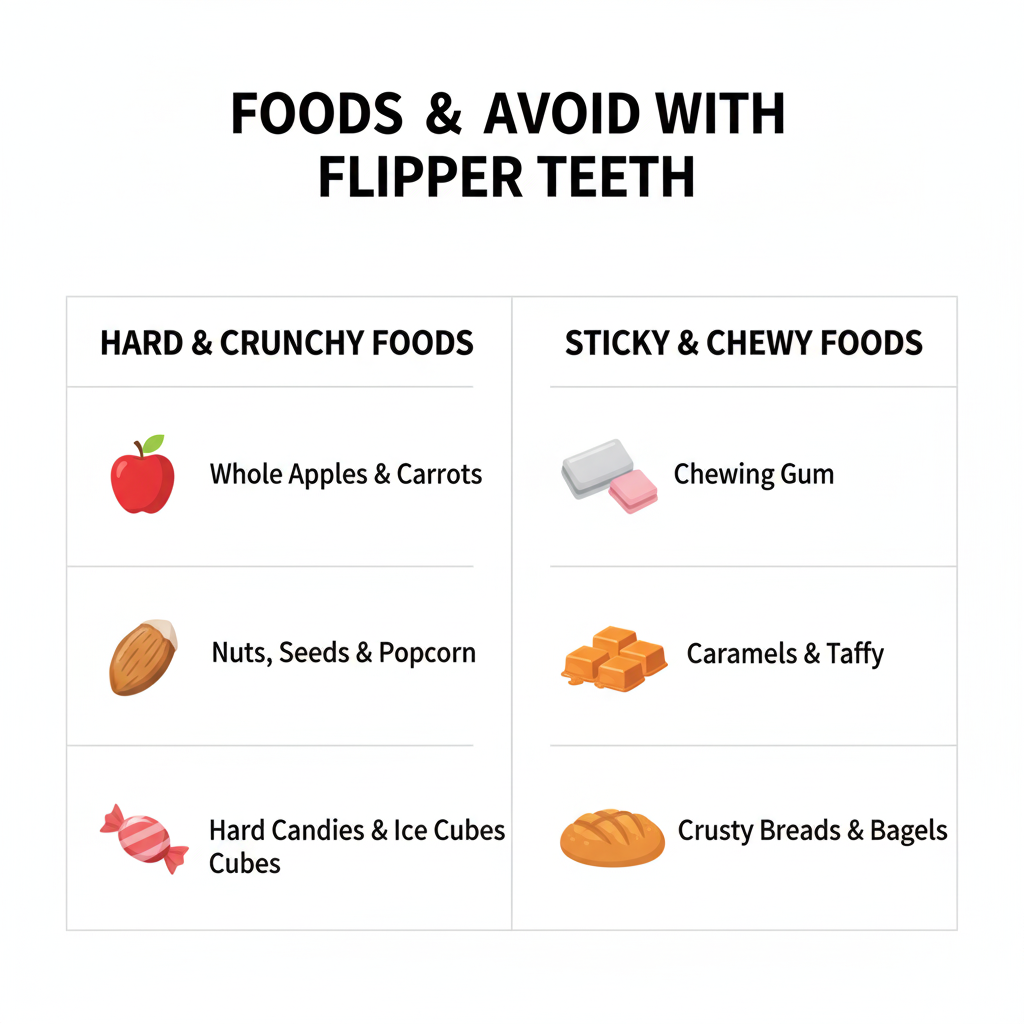
Eating with a Flipper: Start Smart
You can eat with a flipper, but start with soft foods like yogurt, mashed potatoes, and scrambled eggs. Chew slowly on both sides to distribute pressure. Avoid sticky gum, hard nuts, and crunchy raw veggies. Never bite directly on the flipper tooth—cut food into small pieces to prevent cracks.
Warning: Biting hard foods can crack the base or loosen the tooth. Treat your flipper gently.
Speaking Clearly Takes Practice
At first, you might develop a lisp or struggle with “s,” “sh,” or “f” sounds. Excess saliva is common. These issues usually fade within 10–14 days. Speed up adaptation by reading aloud, practicing tongue twisters, and using a mirror to monitor tongue placement.
Comfort Improves with Time
The flipper may feel bulky or foreign, especially if it covers your palate. Sore spots are normal and can be smoothed by your dentist. Use dental wax on sharp clasp tips. Avoid pushing the flipper with your tongue—it can distort the fit.
Care & Maintenance: Keep It Clean and Lasting
Proper care extends your flipper’s life and protects your oral health.
Clean Daily with Care
Use a soft-bristle or denture brush and mild soap with warm (not hot) water. Never use regular toothpaste—its abrasives scratch acrylic, trapping bacteria and stains.
Rinse After Every Meal
Remove and rinse your flipper to clear food debris. This prevents odor and keeps your gums healthy.
Soak Overnight
Store it in water, denture solution, or a vinegar-water mix (1:3) to clean and prevent drying. Never use hot water—it can warp the acrylic.
Remove at Night
Sleeping with your flipper increases risks of gum irritation, infection, and accidental swallowing. Take it out to let your gums breathe. If you grind your teeth, nighttime wear could crack the flipper.
Prevent Stains
Limit coffee, tea, red wine, tobacco, and beets. Rinse your mouth after consuming these to reduce discoloration.
Lifespan and Durability: A Temporary Fix
Flippers are not built to last forever—they’re temporary by design.
Average Life: 6–12 Months
With care, some last years, but most need replacement due to:
– Gum and bone shrinkage
– Normal wear
– Accidental drops
– Chewing hard foods
Common Problems & Fixes
| Issue | Cause | Solution |
|---|---|---|
| Cracked base | Dropping or biting hard food | Lab repair or replacement |
| Loose tooth | Bond failure | Reattach in office |
| Bent clasp | Improper handling | Adjust or replace |
| Poor fit | Gum recession | Reline or remake |
Minor repairs are often quick and affordable. Major damage usually means a new flipper.
Benefits: Why Choose a Flipper?
Despite limitations, flippers offer real advantages:
– Affordable ($300–$800 vs. $3,000+ for implants)
– Immediate—ready in 1–2 days
– Non-invasive—no surgery or tooth grinding
– Removable—easy to clean and adjust
– Prevents shifting—keeps teeth aligned
– Insurance-covered—often partially or fully paid
Drawbacks to Know
- Not permanent—degrades over time
- Can feel bulky—especially with palate coverage
- Visible clasps—metal hooks may show
- Gum risks—constant wear can cause irritation
- Fragile—drops or hard foods can break it
Who Should Use a Flipper?
Ideal for:
– Waiting 3–6 months for implants
– Needing immediate replacement post-extraction
– Facing insurance delays
– Replacing front teeth cosmetically
– Avoiding surgery due to health or cost
Not recommended if you:
– Have poor oral hygiene
– Suffer severe gum disease
– Are allergic to acrylic or metal
– Grind teeth heavily (without protection)
Alternatives Compared
| Option | Best For | Pros | Cons |
|---|---|---|---|
| Implants | Permanent fix | Strong, natural, prevents bone loss | Expensive, surgical, long wait |
| Bridges | Fixed solution | Stable, no removal | Requires grinding healthy teeth |
| Cast Metal Partial | Durable alternative | Long-lasting, better fit | Costlier, still removable |
| Snap-On Smile | Aesthetic cover | No adhesives, thin | Weak, not for chewing |
| Essix with Tooth | Invisible fix | Clear, comfortable | Fragile, short-term only |
Final Thoughts: A Smart, Temporary Smile Solution
A flipper tooth works by combining custom fit, suction, and clasps to replace missing front teeth quickly and affordably. It’s not permanent—but it’s an excellent bridge between tooth loss and long-term restoration.
With proper care, it can:
– Restore your smile
– Improve speech and eating
– Prevent tooth shifting
– Boost confidence
Talk to your dentist to see if a flipper tooth is right for you. With professional guidance, you can enjoy a natural-looking smile while planning your next step toward lasting dental health.