
If your Panasonic water flosser isn’t delivering that crisp, clean stream it once did, or if you notice an odd taste or odor after use, chances are it’s overdue for a proper cleaning. Even with daily use, mineral deposits, biofilm, and bacteria can build up inside the reservoir, tubing, and nozzle, compromising both hygiene and performance. This guide reveals the exact steps to clean your Panasonic water flosser daily, monthly, and for deep disinfection, so you can keep your device running like new and protect your oral health.
Daily Cleaning Routine for Your Panasonic Water Flosser
Keeping your water flosser clean starts with simple habits after every use. These quick steps prevent bacterial growth and keep water tasting fresh.
Drain the Reservoir Completely
Always empty the water tank after flossing. Leaving water inside encourages bacterial growth and mineral buildup. Turn the unit upside-down to expose the drain opening at the base. Open the drain and let all water flow out. A small amount of moisture may remain. Close the drain securely once empty to prevent leaks during storage.
Flush Internal Tubing
Even after draining, water lingers in the internal lines. To clear it, reattach the empty reservoir and power on the device for 2 to 3 seconds. Let it run dry to push out residual water. This prevents stagnation and reduces the risk of mold or biofilm forming inside the tubing.
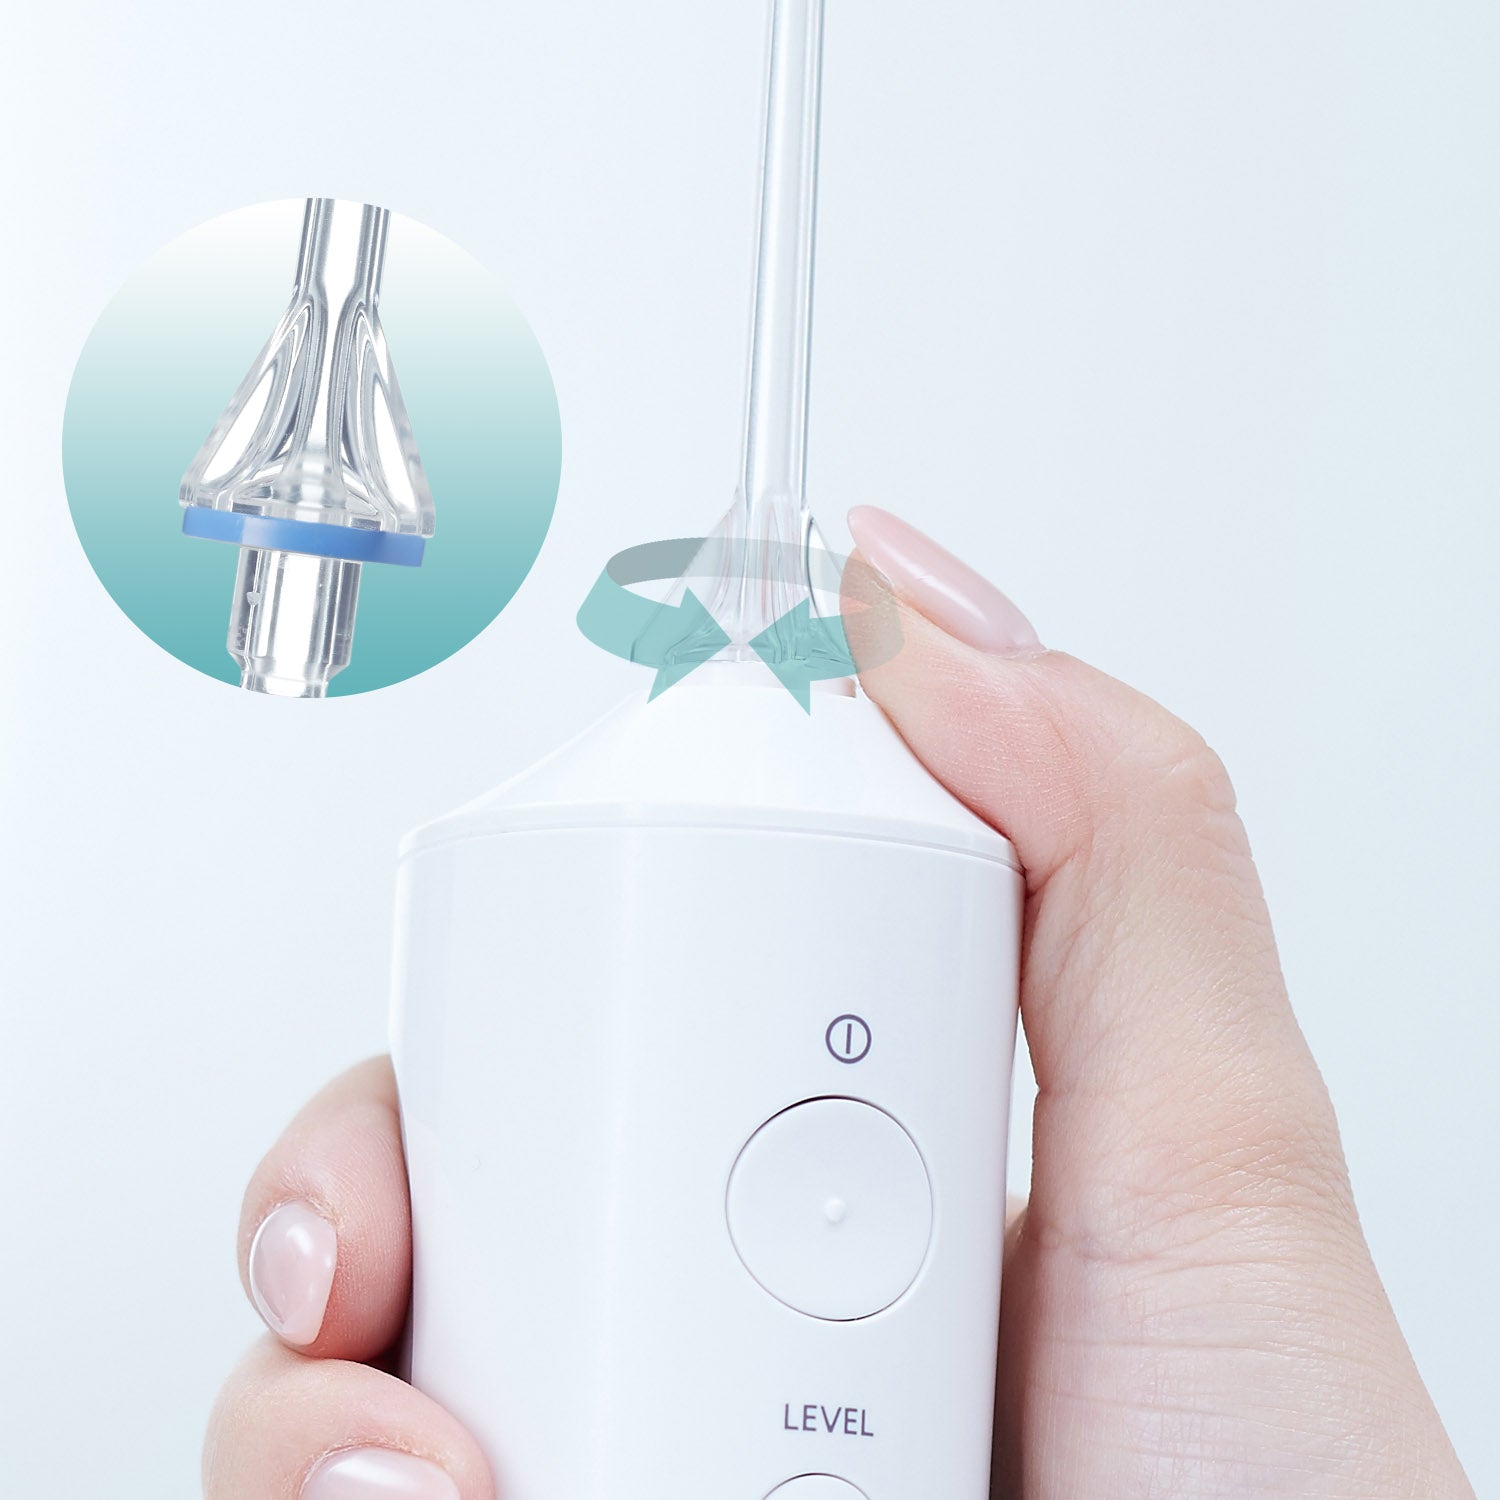
Rinse the Nozzle Thoroughly
Press the nozzle release button on the back of the handle and pull the tip straight off. Rinse it under lukewarm running water, flushing both the exterior and internal channel. For deeper cleaning, use a drop of mild dish soap on a soft cloth or toothbrush. Scrub gently, then rinse completely to remove all soap residue. Soap left behind can irritate gums and alter water taste.
Air-Dry Before Storing
Never reassemble or store wet parts. Place the nozzle and reservoir in a dry area, ideally upside-down to allow airflow. Store the entire unit away from humid bathroom counters if possible. Keeping components dry stops mold and prolongs device life.
Monthly Deep Cleaning Steps
Every 30 days, perform a deeper clean to remove biofilm, debris, and mineral buildup that daily rinsing misses.
Disassemble the Water Tank
Remove the lower section of the reservoir by pulling it downward. Inside, you’ll find a rubber seal ring and the water filter at the base of the tank. If the seal is out of place, clean it with warm water and mild soap, then reseat it firmly to prevent leaks.
Clean the Water Filter
A clogged filter reduces water pressure and flow. Use a soft-bristled toothbrush to scrub the filter surface under running water. For stubborn buildup, apply a tiny amount of mild soap, scrub lightly, and rinse thoroughly. Never use harsh chemicals, as residue can enter your mouth during use.
Wash the Reservoir Interior
Fill the tank with warm water and a drop of dish soap. Use a soft sponge or brush to clean all interior surfaces, especially corners where grime collects. Rinse multiple times until no suds remain. Leftover soap can cause irritation and unpleasant taste.
Check Dishwasher Compatibility
Some Panasonic models allow dishwasher-safe reservoirs. If yours does, place the reservoir on the top rack only and use low-heat or no-heat drying to avoid warping. Always confirm this feature in your model’s manual before assuming it’s safe.
How to Descale Internal Lines

Mineral deposits from hard water reduce performance over time. Clean every 1 to 3 months depending on your water quality.
Use a Vinegar Solution
White vinegar safely dissolves lime and mineral buildup. Mix 2 tablespoons of white vinegar with warm water to fill the reservoir. Attach the nozzle and run the device over a sink until the solution flushes through. Refill with plain water and run again to remove vinegar taste. Repeat the water rinse if needed. Never use boiling water, as it can warp plastic and damage seals.
Try Hydrogen Peroxide for Disinfection
For stronger sanitation, use 3 percent hydrogen peroxide. Mix 2 parts water to 1 part H2O2, or pour 100 mL of peroxide directly into the tank. Run the device for a few seconds, then let the solution sit for 5 to 10 minutes. Flush with clean water until no chemical aftertaste remains. Some users add a splash of mouthwash to the final rinse for freshness. Weekly peroxide use has been verified by long-term users for over six years with no device damage.
Handle and Nozzle Maintenance
The handle and nozzle see the most use and the most contamination. Keep them clean and functional.
Wipe the Handle Weekly
Use a damp cloth with vinegar water or diluted hydrogen peroxide to wipe the handle exterior. Never submerge it, as electronic components can be damaged by water. For tight spots, use a cotton swab around buttons and the nozzle attachment area. For models with removable handles, soaking in vinegar solution is safe, but check your manual first.
Soak and Replace Nozzles
In addition to daily rinsing, soak nozzles monthly in vinegar or peroxide solution for 10 to 15 minutes to disinfect. Rinse well afterward. Replace nozzles every 3 to 6 months, even if they look fine. Worn tips lose pressure and cleaning effectiveness. If multiple users share the device, label each nozzle to avoid cross-contamination.
Protect the Charging Port
Moisture in the charging port can damage internal electronics. Always wipe the port area with a dry cloth after cleaning. Ensure the rubber charging cap is fully closed before using or storing. This simple step prevents water ingress and extends the device’s lifespan.
Reassemble and Dry Properly
Before using your flosser again, ensure all parts are dry and correctly installed.
Allow Full Air-Drying
Let the reservoir, filter, and nozzle dry completely. Overnight is best. Trapped moisture breeds mold, especially in the base or filter housing.
Reattach Components Securely
Reinstall the water filter first. Reconnect the lower tank section, making sure the rubber seal is seated properly. Snap the nozzle into place until it clicks. Check for leaks during first use. If water drips from the base, recheck the seal alignment.
Why Cleaning Your Water Flosser Matters
Stop Biofilm and Bacteria Growth
Stagnant water creates a breeding ground for biofilm, a slimy layer of bacteria and fungi that can enter your mouth with each use. Regular flushing and disinfection prevent this health risk, especially important for those with weakened immune systems.
Maintain Strong Water Pressure
Mineral buildup and clogged filters restrict flow. A clean system delivers full pressure, ensuring effective plaque removal between teeth and below the gumline.
Extend Device Lifespan
Routine care prevents motor strain, leaks, and electronic failure. A well-maintained Panasonic water flosser can last 5 or more years with consistent use.
Avoid These Cleaning Mistakes
Never Use Bleach
Bleach degrades rubber seals and leaves harmful residues that are hard to rinse. It can also discolor plastic components.
Skip Abrasive Tools
Steel wool, rough sponges, or harsh scrubbers scratch surfaces. These micro-scratches trap bacteria and accelerate biofilm formation.
Do Not Ignore the Manual
Not all models disassemble the same way. Some lack removable filters or lower tanks. Always check your model number, found on the device base, and consult the Panasonic support site for exact instructions.
Storage Tips for Long Breaks
Going on vacation? Prepare your flosser for idle time by draining and drying all parts. Store the reservoir detached and open. Keep components separated in a dry place. Before using again, run a vinegar or peroxide cycle to refresh the system.
Troubleshoot Common Issues
Low Water Pressure
Check the nozzle and soak it in vinegar to unclog. Clean the filter, as debris blocks flow. Descale the lines, as mineral buildup slows output.
Bad Taste or Smell
The likely cause is bacteria or soap residue. Solution: flush with hydrogen peroxide, then rinse thoroughly.
Leaking from the Base
The rubber seal may be misaligned or damaged. Remove, clean, and reseat it. Replace if cracked.
Will Not Turn On After Cleaning
Moisture may have entered the motor or charging port. Ensure all parts are dry and the charging cap is sealed.
Panasonic Water Flosser Cleaning Schedule
Use this table to stay on track with your cleaning routine.
Frequency
Task
After Every Use
Drain reservoir, flush tubing, rinse nozzle, air-dry
Weekly
Wipe handle, inspect nozzle for clogs
Monthly
Deep clean reservoir, filter, and internal lines
Every 3 to 6 Months
Replace nozzles, check seal condition
As Needed
Descale more often in hard water areas
Frequently Asked Questions About Cleaning a Panasonic Water Flosser
How often should I clean my Panasonic water flosser?
Perform daily cleaning after every use, monthly deep cleaning, and descaling every 1 to 3 months depending on your water hardness and usage frequency.
Can I use bleach to clean my water flosser?
No. Bleach degrades rubber seals and leaves harmful residues. Use white vinegar or hydrogen peroxide instead for safe and effective disinfection.
Is my water flosser reservoir dishwasher safe?
Some Panasonic models allow dishwasher-safe reservoirs on the top rack with low-heat drying. Always check your model’s manual to confirm.
How do I remove mineral buildup from my water flosser?
Mix 2 tablespoons of white vinegar with warm water in the reservoir. Run the device until the solution flushes through, then rinse with plain water. Repeat if needed.
When should I replace the nozzle on my water flosser?
Replace nozzles every 3 to 6 months, even if they appear undamaged. Worn nozzles lose pressure and cleaning effectiveness.
What should I do if my water flosser has a bad smell?
Bacteria or soap residue likely causes the odor. Flush the system with a mixture of 2 parts water to 1 part hydrogen peroxide, then rinse thoroughly with clean water.
Final Thoughts on Keeping Your Panasonic Water Flosser Clean
By following this proven cleaning routine, your Panasonic water flosser will deliver a hygienic, powerful clean every time. The key steps are draining the reservoir after each use, performing monthly deep cleans with vinegar or hydrogen peroxide, and replacing nozzles every 3 to 6 months. Always ensure all parts are completely dry before reassembling, and protect the charging port from moisture ingress. Set a calendar reminder for monthly cleaning to stay consistent, and use distilled water if you have hard tap water to reduce mineral buildup. With proper care, your device will keep your gums healthy and run smoothly for years.