
Looking at a dental x-ray without labels can feel like solving a puzzle—but for trained professionals, identifying tooth types is a precise science. How to identify tooth types in dental x-ray comes down to recognizing subtle differences in crown shape, root patterns, position in the arch, and surrounding anatomy. Whether you’re a dental student learning radiographic interpretation or a clinician double-checking a diagnosis, mastering this skill is essential for detecting decay, planning treatment, and avoiding misdiagnosis.
Each tooth leaves a distinct “fingerprint” on radiographs. Incisors appear narrow and pointed, canines stand out with their long single roots, premolars show variable root counts, and molars reveal multi-rooted structures that differ between upper and lower jaws. By combining knowledge of dental anatomy with radiographic landmarks—like the maxillary sinus or inferior alveolar canal—you can confidently distinguish a mandibular first molar from a maxillary second premolar in seconds. This guide will walk you through the step-by-step process of accurate tooth identification using key visual cues, anatomical references, and the CREPS framework—a systematic approach to avoid common errors and ensure comprehensive diagnosis.
Decode Radiographic Contrast: Radiolucent vs Radiopaque
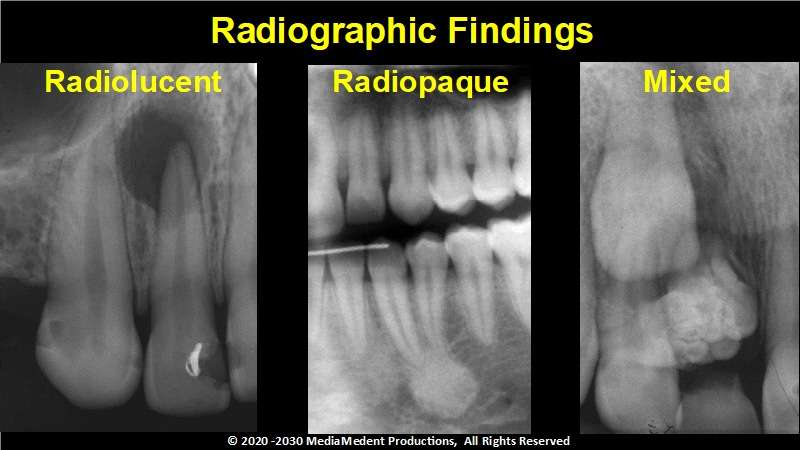
Every dental x-ray is a grayscale image where density determines brightness. Understanding this contrast is the first step in identifying tooth types in dental x-ray.
Radiolucent areas appear dark because x-rays pass through them easily. These include:
– Pulp chamber and canals – naturally dark; expansion suggests resorption.
– Dental caries – dark spots between or inside teeth, often starting at contact points.
– Abscesses – dark lesions at root tips indicating infection.
– Maxillary sinus – large dark space above upper molars.
– Cervical burnout – a common artifact mimicking caries near the gumline.
Radiopaque areas appear white because they block x-rays. These include:
– Enamel – the brightest structure due to high mineral content.
– Dentin and cementum – slightly less white than enamel.
– Alveolar bone – appears as a continuous white line around roots.
– Restorations:
– Amalgam fillings – extremely bright.
– Composite fillings – grayish, with fuzzy edges.
– Crowns – metal crowns are solid white; ceramic blends with tooth.
– Gutta-percha – radiopaque material in root canals, confirming endodontic treatment.
– Calculus – white deposits on roots, resembling “barnacles.”
Pro Tip: Use digital x-ray software to adjust contrast and brightness. Enhancing grayscale can reveal hidden caries, calculus, or early bone loss that’s invisible at default settings.
Locate Anatomical Landmarks Before Identifying Teeth
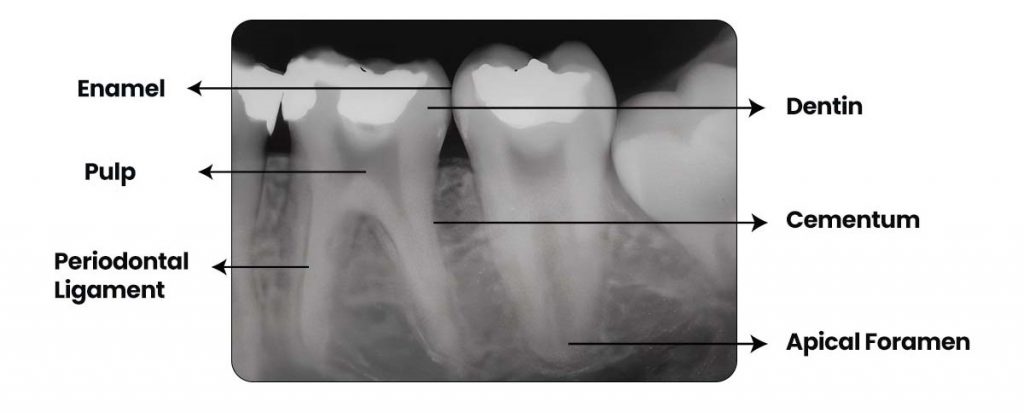
Before analyzing individual teeth, identify key anatomical landmarks—they provide critical context for tooth type identification in dental radiographs.
Cementoenamel Junction (CEJ)
The CEJ is where the enamel-covered crown meets the cementum-covered root. It appears as a faint dark line encircling the tooth near the gumline. This is your reference point for measuring bone loss. Healthy bone should align with the CEJ; if it dips below, periodontal disease is likely present.
Periodontal Ligament (PDL) Space
A thin, continuous dark line surrounding the root. It represents the space between the tooth and alveolar bone. A widened PDL suggests trauma, infection, or inflammation—common in apical periodontitis.
Lamina Dura
A sharp white line just outside the PDL. It’s the dense inner wall of the tooth socket. When blurred or broken, it indicates bone destruction from abscess, cyst, or aggressive periodontitis.
Alveolar Bone Level
Follow the white bone line from tooth to tooth. It should form a smooth, scalloped curve. Triangular radiolucencies between teeth indicate vertical bone loss, while a flat, low bone height suggests generalized horizontal loss.
Maxillary Sinus
A large dark cavity above upper molars and premolars. Its floor often overlaps molar roots. If a root projects into a dark area, it’s likely maxillary—helping confirm both arch and tooth type.
Mental Foramen & Inferior Alveolar Canal
- Mental foramen: Oval dark spot in the mandibular premolar region—don’t mistake it for a periapical lesion.
- Inferior alveolar canal: Horizontal dark line through the mandible—contains nerves and blood vessels.
Visual Cue: In mandibular molars, the roots sit just above this dark canal—like teeth floating over a tunnel. This is a key clue for identifying lower molars.
Identify Anterior Teeth: Incisors and Canines
Anterior teeth are typically easier to identify due to their simple, symmetrical structure.
Central and Lateral Incisors
- Crown Shape: Narrow, chisel-like with one sharp incisal edge.
- Root: Single, straight, conical.
- Size: Central incisors are wider than laterals.
- Position: Most forward; centrals sit at the midline.
- Radiographic Clue: Symmetrical crowns and roots—no cusps.
Differentiate Laterals: Smaller crown; upper laterals may be peg-shaped.
Canines
- Crown: Broad with a single pointed cusp—longest crown in the mouth.
- Root: Longest single root—extends deep, often curves slightly distally.
- Position: Between incisors and premolars.
- Radiographic Clue: Root length exceeds adjacent teeth—stands out in periapicals.
Common Mistake: Confusing maxillary canine root with lateral incisor due to angulation. Look for distal curvature—a hallmark of canines.
Distinguish Premolars by Root and Cusp Pattern
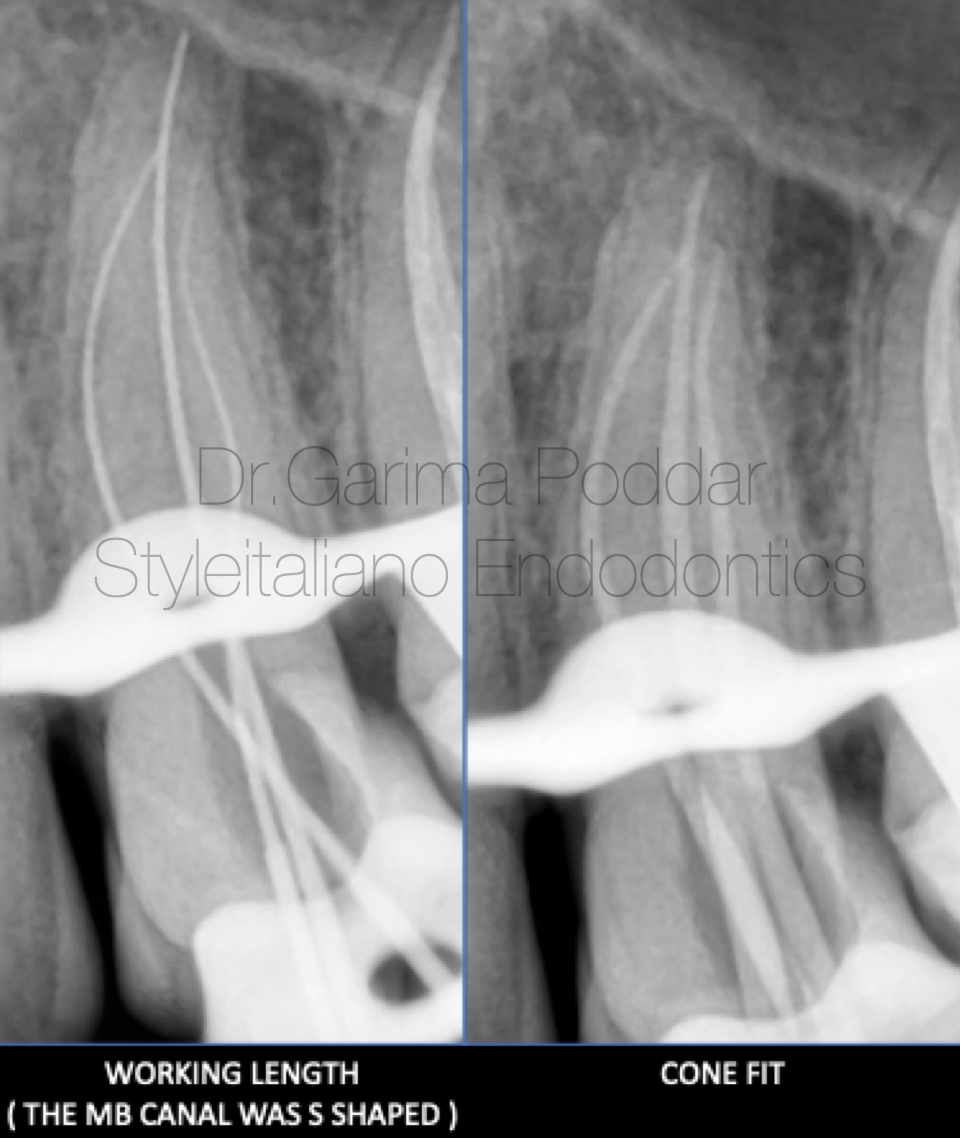
Premolars bridge the gap between canines and molars—use root count and cusp shape to identify them.
Maxillary Premolars
First Premolars
- Roots: Two in ~60% of cases—buccal and palatal.
- Palatal root longer and straighter.
- Buccal root may curve.
- Crown: Two distinct cusps—buccal larger than lingual.
- Position: Just distal to canines.
- Radiographic Clue: “Two-rooted” appearance—check for separation at apex.
Second Premolars
- Root: Usually single, short, straight.
- Crown: Rounded, three small cusps.
- Radiographic Clue: Looks like a “fat canine”—but in premolar position.
Mandibular Premolars
First Premolar
- Crown: Large buccal cusp, tiny or missing lingual cusp.
- Root: Single, often curves distally.
- Radiographic Clue: “Crescent moon” shape due to distal curve—classic sign.
Second Premolar
- Crown: Two or three well-developed cusps.
- Root: Single, straighter than first premolar.
- Radiographic Clue: Broader occlusal table—more molar-like.
Pro Tip: In bitewings, mandibular premolars appear narrower than maxillary ones. Use crown width and root curvature to tell them apart.
Recognize Molars by Root Number and Arch Location
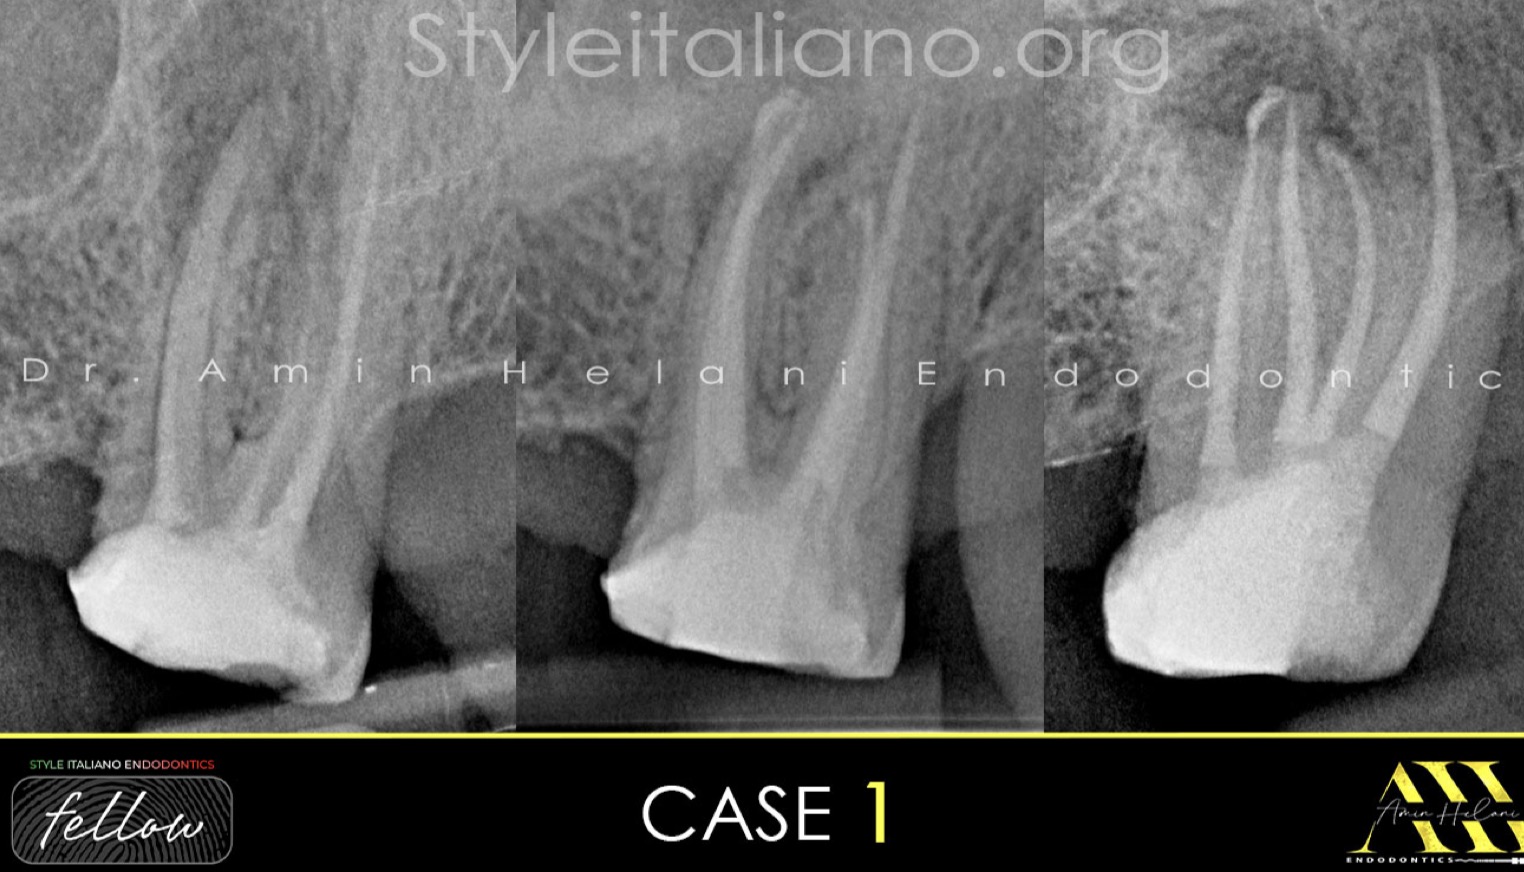
Molars are best identified by root count and anatomical context.
Maxillary Molars
- Roots: Three roots—mesiobuccal, distobuccal, palatal.
- Palatal root: Longest, straight, central.
- Mesiobuccal root: Often curves distally—may hide behind others.
- Crown: Broad, squarish with 4–5 cusps.
- Location: Roots project into maxillary sinus (dark area above).
- Radiographic Clue: “Mercedes-Benz” appearance in occlusal view—three roots diverging.
Note: First maxillary molar has a prominent oblique ridge and distobuccal cusp—visible in bitewings.
Mandibular Molars
- Roots: Two—mesial and distal.
- Mesial root: Often curves distally.
- Distal root: Shorter, straighter.
- Crown: Rectangular with 5 cusps (first molar has a distal cusp).
- Location: Roots sit just above the inferior alveolar canal.
- Radiographic Clue: “Two-rooted” with clear bifurcation—no third root.
Differentiate First and Second:
– First molar: Larger, five cusps, mesial root curvature.
– Second molar: Smaller, four cusps, shorter roots.
Use X-ray Type to Guide Interpretation
Different radiographs offer different views—use them strategically.
Bitewing Radiographs
- Shows: Crowns of posterior teeth.
- Best For: Detecting interproximal caries, checking fillings.
- Tooth ID Tips:
- Premolars: One or two roots.
- Molars: Three roots (maxillary) or two (mandibular).
- Avoid Mistake: Cervical burnout looks like decay—check if it’s at CEJ, not extending inward.
Periapical Radiographs
- Shows: Entire tooth—from crown to apex.
- Best For: Identifying tooth type by root count, diagnosing abscesses, resorption, fractures.
- Tooth ID Tips:
- Canines: Long single root.
- Molars: Multiple roots with clear bifurcation/trifurcation.
- Expert Move: Compare left and right sides—symmetry helps confirm ID.
Panoramic (OPG)
- Shows: Both jaws, sinuses, TMJs, developing teeth.
- Best For: Locating impacted teeth, assessing third molars.
- Tooth ID Tips:
- Maxillary teeth: Above sinus.
- Mandibular teeth: Above nerve canal.
- Limitation: Distortion in anterior region—don’t rely on it for caries.
Apply the CREPS Framework Systematically
Use CREPS to ensure no detail is missed:
C – Check for Caries
Scan for triangular radiolucencies at contact points.
R – Review Restorations
Look for amalgam, composite, crowns, and secondary decay.
E – Evaluate Endodontics
Check for gutta-percha, post and core, or resorption.
P – Probe Periapical Health
Assess PDL space, lamina dura, and apex.
S – Survey Supporting Structures
Identify sinuses, foramina, impacted teeth, cysts.
Best Practice: Always correlate x-ray findings with clinical exam.
Avoid Common Pitfalls and Artifacts
- Cervical Burnout: Symmetric, at CEJ, no enamel breakdown—don’t treat it.
- Overlapping Teeth: Caused by poor angulation—retake if caries suspected.
- Cone-Cut: Missing part of image—requires retake.
- Metallic Artifacts: Earrings or necklaces can obscure anatomy.
Save Time: Educate patients about artifacts to reduce unnecessary concern.
Final Note
Identifying tooth types in dental x-ray is not guesswork—it’s a structured process combining anatomy, radiographic principles, and clinical context. By mastering crown and root patterns, using anatomical landmarks, and applying the CREPS framework, you turn every x-ray into a diagnostic roadmap. Whether diagnosing decay, planning a crown, or extracting a wisdom tooth, accurate tooth identification is the foundation of excellent care. Keep practicing, use digital tools, and always correlate x-ray findings with clinical exam—because the best diagnosis comes from seeing the whole picture.