
After a tooth extraction, controlling bleeding and protecting the surgical site are your top priorities—and proper gauze placement is the most effective way to achieve both. Placing gauze correctly helps form a stable blood clot in the socket, which is essential for healing. Without it, you risk serious complications like dry socket, infection, or prolonged pain. Yet, many patients unknowingly make mistakes: checking too early, using the wrong size, or biting down in the wrong spot. This guide provides clear, step-by-step instructions on how to place gauze after tooth extraction the right way—based on clinical best practices. You’ll learn exactly where to position the pad, how long to bite, when to change it, and what to avoid for a smooth, complication-free recovery.
Choose the Right Gauze Size for Your Extraction

Use 2×2 Inch Gauze for Most Extractions
For simple extractions—like removing a front tooth or a single-rooted molar—a 2×2 inch gauze pad is ideal. It’s compact enough to fit comfortably but large enough to cover the socket and apply focused pressure. Fold it in half or into quarters to create a thick, stable square that won’t shift when you bite. This size works perfectly when neighboring teeth help hold the gauze in position.
Upgrade to 4×4 Inch for Upper Molars
If you’ve had an upper molar extracted, especially in an area where adjacent teeth are missing, opt for a 4×4 inch gauze pad. The larger size provides better coverage and stability, ensuring even pressure across the socket. Without surrounding teeth to anchor a smaller pad, the gauze can easily slip—leading to ineffective compression and prolonged bleeding.
Prepare the Gauze Properly Before Use
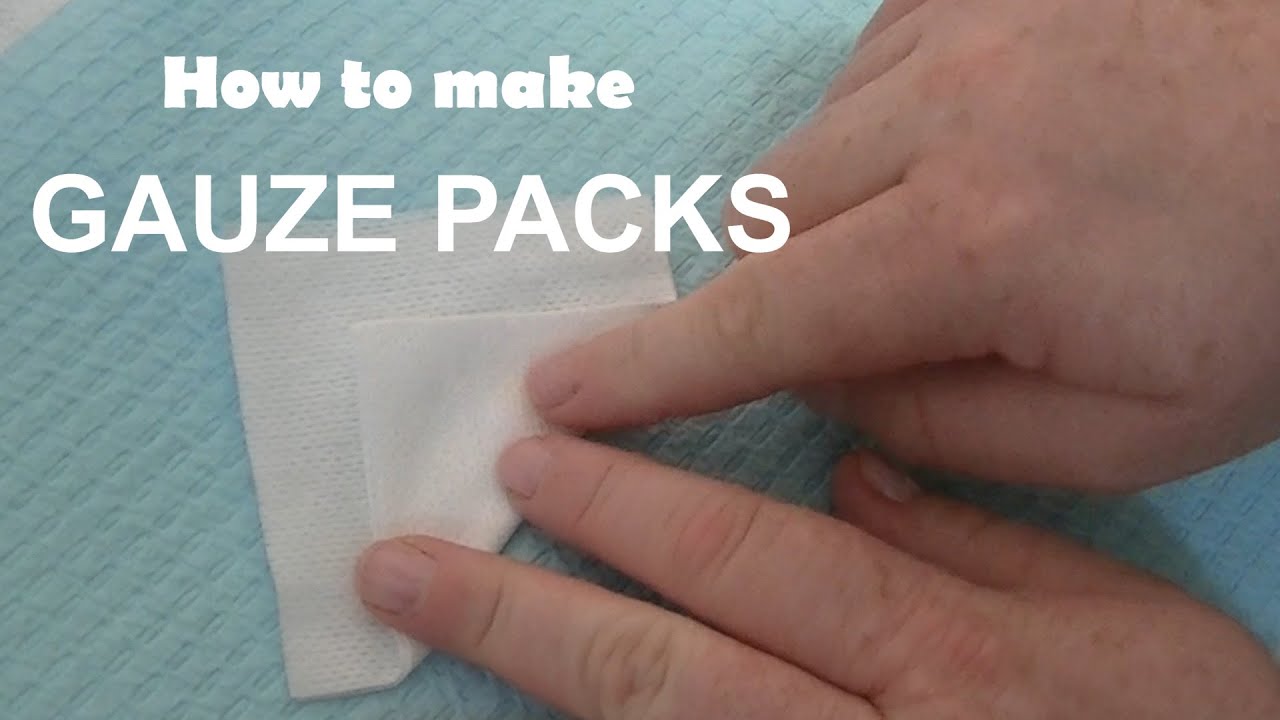
Fold for Firm, Targeted Compression
Fold the gauze into a tight, flat square—about the size of a sugar cube—so it delivers concentrated pressure right over the socket. Avoid loose folds or fluffy shapes that collapse when you bite. A compact pad stays in place and ensures the pressure is focused where it’s needed most: directly on the extraction site.
Dampen Slightly to Prevent Clot Damage
Lightly moisten the gauze with sterile water or saline before placing it. A slightly damp pad:
– Sticks less to the forming blood clot
– Reduces pain and irritation when removed
– Feels more comfortable during biting
Do not soak it. Excess moisture reduces absorbency and weakens compression. Just a quick dip and a gentle squeeze is enough.
Place Gauze Directly Over the Extraction Socket

Position It Squarely on the Wound
The gauze must sit directly over the empty socket, not beside it or between your teeth. This is where bleeding occurs, and that’s where pressure needs to be applied. Misplaced gauze fails to compress the socket, allowing blood to ooze continuously. You should feel firm pressure exactly where the tooth was removed.
Pro tip: Use a mirror or ask someone to help if you’re unsure. The gauze should cover the hole, even if stitches are present.
Avoid Common Placement Errors
One of the most frequent mistakes is tucking gauze only between the teeth. This doesn’t compress the socket and can actually trap blood on top of the gauze instead of letting it form a clot inside the socket. In one documented case, a patient bled for hours because the clot formed on top of misplaced gauze—preventing proper healing beneath.
Always cover the actual wound, not just the surrounding area.
Apply Firm, Steady Pressure—Not Excessive Force
Bite Down with Natural, Even Pressure
Close your jaws using your normal bite force. You’re not trying to crush the gauze—just compress the socket enough to stop bleeding. Aim for moderate, continuous pressure that feels snug but not painful. Think of it like pressing a bandage onto a cut—firm, but not forceful.
Sign of effective pressure: The gum tissue around the socket turns pale (blanched). This means blood flow is slowing, allowing the clot to stabilize.
Don’t Overdo It—Too Much Force Can Harm
Biting too hard can damage delicate tissues or disrupt the fragile initial clot. If it hurts, you’re pressing too hard. Let your jaw do the work—no need to clench extra tight. The goal is consistency, not maximum force.
Hold Pressure for the Full Recommended Time
Maintain 20 Minutes Without Interruption
Keep biting down for a full 20 minutes straight. This is non-negotiable. Opening your mouth early—even for a quick peek—breaks the seal and dislodges the forming clot. Most early bleeding issues happen because patients check after just 1–2 minutes.
Pro tip: Set a timer. Don’t remove the gauze until it rings. Use the time to rest with your head elevated.
Extend to 30–60 Minutes for Complex Cases
If you had a surgical extraction, impacted wisdom teeth, or are on blood thinners, your dentist may recommend 30 to 60 minutes of continuous pressure. Follow their instructions carefully. More complex sites need longer compression to stabilize.
Replace Gauze Correctly and on Schedule
Always Use a Fresh, Clean Pad
After the first round, remove the gauze gently. If bleeding continues, place a new, clean pad—never reuse old gauze. Used gauze is saturated with blood and bacteria, reducing its effectiveness and increasing infection risk.
Repeat Until Bleeding Slows to Light Oozing
Reapply fresh gauze for another 20–30 minutes if oozing persists. Most people need 2–3 changes. Bleeding should gradually decrease from active flow to a light pink tinge in saliva.
Never leave one gauze in for more than 30 minutes unless your dentist says otherwise. Prolonged use can trap bacteria and irritate tissues.
Stop Using Gauze When Bleeding Subsides
Discontinue After 4–5 Hours
Most patients can stop using gauze within 4 to 5 hours after extraction. By then, bleeding should be minimal—just occasional pink saliva. If you’re still soaking through pads, contact your dentist.
Know When to Seek Immediate Help
Call your dentist right away if:
– Blood soaks through gauze every 10–15 minutes
– Bleeding is spurting or bright red
– You feel dizzy, weak, or nauseous from blood loss
These signs indicate uncontrolled bleeding that needs professional treatment.
Special Cases: Wisdom Teeth and Stitches
Cover Surgical Sites Fully, Even with Stitches
After wisdom tooth removal, place gauze directly over the extraction site—even if you have stitches. Pressure supports clot formation beneath the sutures. Just avoid pressing directly on dissolvable stitches if possible. Position the gauze to cover the socket while minimizing suture contact.
Use Larger Gauze for Upper Molars
Upper molars are harder to stabilize due to their location and often missing neighbors. A 4×4 inch pad stays in place better and prevents shifting when you talk or swallow.
Avoid These Common Gauze Mistakes
Never Check Too Early
Peeking after 1–2 minutes is the #1 mistake. It breaks suction and restarts bleeding. Commit to 20 full minutes—set a timer and resist the urge to look.
Never Sleep with Gauze in Your Mouth
Leaving gauze in overnight poses a choking hazard if it slips. If bleeding persists at bedtime:
– Change gauze every 30 minutes
– Rest upright
– Swallow saliva—don’t spit
– Only go to sleep once bleeding has slowed to minimal oozing
Skip Spitting, Rinsing, and Straws
For the first 24–48 hours, avoid:
– Spitting – creates suction that dislodges clots
– Rinsing vigorously – washes out the clot
– Using straws – sucking motion pulls the clot out
– Smoking – doubles your risk of dry socket
Swallow saliva normally. Let water drain from your mouth instead of spitting.
Support Healing After Gauze Use
Start Saltwater Rinses After 24 Hours
Once gauze is no longer needed, begin gentle saltwater rinses:
– Mix ¼ tsp salt in 1 cup warm water
– Swish gently, then let it drain out
– Do this 2–3 times daily for 5–7 days
Saltwater reduces bacteria and soothes healing tissues.
Manage Pain and Swelling Effectively
Take ibuprofen (400–600 mg) before anesthesia wears off to prevent pain flare-ups. Repeat every 4–6 hours as needed.
Apply ice packs:
– 20 minutes on, 20 minutes off
– Continue for the first 24 hours
– Wrap in a cloth to protect your skin
Rest and Eat Safely
Stay off your feet for the first 24 hours. Avoid exercise, heavy lifting, or bending over—these increase blood pressure and can restart bleeding.
Drink cool water slowly. Eat soft foods (yogurt, mashed potatoes) on the opposite side of your mouth. Avoid hot, spicy, or crunchy foods for 2–3 days.
Recognize Emergency Signs Early
Watch for Dry Socket
Severe pain starting 2–4 days after extraction, especially if it radiates to your ear or jaw, may mean dry socket. The blood clot has dislodged or dissolved. Call your dentist immediately—the site needs a medicated dressing.
Seek Help for These Symptoms
Contact your dentist right away if you have:
– Heavy bleeding after 5 hours
– Fever over 101°F (38.3°C)
– Pus or foul smell from the socket
– Severe pain not relieved by medication
– Rash or itching (possible gauze allergy)
– Swelling that worsens after Day 2
These could signal infection or other complications.
Dentist Best Practices for Better Outcomes
Demonstrate, Don’t Just Explain
Patients remember better when they see and do. Show them how to fold and place gauze before they leave. Use a mirror so they can replicate it at home.
Provide Take-Home Supplies
Send patients home with:
– 5–6 pre-folded gauze pads
– Sanitized tweezers (for easier handling)
– Written instructions with diagrams
This reduces confusion and improves compliance.
Recommend Tea Bag Backup
If bleeding persists, suggest a damp black tea bag as an alternative. Tannins in tea help constrict blood vessels. Place it over the site and bite for 30 minutes.
Note: Use only plain black tea—no flavorings or additives.
Summary of Key Steps
✅ Use 2×2 gauze (4×4 for upper molars)
✅ Fold tightly, dampen slightly
✅ Place directly over socket
✅ Bite firmly for 20–30 minutes
✅ Change every 20–30 minutes until bleeding slows
✅ Stop after 4–5 hours or when oozing stops
❌ Never sleep with gauze in
❌ Avoid spitting, straws, rinsing for 24 hours
Proper gauze use isn’t complicated—but it’s critical. Follow these steps exactly, and you’ll support fast healing and avoid preventable pain. When in doubt, call your dentist. Your comfort and recovery start with that first bite.