
Leaving your water flosser sitting on the counter with water still in the reservoir might seem harmless, but it creates the perfect environment for mold, bacteria, and mineral buildup. Proper storage directly impacts how long your device lasts and how effectively it cleans between your teeth. Whether you own a countertop Waterpik, a cordless Philips Sonicare, or a compact travel model, the way you store it after each use determines whether it stays hygienic and functional for years. This guide walks you through the exact steps to store your water flosser correctly for daily home use, travel, and long-term storage.
Empty the Reservoir After Every Use
Why Standing Water Causes Problems
Leaving water in the reservoir is the most common storage mistake that water flosser owners make. Stagnant water creates an ideal environment for microbial growth, and biofilm can start forming in as little as 24 hours. Over time, this leads to mold, unpleasant odors, and clogged internal tubing that can damage your device. Waterpik, Philips, and other major brands explicitly warn against leaving water in the unit after use.
How to Drain Completely
Remove the reservoir immediately after flossing and pour out all remaining water. Hold the reservoir upside down over the sink to let any residual water drip out completely. Do not reattach the reservoir to the base until you are ready to use the device again.
Pro Tip: If your model has internal tubing, run a quick burst of air by briefly turning the flosser on without water attached. This helps push out moisture trapped in the lines.
Dry All Components Before Storing
Wipe and Air Dry the Base Unit
Moisture left on the base can lead to electrical issues and promote mold growth around seals and buttons. After each use, wipe the exterior with a dry or slightly damp cloth. Pay special attention to crevices where toothpaste residue or water may pool. Let the base air dry for a few minutes before putting it away.
Avoid storing your water flosser in damp environments like under the sink unless the unit is completely dry.
Air Dry the Reservoir and Nozzles
Place the reservoir upside down on a clean towel or drying rack. Store nozzle tips upright in a ventilated area, never in a sealed airtight container that traps moisture. Shake excess water from the tips, then let them dry completely before capping or storing.
User Insight: Verified purchasers report zero odor issues when they follow this daily drying routine consistently.
Dry the Cord and Charger
Unplug and dry the charging cable if it got splashed during use. Coil the cord loosely rather than winding it tightly, which can damage internal wires over time. Store the cord in a dry drawer or designated pouch away from moisture sources.
Choose the Ideal Storage Location

Countertop Storage: Pros and Cons
Storing your water flosser on the bathroom counter offers convenient access that encourages regular use, but it comes with hygiene trade-offs. The unit gets exposed to toothpaste splatter, toilet plume aerosols from flushing, and ambient humidity.
Best Practices for Countertop Storage:
- Use a non-porous tray or mat to catch drips and protect surfaces
- Keep the unit at least 2 feet away from the toilet
- Position in a well-ventilated area with good airflow
- Consider a minimalist organizer for a cleaner look
Wall-Mounted Organizers Save Space
Wall-mounted storage keeps your water flosser elevated, dry, and out of high-humidity zones near the sink. Install a shelf, rack, or custom oral care station near the sink area. This setup works especially well for models with flat backs or magnetic bases. Combining it with an electric toothbrush holder and USB outlet organizer creates a unified charging station.
Space-Saving Bonus: Wall mounting frees up valuable counter space in small bathrooms.
Medicine Cabinet Storage
A medicine cabinet provides a clean, enclosed space perfect for compact or cordless models. Remove the reservoir and detach the nozzle before storing to ensure a snug fit. Only use this option if the cabinet stays dry and is not located above a shower or near a sink where moisture could seep in.
Wipe the inside of the cabinet occasionally to prevent moisture buildup that could affect your device.
Avoid High-Humidity Storage Areas
Never Store in the Shower
High humidity accelerates mold growth and degrades seals and electronics. Only store your water flosser in the shower if you have an IPX7-rated waterproof model, and even then, you must remove and dry it thoroughly after each use.
Under-Sink Storage Requires Caution
Storing under the sink is risky unless the cabinet is well-ventilated and completely dry. Use a dedicated bin to isolate the device from damp towels and cleaning chemicals. Always let the reservoir dry fully before placing it back in the cabinet.
User Concern: One verified buyer reported a mildew smell after storing their water flosser under the sink without allowing it to dry first.
Protect Nozzle Tips Properly
Use Caps or a Dedicated Storage Case
Exposure to dust, bathroom aerosols, and germs compromises tip hygiene. Always replace the included tip cap after each use. For households with multiple users, label tips to prevent cross-contamination. Store tips in a ventilated case rather than a sealed plastic bag.
Dental Professional Tip: Closed but breathable containers balance protection and airflow, keeping tips clean without trapping moisture.
Waterpik Tip Storage Case Options
The Waterpik Tip Storage Case holds up to 6 flossing tips and is made from durable BPA-free plastic. This case is compatible with Waterpik Ultra, Ion, Cordless Express, and many other models. It is designed specifically for tip organization, not full-unit storage.
Travel Storage Solutions
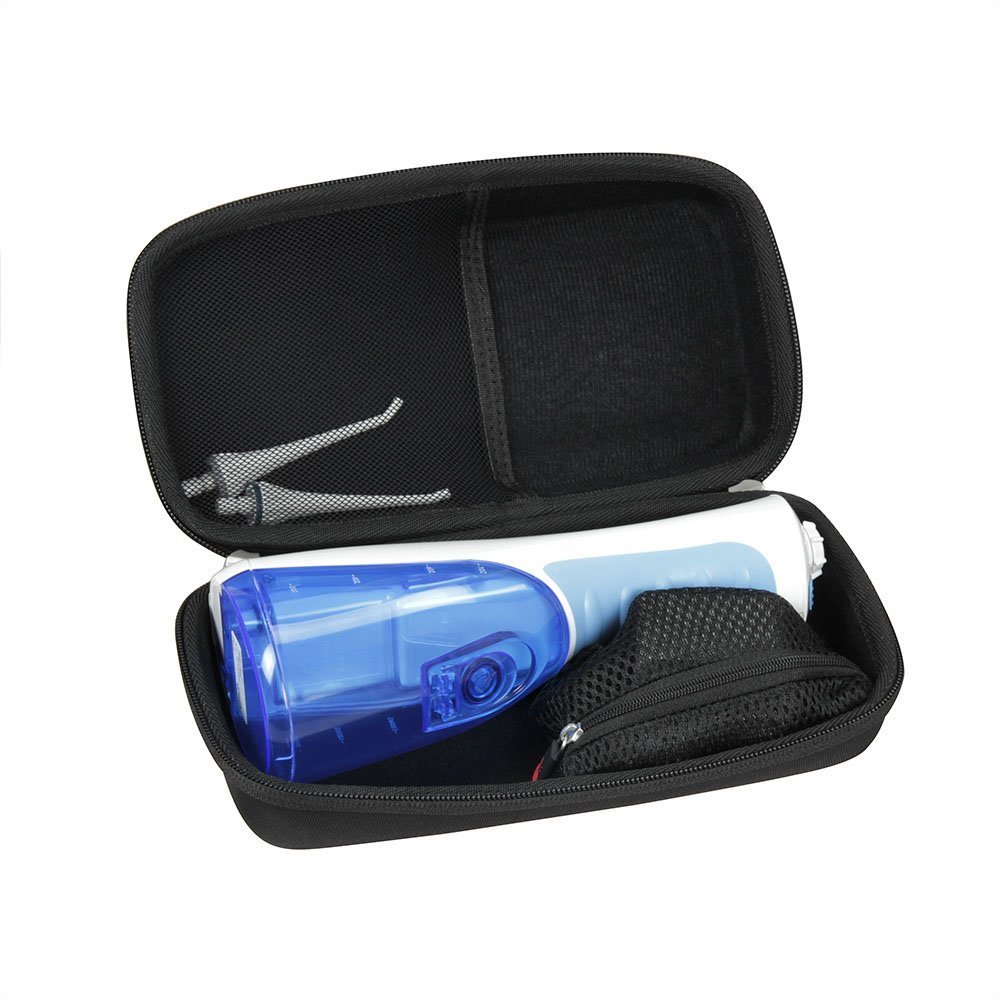
Best Travel Cases by Model
| Brand | Compatible Models | Key Features | Price (INR) |
|---|---|---|---|
| usmile Travel Case | C10, C30, Y10PRO | PU leather, hanging hook | 1,505.99 |
| Hermitshell Hard Case | WP-580, WP-660 | Shockproof, precise fit | 1,411.80 |
| Aproca Case | WF-02, COSLUS C20 | Durable EVA shell | 1,317.62 |
| Tourmate Hard Case | Philips HX3826 | Rigid protection | 1,562.50 |
Essential Travel Storage Features
Look for travel cases with water-resistant materials like PU leather or EVA hard shell. Choose cases with compartments for tips, cables, toothpaste, and adapters. Zippered mesh pockets help keep small items organized. Select lightweight designs that fit easily in carry-on luggage.
Air Travel Best Practices
Empty all water from the reservoir before packing. Dry every part thoroughly, especially the reservoir and nozzle. Always use tip caps to maintain hygiene during travel. Pack the device in carry-on luggage to avoid pressure leaks and temperature damage in the cargo hold.
User Insight: Hard EVA cases from brands like SMYV and Hermitshell prevent cracking better than soft pouches during transit.
Long-Term Storage Protocol
Step-by-Step Off-Season Protocol
When storing your water flosser for weeks or months, follow this comprehensive process:
-
Deep Clean First: Wash the reservoir with warm, soapy water. Flush internal tubing with a 1:1 white vinegar-water solution to descale. Rinse thoroughly with clean water afterward.
-
Dry Completely: Leave all parts disassembled and air-dry for 24 hours. Store the reservoir upside down to ensure no moisture remains.
-
Disassemble and Pack: Place in the original box or a sealed dust-proof container. Include silica gel packs to absorb any remaining moisture.
-
Choose the Right Environment: Store in a location between 15–25°C (59–77°F). Avoid attics, basements, cars, or areas with humidity fluctuations.
-
Before Reactivating: Inspect for mold, odor, or cracks. Flush with clean water before first use. Replace worn or discolored tips.
Weekly and Monthly Maintenance
Weekly Cleaning Routine
Wash the reservoir with warm, soapy water. Disinfect tips by soaking in a 2:1 water-vinegar mix for 15–30 minutes, or in 3% hydrogen peroxide for 10–15 minutes. Rinse thoroughly after soaking to remove all residue.
Monthly Descaling
Fill the reservoir with a 1:1 vinegar-water solution. Run the flosser for 30 seconds to circulate the solution through internal tubing. Flush with clean water 2–3 times to remove all residue. Inspect O-rings and seals for wear or cracking.
Common Storage Mistakes to Avoid
Leaving water in the reservoir leads to mold and clogs. Storing in a wet cabinet promotes mildew and electrical issues. Placing the device near heat or sunlight warps plastic and degrades seals. Leaving tips loose exposes nozzles to germs and physical damage. Using bleach or harsh cleaners damages internal components.
Expert Note: “Proper storage extends your device’s life and ensures it is ready to use whenever you need it.” — Water Flosser Maintenance Guide
Storage Recommendations by Use Case
For Daily Home Use
Keep your water flosser on a dry countertop tray or wall-mounted rack. Wipe and dry after each use. Store tips in a ventilated case. This routine keeps the device accessible while maintaining hygiene.
For Small Bathrooms
Install over-toilet shelves or recessed wall storage. Choose compact cordless models that fit in limited spaces. Combine with a unified oral care station that includes your toothbrush and charging accessories.
For Travel
Use a hard-shell travel case for maximum protection. Dry all parts completely before packing. Carry the device in your carry-on luggage rather than checked bags.
For Families
Label individual nozzle tips to prevent cross-contamination between users. Store in a shared tip case with separate compartments. Replace tips every 3–6 months per dental professional recommendations.
Frequently Asked Questions About Storing a Water Flosser
Can I leave water in my water flosser reservoir between uses?
No, you should empty the reservoir after every use. Standing water promotes bacterial growth, mold, and mineral buildup within 24-48 hours. Manufacturers like Waterpik explicitly warn against leaving water in the unit.
Where is the best place to store a water flosser at home?
The best storage locations are cool, dry, and well-ventilated areas. Options include a clean countertop tray, wall-mounted organizer, or medicine cabinet. Avoid damp areas like under the sink or near showers.
How do I store my water flosser for travel?
Empty and dry all components thoroughly before packing. Use a hard-shell travel case with compartments for tips and cables. Store in carry-on luggage to avoid temperature and pressure damage.
How often should I clean my water flosser storage accessories?
Clean the reservoir weekly with warm soapy water. Disinfect tips weekly and descale the system monthly. Wipe down storage cases and organizers monthly to prevent moisture buildup.
What happens if I store my water flosser in a humid environment?
High humidity causes mold growth, mildew odors, and degradation of seals and electronics. Avoid storing in bathrooms without ventilation, near showers, or in damp cabinets. Always ensure the device is completely dry before storing.
How do I prepare my water flosser for long-term storage?
Deep clean and descale the device. Disassemble all parts and air dry completely for 24 hours. Store in a sealed container in a climate-stable environment (15-25°C). Include silica gel packs to absorb moisture.
Key Takeaways for Storing Your Water Flosser
Proper water flosser storage is simple but critical for maintaining hygiene and device longevity. Always empty the reservoir immediately after use and dry all components thoroughly before storing. Choose cool, dry storage locations like wall-mounted organizers or ventilated cabinets, and avoid high-humidity areas like showers or damp under-sink cabinets.
Use protective cases for nozzle tips and invest in a quality travel case if you move your device frequently. Follow weekly cleaning and monthly descaling routines to prevent buildup. Whether you keep it on the counter, mount it on the wall, or pack it for a trip, the right storage routine keeps your water flosser clean, functional, and ready to use whenever you need it.