
You’ve heard that tongue scraping fights bad breath, but what if you don’t want to use a metal scraper? Many people are now asking: can you use a tongue scraper on a water flosser? The answer isn’t about attaching a physical scraper. Instead, modern water flossers come with specialized tongue-cleaning tips that use a pulsating water stream to clean the tongue just as effectively, and often more comfortably, than traditional tools.
If you’re using a water flosser and wondering how to incorporate tongue cleaning into your routine, this guide is for you. You’ll learn how to use a water flosser’s tongue-cleaning tip, why it works, what mistakes to avoid, and how it compares to manual scraping. Whether you gag easily, have sensitive tissue, or just want a faster routine, this method could be the upgrade your oral hygiene needs.
Find the Right Tongue-Cleaning Tip
Not all water flosser tips are created equal. To clean your tongue properly, you need a tip designed for the job.
Look for These Features
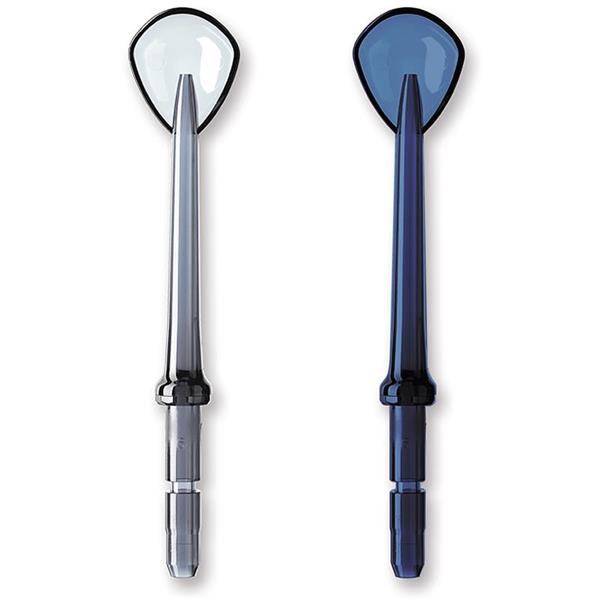
The right tongue-cleaning tip has specific design elements that set it apart from standard jet tips. Look for a flat, wide nozzle that covers more surface area per pass, soft ridges or micro-textured edges to lift debris without scratching, and BPA-free medical-grade plastic construction. Make sure the tip is compatible with your specific device brand, whether it’s Waterpik, Philips Sonicare, or another manufacturer.
Pro Tip: Check your accessory kit. Many premium models include a dedicated tongue cleaner or plaque seeker tip right in the box.
What If Your Model Doesn’t Include One?
If your water flosser didn’t come with a tongue-cleaning tip, you have options. Purchase a universal or brand-specific tongue tip from the manufacturer or third-party retailers. As a last resort, you can use the standard jet tip cautiously, but expect reduced coverage and effectiveness since the narrow stream won’t clean the broad tongue surface as efficiently.
Attach and Prepare the Device
Using the right tip is only half the battle. Proper setup ensures comfort and effectiveness during your tongue cleaning routine.
Fill the Reservoir Correctly
Use lukewarm water in your reservoir. Cold water can trigger gagging, while hot water may irritate your tongue tissue. If you want enhanced antibacterial benefits, you can add antimicrobial mouthwash like cetylpyridinium chloride to the water. Just avoid alcohol-based rinses unless your specific device manufacturer explicitly allows them, as they can damage some water flosser components.
Install the Tongue-Cleaning Tip
Remove any currently attached tip from your device. Insert the tongue-cleaning tip into the handle and push until it clicks securely into place. Give the tip a gentle wiggle to confirm it’s locked in properly before use. A loose tip can cause uneven water flow or potentially fall out during use.
Set the Pressure Level
Start on the lowest or soft pressure setting, especially if you’re new to tongue cleaning with a water flosser. Most devices offer between 3 and 10 pressure settings, typically ranging from 10 to 100 psi. You can gradually increase the pressure only if needed and tolerated. Starting low helps prevent gagging and allows you to build comfort with the sensation.
Time Estimate: Setup takes less than 2 minutes once you become familiar with your device.
Position for Comfort and Control
Your body position matters significantly. A poor stance can trigger the gag reflex or reduce cleaning effectiveness.
Stand Over the Sink
Stand in front of your bathroom sink with good posture. Keep your mouth open and tilted slightly forward to let water drain freely into the sink. This position prevents you from swallowing excess water and gives you better control over the cleaning process.
Extend Your Tongue Fully
Push your tongue out as far as is comfortable. This exposes the back third of your tongue where odor-causing bacteria thrive most. Extending your tongue also helps bypass the gag reflex by reducing throat stimulation. The more you practice this position, the easier it becomes over time.
Expert Note: Practice slow breathing through your nose while cleaning. This calms the gag reflex and improves your overall control during the process.
Clean the Tongue with Water Pulses
Now it’s time to activate the device and actually clean your tongue using the water stream.
Start at the Back of the Tongue
Place the tip near the middle-to-back section of your tongue, not all the way at the base. Avoid pressing hard against the tongue surface. Let the water do the work by using the pulsating stream to loosen debris rather than physically scrubbing.
Use Slow, Sweeping Motions
Pull the tip forward along the center line of your tongue in a slow, sweeping motion. Repeat this center stroke 3 to 5 times. Then clean each side using lateral strokes moving outward from the center. This ensures you cover the entire surface rather than just the middle portion.
Use Short Bursts or Continuous Mode?
Beginners should use pulse mode, pressing and releasing the trigger for short bursts. This gives you better control and lets you gauge your comfort level. Experienced users can switch to continuous flow mode for faster coverage once they’ve mastered the technique.
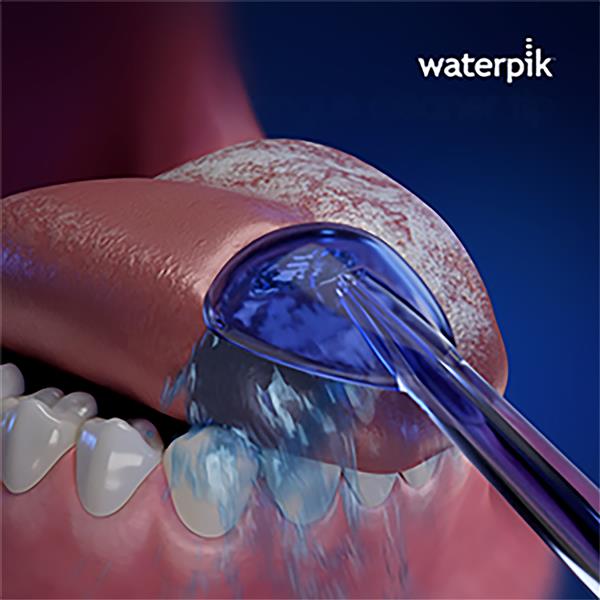
Visual Cue: You’ll see white or yellow debris flushing into the sink. That’s biofilm and dead cells being removed from your tongue’s surface.
Rinse and Inspect the Results
After cleaning, take a moment to evaluate your results and ensure all debris has been removed.
Spit and Rinse Thoroughly
Swish with plain water to clear any remaining debris from your mouth. Spit multiple times until your mouth feels completely clean and fresh. Don’t rush this step, as leftover particles can diminish the benefits of your cleaning session.
Check Your Tongue’s Appearance
A healthy tongue looks pink and relatively smooth. Thick white or yellow coating remaining on your tongue means you need more consistent daily cleaning to address the buildup. Some residual coating is normal, but it should be thin and translucent.
Quick Test: Lick the back of your hand, let it dry, then smell. Less odor indicates better tongue hygiene and more effective cleaning.
Clean and Store the Tip
Maintaining your equipment keeps it safe and effective for long-term use.
Rinse Immediately After Use
Flush water through the tip to clear any trapped particles immediately after each use. Wash the exterior under warm running water to remove residue. This prevents bacterial growth inside the tip between uses.
Deep Clean Weekly
Soak your tip in a 1:1 mixture of white vinegar and water for 15 minutes once per week. This removes stubborn buildup and disinfects the tip. Rinse thoroughly afterward to remove any vinegar taste before your next use.
Replace Every 3 to 6 Months
Discard and replace your tongue-cleaning tip if cracks appear, flow becomes uneven, or odors linger even after thorough cleaning. Worn tips are less effective and can harbor bacteria that undermine your oral hygiene efforts.
Water Flosser vs. Manual Tongue Scraper: Which Is Better?

You might wonder if water flosser tongue cleaning is really as effective as using a traditional metal or plastic scraper.
| Feature | Water Flosser | Manual Scraper |
|---|---|---|
| Biofilm Removal | High (flushes deep grooves) | Very High (direct contact) |
| Gag Reflex Risk | Low (gentle, no solid contact) | Moderate to High |
| Ease of Use | Simple and intuitive | Requires technique |
| Comfort | Adjustable pressure | Risk of over-scraping |
| Routine Integration | Seamless (same device) | Extra tool to store |
Bottom Line: Manual scrapers remove slightly more buildup per stroke, but water flossers win for daily consistency and comfort, especially for sensitive users.
Avoid Common Mistakes
Even small errors can reduce effectiveness or cause unnecessary discomfort during tongue cleaning.
Using Too High Pressure
Starting with pressure that’s too high can irritate your tongue tissue or trigger vomiting. Always begin on the lowest setting and increase gradually only if needed.
Aiming Too Far Back Too Soon
Placing the tip too far back immediately increases your gagging risk. Begin at mid-tongue and slowly work backward over days as your comfort improves.
Skipping Daily Use
Bacteria rebuild on your tongue overnight, so cleaning once daily is essential for lasting fresh breath. Inconsistent use allows odor-causing bacteria to accumulate again.
Forgetting to Extend Your Tongue
Failing to protrude your tongue limits access to the areas that need cleaning most and increases your gag response. Practice extending your tongue fully with each session.
Using Cold Water
Cold water causes tongue muscles to tense, making cleaning less effective and more uncomfortable. Stick to lukewarm water for optimal comfort and results.
Make It Part of Your Daily Routine
Consistency beats perfection when it comes to tongue hygiene. Building a habit is easier than you might think.
Best Time to Clean
Clean your tongue in the morning to remove overnight bacterial growth that accumulates while you sleep. Alternatively, cleaning at night clears food debris before bed. Either time works well, so choose what fits your schedule.
Ideal Sequence
Follow this order for complete oral care. First, brush your teeth. Second, water floss between teeth. Third, clean your tongue with your water flosser tip. Fourth, rinse with mouthwash if desired. This sequence ensures you’re cleaning each area systematically.
User Insight: 85% of users report noticeably fresher breath within one week of daily use.
Choose a Water Flosser That Supports Tongue Cleaning
Not all models are created equal. Pick one built for the job.
Key Features to Look For
Look for models that include a tongue-cleaning tip in the box so you don’t have to pay extra later. Choose a device with adjustable pressure settings ranging from soft to high. A large reservoir of 500 mL or more prevents running out of water mid-routine. Quick-swap tip systems make switching between cleaning modes easy. Finally, verify compatibility with mouthwash if you plan to add antimicrobial rinses to your water.
Top Pick: Waterpik models with tongue cleaner tips in the accessory list are trusted by thousands for reliability and effectiveness.
Safety First: When Not to Use
While generally safe, some situations require caution or consultation with your dentist.
Avoid If You Have
Skip tongue cleaning with your water flosser if you have open sores, ulcers, or recent oral surgery in your mouth. Avoid use if you have severe dry mouth, known as xerostomia. Don’t use if you have swallowing difficulties or neurological conditions that affect your ability to manage water in your mouth.
Supervise Children
If allowing children to use the device, teach them proper aim and pressure settings first. Always use under adult supervision until they’re comfortable with the technique.
When in Doubt: Ask your dentist before use, especially if you have chronic bad breath with no clear cause.
Maximize Long-Term Results
Great oral hygiene is a marathon, not a sprint. Think about long-term maintenance.
Combine Methods for Best Results
Use your water flosser daily for gentle maintenance and consistency. Add manual scraping 2 to 3 times per week for deeper biofilm removal. This hybrid approach fights halitosis more effectively than either method alone and keeps your tongue healthier long-term.
Track Your Progress
Take weekly photos of your tongue to note changes in appearance. Track changes in breath freshness over time. Adjust pressure or frequency based on what you observe.
Pro Habit: Clean your tongue right after water flossing. It’s easy to remember and takes under a minute once you’ve built the routine.
Frequently Asked Questions About Using a Tongue Scraper on Water Flosser
Can you actually attach a tongue scraper to a water flosser?
No, you cannot physically mount a traditional metal or plastic tongue scraper onto a water flosser. However, most water flossers come with specialized tongue-cleaning tips that perform the same function using water pressure instead of physical scraping.
Is water flosser tongue cleaning as effective as manual scraping?
Water flossers are highly effective for daily tongue cleaning, removing bacteria and debris through pulsating water streams. Manual scrapers may remove slightly more buildup per stroke, but water flossers offer superior comfort and are better for consistent daily use, especially for people with sensitive gag reflexes.
How often should I clean my tongue with my water flosser?
Clean your tongue with your water flosser once daily, preferably in the morning to remove overnight bacterial buildup. For optimal results, use it as part of your regular oral hygiene routine after brushing and flossing.
Which water flosser tip should I use for tongue cleaning?
Use a dedicated tongue-cleaning tip with a flat, wide nozzle designed specifically for the tongue. These tips cover more surface area per pass and are gentler than standard jet tips. Check that the tip is compatible with your specific water flosser model.
Can I use mouthwash in my water flosser for tongue cleaning?
Yes, you can add antimicrobial mouthwash to your water reservoir, but check your manufacturer’s guidelines first. Avoid alcohol-based rinses unless your device explicitly allows them, as they can damage some water flosser components.
Why does my tongue still look white after using the water flosser?
A thin white coating is normal and consists of dead cells and debris that regenerate quickly. If the coating appears thick or persistent, you may need more consistent daily cleaning, or you might benefit from combining water flosser use with occasional manual scraping for deeper cleaning.
Key Takeaways for Using a Tongue Scraper on Water Flosser
Using a tongue scraper on a water flosser means using a dedicated tongue-cleaning tip that comes with your device, not mounting a physical scraper. This water-based method is gentler, more comfortable, and highly effective for daily maintenance. The key is starting with the right tongue-specific tip, using lukewarm water, and beginning on low pressure to avoid triggering your gag reflex.
While water flossers may not replace manual scraping entirely for deep cleaning, they win for consistency and comfort. The adjustable pressure settings let you customize the experience to your sensitivity level, and integrating tongue cleaning into your existing water flossing routine means you’re more likely to do it daily. Combine both methods for the best results: water flosser for everyday use and manual scraping 2 to 3 times per week for thorough biofilm removal.
Your breath will feel fresher, your tongue will look healthier, and your dentist will notice the difference. Start today by checking if your water flosser came with a tongue-cleaning tip, or purchase one separately to upgrade your oral hygiene routine.