
If you’ve just gotten braces, you’re likely feeling the pinch—literally—of metal brackets and wires rubbing against your cheeks, lips, or tongue. That sharp wire poking the side of your mouth? The constant irritation making it hard to eat or talk? Enter tooth wax, also known as orthodontic or braces wax. This soft, safe, and easy-to-use product acts as a protective shield, instantly reducing friction between your braces and soft tissues. Knowing how to use tooth wax properly can transform an uncomfortable experience into a manageable one. Whether you’re a teen adjusting to your first set of braces, a parent helping a child, or an adult navigating a late-in-life orthodontic journey, this guide delivers step-by-step instructions, expert tips, troubleshooting advice, and even insights into non-orthodontic uses.
When to Apply Tooth Wax
Right After Getting Braces
The first 1–2 weeks with braces are typically the most uncomfortable. As your mouth adapts to the new hardware, soft tissue irritation is common. Applying tooth wax during this period prevents sores from forming and helps your cheeks and lips toughen up faster.
After Orthodontic Adjustments
Every time your braces are tightened or your wires are changed, discomfort can flare up again. Wax provides immediate relief by covering newly tensioned or repositioned wires that may now be rubbing in unexpected places.
To Protect Sores or Handle Protruding Wires
If you notice a wire end poking your cheek or a bracket edge cutting into your lip, apply wax right away. It creates a smooth buffer, allowing the sore to heal while preventing further damage. It’s also a smart temporary fix if a wire breaks or a bracket loosens before your next orthodontist visit.
Pro Tip: Don’t wait for pain to start. Apply wax preventively on known problem spots—like the back hooks or upper wire ends—especially at night or before long conversations.
Step-by-Step: Apply Tooth Wax Correctly
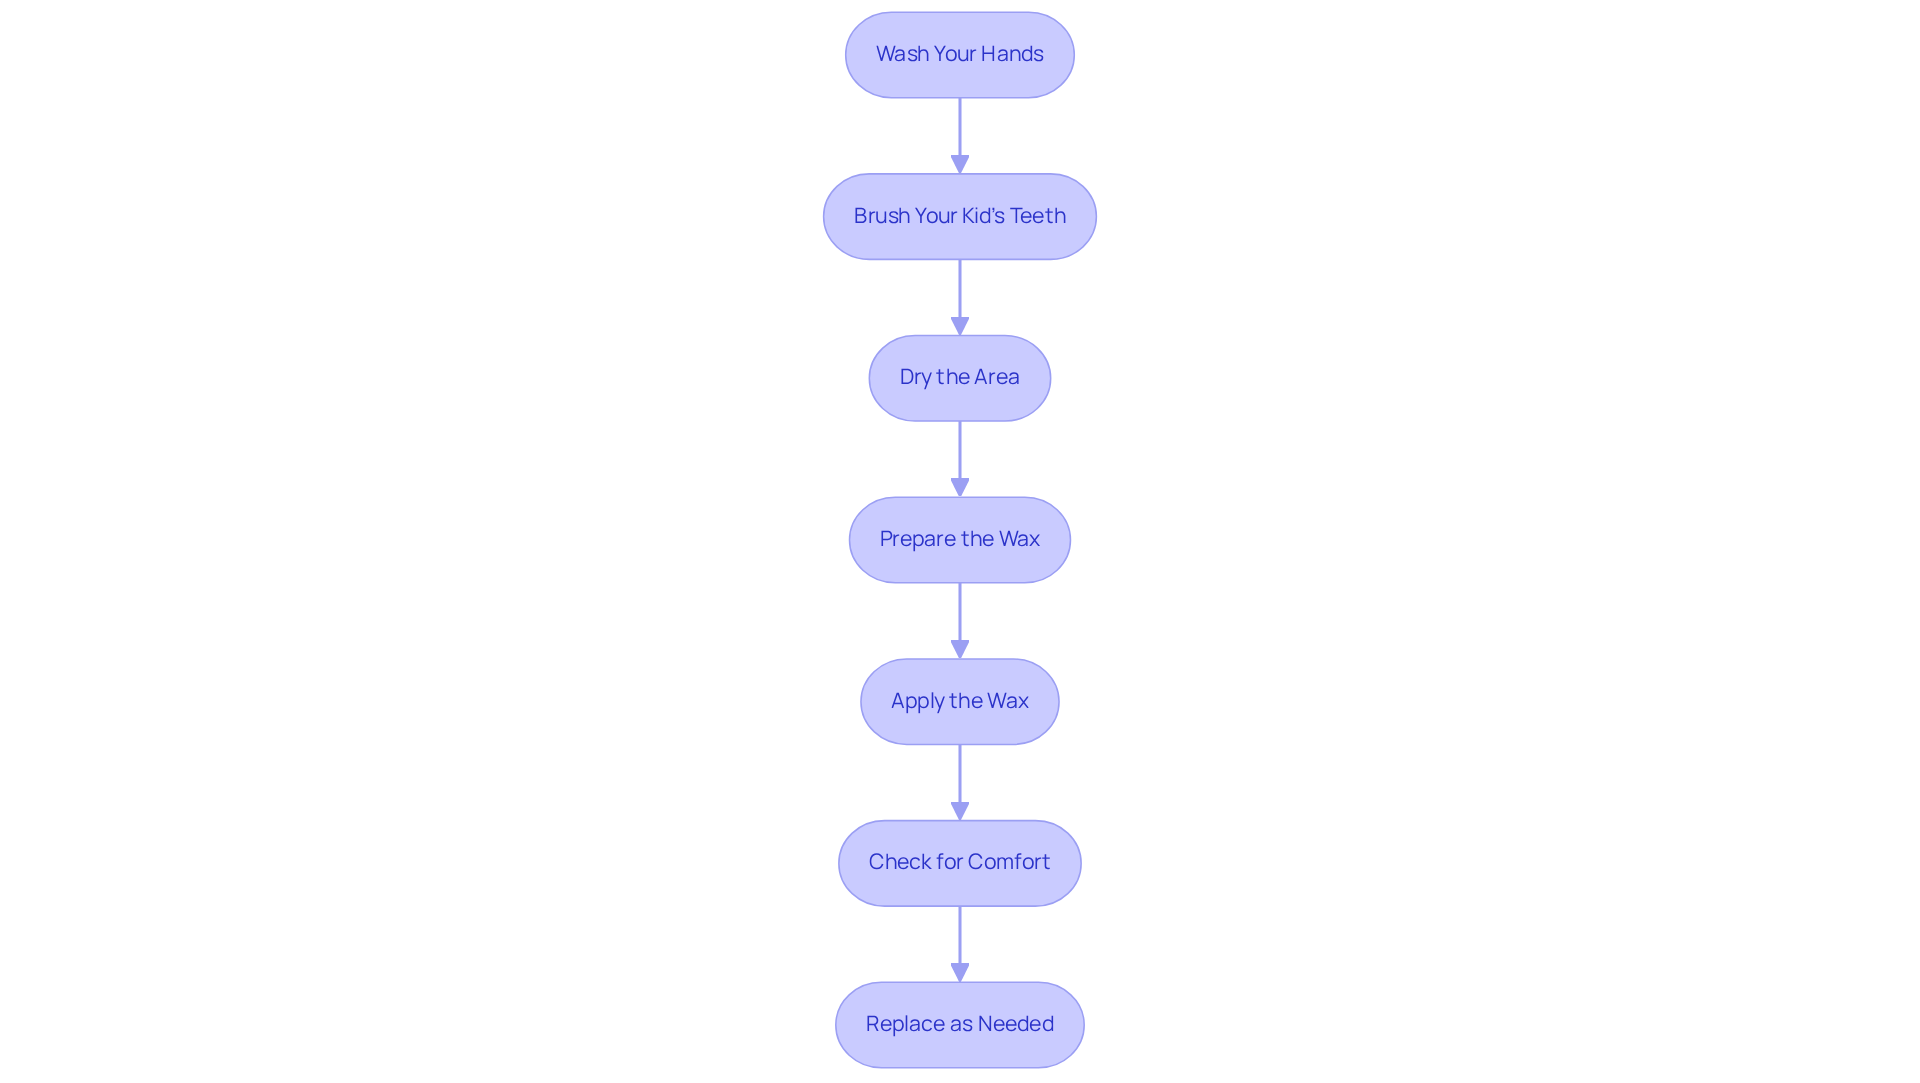
Wash Hands First
Always begin with clean hands. Wash them thoroughly with soap and water, then dry completely. This simple step prevents bacteria from transferring into your mouth during application.
Clean and Dry the Area
Brush your teeth to remove food debris and plaque around the irritating bracket or wire. Then, gently dry the surface using a cotton swab, tissue, or paper towel. Moisture is the #1 reason wax fails to stick, so take a few extra seconds to ensure the area is completely dry.
Soften a Pea-Sized Piece
Take a small piece of wax—about the size of a pea or popcorn kernel. Roll it between your fingers for 5–10 seconds to warm it. The warmth makes the wax more pliable and improves adhesion.
Avoid using too much wax—excess can feel bulky, interfere with your bite, and fall off more easily.
Press Wax Over the Irritating Spot
Place the softened wax directly over the sharp bracket, poking wire end, or metal hook. Use firm pressure to mold it into place, ensuring it fully covers the sharp edge.
Smooth Into a Seamless Barrier
Use a clean finger or cotton swab to smooth the wax into a rounded, even layer. A seamless finish reduces new irritation and improves comfort when speaking or eating.
Test for Comfort
Close your mouth gently and move your lips and tongue around the waxed area. Check that:
– It doesn’t interfere with your bite
– It stays in place
– It doesn’t create new discomfort
If it shifts or feels awkward, remove and reapply with a fresh piece.
Best Practices for Effective Use
✅ Do This:
- Replace wax daily—especially if it’s dirty, discolored, or loose.
- Reapply after brushing or eating, since both activities often remove wax.
- Carry wax on the go—keep a small tin in your backpack, wallet, or desk.
- Combine with saltwater rinses (½ tsp salt in 8 oz warm water) to soothe sores and speed healing.
- Use warm water to soften stubborn wax before applying, especially in cold weather.
❌ Avoid These Mistakes:
- Don’t reuse old wax—it collects bacteria and food particles.
- Never apply to a wet surface—it won’t stick.
- Don’t use excessive amounts—thick clumps are uncomfortable and prone to falling off.
- Don’t leave wax on indefinitely—replace it regularly for hygiene.
Expert Note: High-quality waxes—often provided by orthodontists—adhere better and last longer than generic brands. Ask your orthodontist about their preferred product.
Can You Eat with Tooth Wax?
Yes—But Be Cautious
Orthodontic wax is non-toxic and safe to swallow, so accidentally ingesting it isn’t harmful. However:
– Hot foods (like soup or pizza) can melt the wax.
– Chewy or sticky foods (gum, caramel, taffy) often pull it off.
– Soft foods (yogurt, mashed potatoes, smoothies) are less likely to dislodge it.
Two Approaches:
- Remove wax before meals, eat normally, then brush and reapply.
- Leave it on for continuous protection—ideal for soft or quick meals.
Choose the method that works best for your comfort and lifestyle.
How Long Does Tooth Wax Last?
Most wax stays in place for several hours, but duration varies based on:
– Saliva production
– Location in the mouth
– Diet and drinking habits
– Type of wax used
Replace It When:
- It falls off
- It turns dark from trapped food
- It feels gritty or loose
- More than 24 hours have passed
Some premium waxes are designed to resist moisture and last longer—ask your orthodontist for recommendations.
Troubleshooting Common Problems
Wax Won’t Stick
Cause: Moisture on the tooth or bracket.
Fix: Dry the area thoroughly with a cotton swab or tissue before applying.
Wax Keeps Falling Off
Cause: Poor adhesion, high saliva flow, or incorrect application.
Fix: Reapply on a dry surface, press firmly, and consider switching to a stronger-adhesion brand.
Wax Feels Bulky or Uncomfortable
Cause: Too much wax or uneven shaping.
Fix: Use a smaller amount and smooth it into a low-profile dome.
Wax Gets Stuck in Food
Cause: Eating with wax in place.
Fix: Remove before messy meals; reapply afterward.
Still in Pain After Application
Cause: Incomplete coverage or a broken wire.
Fix: Ensure the sharp edge is fully covered. If pain persists, contact your orthodontist.
Special Uses: Cosmetic Tooth Wax

Simulate Missing or Rotten Teeth
A different type of tooth wax—theatrical or cosmetic wax (e.g., Graftobian)—is used in film, Halloween, or stage makeup to create realistic dental effects.
How to Use Cosmetic Wax:
- Dry the tooth with a paper towel.
- Apply black wax to mimic a missing tooth.
- For decay, use brown wax and scuff it with an old toothbrush.
- Lick the wax lightly to blend it with natural tooth color and texture.
⚠️ Important: Do not confuse cosmetic wax with orthodontic wax. They serve different purposes and are not interchangeable.
Tools Needed:
- Toothpick (for shaping)
- Paper towel (for drying)
- Old toothbrush (for texturing)
- Mirror
Time required: ~10–15 minutes per tooth.
Is Swallowing Tooth Wax Safe?
Yes—It’s Non-Toxic
Orthodontic wax is made from beeswax, carnauba wax, or paraffin, all of which are safe if swallowed. It passes through the digestive system without being absorbed.
- Accidental ingestion during sleep or eating is common.
- No medical action is needed if swallowed.
However, do not eat it intentionally—it serves no nutritional purpose and could cause mild stomach upset in large quantities.
How Long Should You Use Braces Wax?
Not Forever—Just During Adjustment
Most people only need wax for:
– The first 2 weeks after getting braces
– A few days after each adjustment
As your mouth adapts, discomfort decreases significantly. Many stop using wax entirely within 1–2 months.
Use It Occasionally For:
- Loose or broken wires
- Sore spots after meals
- Emergency protection before orthodontist visits
User Insight: “I only used wax the first week. After that, my cheeks toughened up and I didn’t need it anymore.” — Reddit user, braces community
Keep a supply on hand, but expect reliance to drop over time.
When to See Your Orthodontist
Wax is a temporary comfort aid, not a fix for serious issues. Contact your orthodontist if:
– Pain continues despite wax use
– A bracket is cracked or detached
– A wire is bent or digging deeply into tissue
– Sores don’t heal within 3–5 days
– You notice swelling, pus, or bleeding
Delaying care can prolong discomfort or damage oral tissues.
Storage and Cost Tips
Where to Buy
- Pharmacies: CVS, Walgreens
- Online: Amazon, dental supply sites
- Orthodontist’s office: Often provided free
Average Price
- $2–$10 per container
- Tins last weeks to months with regular use
How to Store
- Keep in original container
- Store at room temperature
- Avoid heat (e.g., car dashboard), which can melt or soften wax
Pro Tip: Split a large roll into smaller portions and store in a clean mint tin for portability.
Final Tips for Success
Keep Wax Accessible
Store supplies in multiple locations:
– Bedroom
– Bathroom
– School locker
– Work desk
– Car glove compartment
Teach Kids Independence
Show children how to apply wax safely so they can manage discomfort at school or social events.
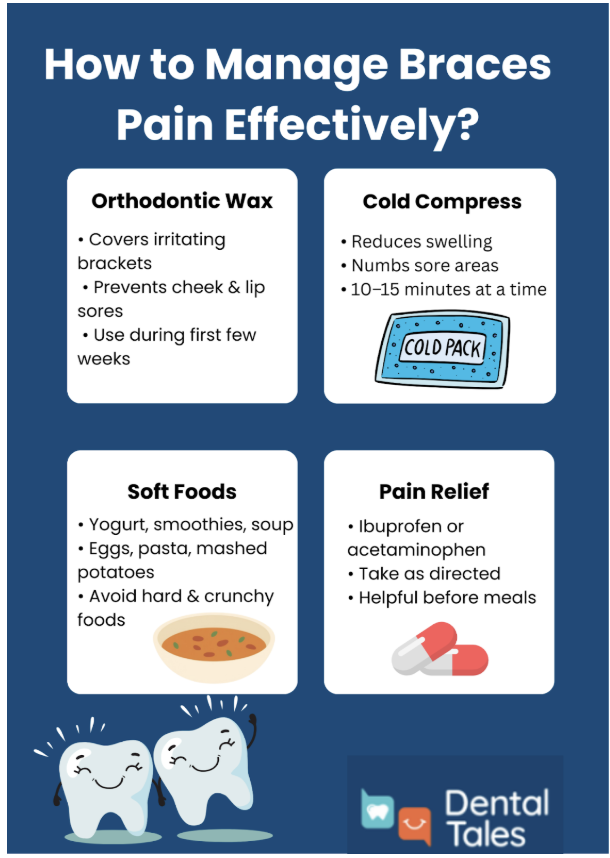
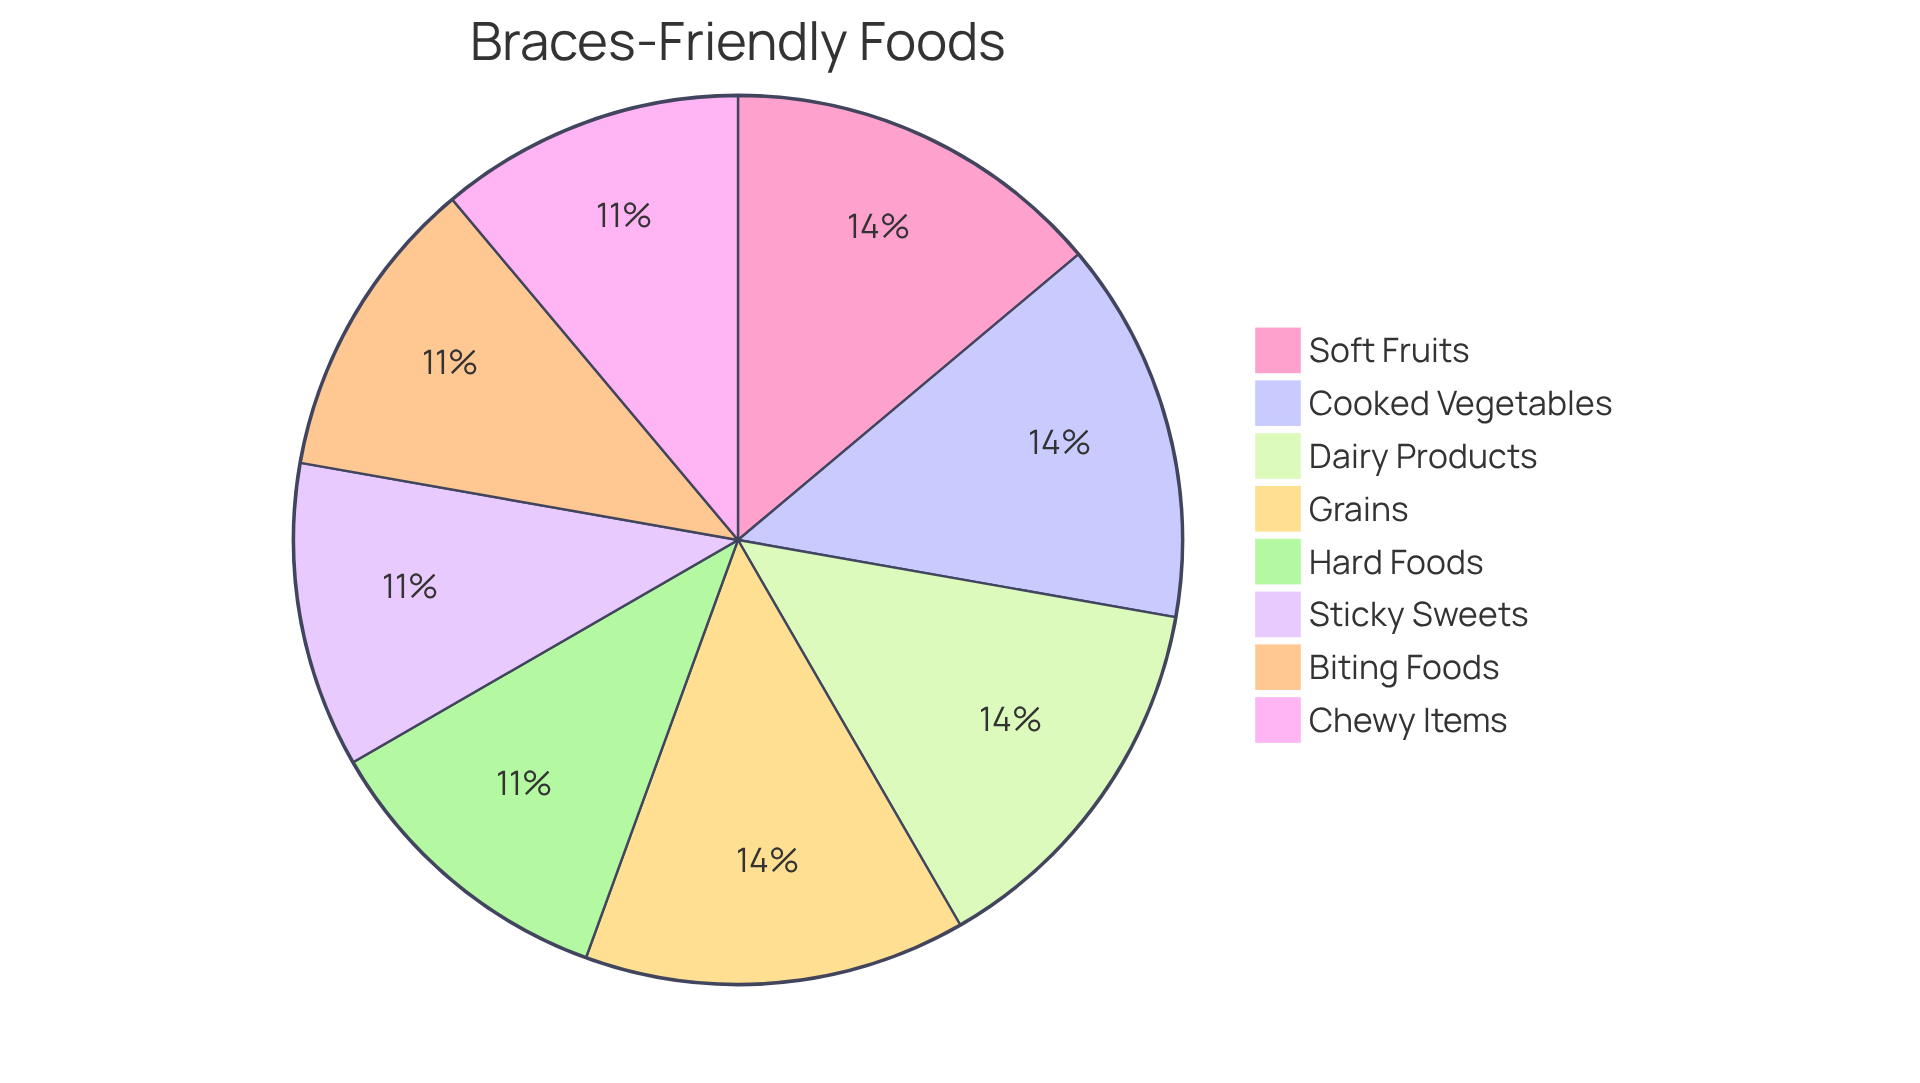
Combine with Other Comfort Methods
Maximize relief with:
– Cold water or ice chips
– Soft foods (pasta, scrambled eggs, smoothies)
– Over-the-counter pain relievers (ibuprofen or acetaminophen)
– Saltwater rinses (2–3 times daily)
Maintain Oral Hygiene
Wax can trap food and plaque. Always:
– Remove old wax before brushing
– Brush thoroughly before reapplying
– Floss daily to prevent decay
Summary: Key Facts at a Glance
| Category | Details |
|---|---|
| Purpose | Protect soft tissues from braces irritation |
| Best For | First 1–2 weeks, after adjustments, or with sores |
| Application | Clean, dry, soften, press, smooth |
| Amount | Pea-sized piece per spot |
| Eating with Wax | Safe, but may dislodge—remove if preferred |
| Swallowing Wax | Harmless; passes through system |
| Replace Frequency | Daily or when dirty/fallen off |
| Duration of Use | Typically 2 weeks to 2 months |
| Storage | Cool, dry place; original container |
| Cost | $2–$10; often free from orthodontist |
Final Note: Tooth wax is a simple, effective solution for managing braces discomfort. With proper use, it transforms an otherwise painful experience into a manageable one. While your mouth adapts, let wax be your go-to relief tool—just remember it’s a temporary aid, not a substitute for professional care. Stay consistent, stay comfortable, and keep smiling toward your straighter, healthier smile.