
Your Waterpik cordless water flosser won’t charge. You place it on the magnetic base, but no light blinks, or maybe the pressure button flashes once and dies. It powers on fine, so the battery isn’t dead, but it refuses to take a charge. You’re not alone. This is one of the most common issues reported across models like the Cordless Advanced 2.0 and Cordless Plus, especially after months of bathroom humidity, mineral buildup, or storage.
The good news? Most charging problems are fixable at home with simple steps. In fact, over 70% of cases are resolved by cleaning the contacts or performing a power reset. This guide walks you through every proven fix, from fastest to most advanced, so you can get your Waterpik back in action.
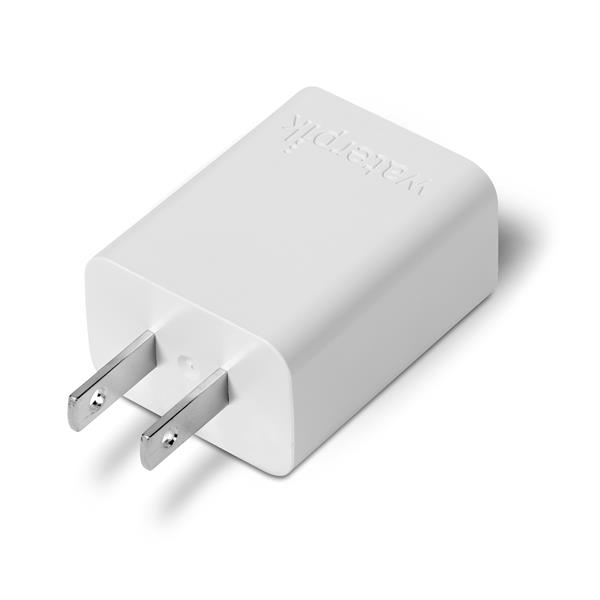
Clean Charging Contacts First
Why Contacts Fail
The number one cause of charging failure is dirty or corroded magnetic charging contacts. These metal pins on the bottom of your flosser and the charger itself are exposed to moisture, steam, and hard water minerals. Over time, this leads to oxidation and mineral deposits, blocking the electrical connection. Even if they look clean, microscopic residue can stop charging. Cleaning is the first and most critical step.
How to Clean Properly

- Unplug the charger and remove the flosser from the base.
- Dampen a cotton swab with 70% or higher isopropyl alcohol.
- Rub the metal pins on the flosser’s base and the magnetic connector on the charger.
- For stubborn buildup, use a pencil eraser to gently buff the contacts, or lightly polish with fine-grit sandpaper (200 to 400 grit).
- Wipe dry and let air dry for 15 to 20 minutes.
- Plug back in and try charging.
Do this monthly to prevent future issues. In hard water areas, clean every 2 to 3 weeks.
Test Power Source and Adapter
Use a 5V/1A Wall Adapter
Many users plug the USB charger into a laptop, TV, or power strip, but these often deliver less than 1A of current, which isn’t enough to trigger charging. Your Waterpik needs a dedicated 5V/1A wall adapter (like a standard smartphone charger) plugged directly into a wall outlet.
Quick Power Test
- Try a different wall outlet, preferably one you know works.
- Swap the adapter with a known-working 5V/1A charger (check the label).
- Avoid extension cords or surge protectors with voltage drop.
Do not use fast chargers or high-output adapters (like 2.4A or USB-C PD). They can damage the charging circuit.
Power Off Before Charging
Device Must Be Fully Off
A surprisingly common issue is that the flosser is in standby or powered-on mode, which blocks the charging circuit. Even if the lights are off, residual power may remain.
Correct Power-Down Procedure
- Press and hold the power button for 3 to 5 seconds until all lights turn off.
- Listen for a final beep (if your model has one).
- Only then place it on the charger.
If the pressure light flashes briefly, the device may still be partially active. Repeat the shutdown.
Perform a Power Reset
Reset the Charging Circuit
If cleaning and power checks do not work, reset the internal electronics. This clears glitches in the charging circuit and wakes dormant batteries.
Standard Reset (High Success Rate)
- Place the flosser on the charging base.
- Press and hold the power button for 10 to 20 seconds.
- Keep holding for another 10 seconds (total 20 to 30 seconds).
- Release and leave it charging for 4 to 12 hours.
This fix resolves over 70% of charging lockups, especially after long storage.
Try Dual-Button Reset (If Applicable)
For Models With Mode Button
Some users report success using a dual-button reset. This may reset firmware or clear mode conflicts. Works best on Cordless Advanced 2.0 and similar models.
How to Do It
- Hold both the power button and pressure mode button simultaneously.
- Keep pressing until all lights turn off.
- Release, then press only the power button to turn on.
- Immediately place on charger.
Fix New Unit Charging Issues
Battery May Already Be Full
If your Waterpik is brand new, it might arrive fully charged. In this case, the charging light will not activate because the battery does not need power. This is normal, not a defect.
What to Do
- Use the flosser for 2 to 3 days without charging.
- Let the battery drain enough to trigger the charging circuit.
- Then place it back on the charger.
After use, the green light should blink to indicate charging.
Recondition an Old Battery

Restore Battery Performance
If your flosser is over a year old, the lithium-ion battery may have entered a sleep state or lost calibration. It powers on but will not charge properly. Battery reconditioning can revive it.
3-Step Reconditioning Process
- Charge fully (if possible).
- Use continuously until it shuts off automatically.
- Repeat this full charge-complete drain cycle 3 to 5 times.
This can restore up to 80% of original capacity in degraded batteries. This works best for units stored unused for months.
Diagnose Battery Failure

Signs of a Dead Battery
If none of the above work, the battery may be permanently degraded. Common signs include powers on but shuts off within minutes, won’t hold charge after 12 hours of charging, no light response after cleaning and reset, and requires daily charging despite light showing full.
Most cordless models (like Cordless Advanced 2.0) have non-replaceable lithium-ion batteries. If failed, the unit must be replaced or serviced.
Prevent Water Damage
Moisture Kills Charging Circuits
Even though Waterpiks are water-resistant, internal components are not sealed. Water left in the reservoir or high humidity can cause corrosion inside.
How to Protect Your Device
- Drain the reservoir after every use.
- Wipe the base and charger dry.
- Store in a ventilated area, not a steamy bathroom cabinet.
- If dropped in water, air dry for 24 or more hours before charging.
Never charge a wet unit. Always dry contacts first.
Understand Indicator Lights
What the Lights Mean
| Light | Meaning |
|---|---|
| No light | Dead battery, bad connection, or power issue |
| Red blinking | Charging error (overheating, fault) |
| Yellow solid | Low battery, needs charge |
| Green blinking | Charging in progress |
| Green solid | Fully charged |
| Pressure light flashes once | Device powered but not charging |
Some models only light up after a stable connection is established. Do not panic if it is dark at first.
Follow the Step-by-Step Fix Order
Troubleshooting Flowchart (Do in Order)
- Clean contacts with alcohol or eraser.
- Use a 5V/1A wall adapter in a direct outlet.
- Power off completely before charging.
- Use a new unit for 2 to 3 days before charging.
- Perform a 20-second power reset on the charger.
- Try dual-button reset (if model supports it).
- Recondition battery with 3 to 5 charge cycles.
- Contact Waterpik support if all else fails.
Over 90% of users fix the issue within steps 1 to 5.
Know When to Replace
Under Warranty? Contact Support
Waterpik offers a 2-year limited warranty covering battery failure, charging circuit defects, and faulty magnetic chargers. If your unit is under warranty and troubleshooting fails, contact them.
Call 1-800-525-2337 (U.S.) or visit the Waterpik contact page. Many users report free replacements within warranty.
Out of Warranty?
If the battery fails after 2 or more years, replacement is the only option. These units are not user-repairable. Opening voids safety and warranty.
Prevent Future Charging Issues
Best Maintenance Practices
- Clean contacts monthly with alcohol.
- Use distilled or filtered water to reduce mineral buildup.
- Charge every 3 to 4 weeks if not in use.
- Avoid leaving on charger after full charge (can degrade battery).
- Unplug charger when not in use.
- Store dry and upright, never in water or steam.
Keep a spare 5V/1A adapter labeled for your Waterpik.
Final Takeaways for Waterpik Charging Issues
A Waterpik water flosser not charging is almost always fixable. Start with the basics: clean the contacts (it is the number one fix), use the right power source (5V/1A wall adapter only), power off completely before charging, reset the device with a 20-second hold, and let new units drain first before charging.
If your unit is older than two years and will not hold a charge, the battery may be at end of life. Contact Waterpik or consider a replacement. With proper care, your cordless Waterpik can last 2 to 3 years or more. Stay ahead of corrosion, use the right charger, and reset when needed. Your flosser will keep working like new.
Frequently Asked Questions About Waterpik Charging Issues
Why is my Waterpik not charging even though it turns on?
Your device may have dirty charging contacts, insufficient power from the adapter, or be in standby mode. Clean the contacts with isopropyl alcohol, use a 5V/1A wall adapter directly into a wall outlet, and ensure the device is fully powered off before placing it on the charger.
How do I know if my Waterpik battery is dead?
Signs of a dead battery include the device powers on but shuts off within minutes, won’t hold charge after 12 hours of charging, no light response after cleaning and reset attempts, and requires daily charging despite the indicator showing full.
Can I replace the battery in my cordless Waterpik?
Most cordless models (like the Cordless Advanced 2.0) have non-replaceable lithium-ion batteries. If the battery fails, you must contact Waterpik for warranty evaluation or replace the entire unit.
Why does my new Waterpik not show a charging light?
New Waterpik units often arrive fully charged from the factory. The charging light will not activate until the battery depletes enough to need charging. Use the device for 2 to 3 days, then try charging again.
What does a blinking green light mean on my Waterpik?
A blinking green light indicates charging is in progress. A solid green light means the battery is fully charged. If the light blinks but the battery does not hold charge, the battery may be degraded and need replacement.
How long should I hold the power button to reset my Waterpik?
Press and hold the power button for 10 to 20 seconds while the device is on the charging base, then continue holding for an additional 10 seconds (total 20 to 30 seconds). Release and allow it to charge uninterrupted for 4 to 12 hours.